D-Link DNR-312L User Manual - Page 15
Setup Wizard - Mac Users
 |
View all D-Link DNR-312L manuals
Add to My Manuals
Save this manual to your list of manuals |
Page 15 highlights
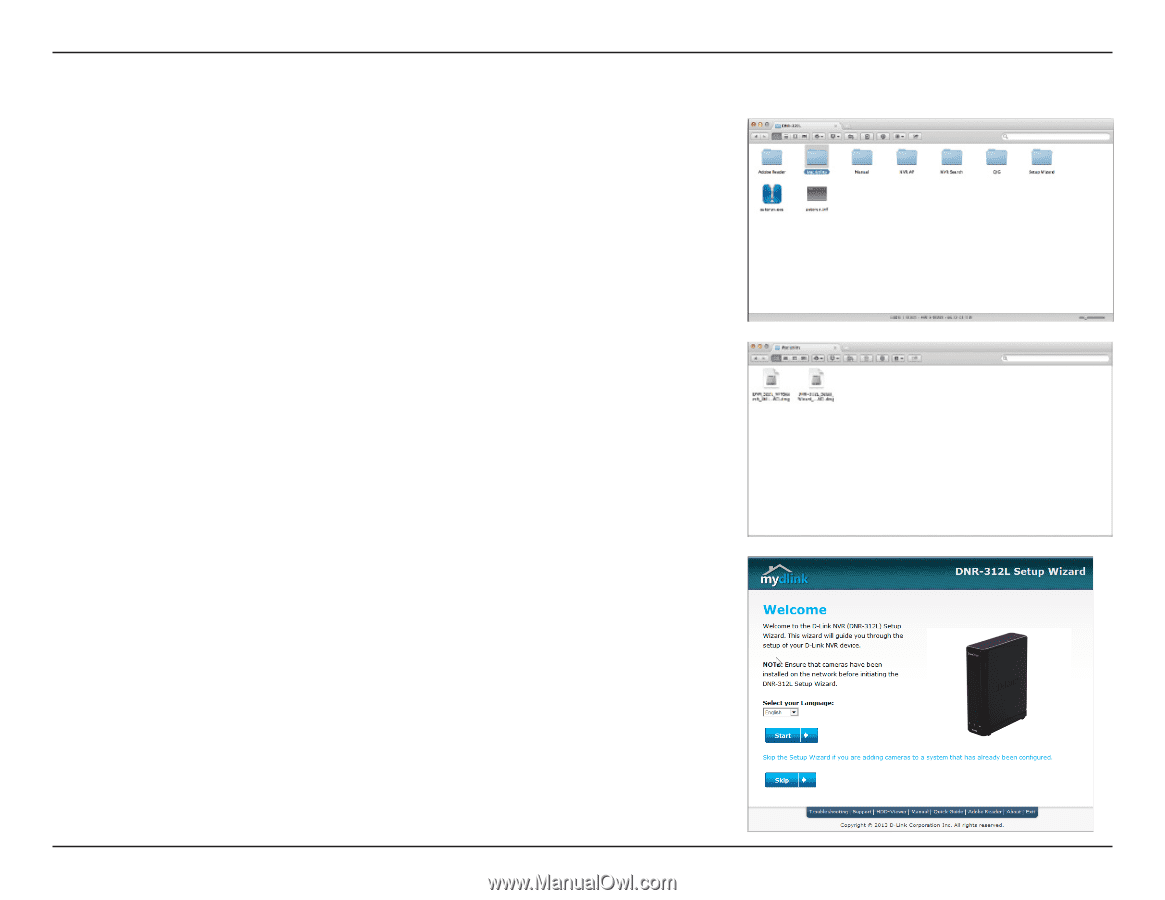
Section 2 - Installation Setup Wizard - Mac Users The following instructions explain how to launch the Setup Wizard using your Mac computer. Step 1: Insert the DNR-312L installation CD into the CD-ROM drive, and go to the CD drive directory. Double-click the Mac Utility folder to enter. Step 2: Double-click the DNR-312L Setup Wizard file to launch the wizard, which will guide you through the complete installation process. Note: If you do not have the CD, go to http://www.mydlink.com/support. Click the Storage tab and select your product to download the Setup Wizard. Step 3: From the Welcome screen, click Start and follow the instructions to set up your NVR. (Detailed instructions begin on the next page.) If you just need to add cameras to your previously configured DNR-312L, click the Skip button. Refer to "Camera Search" on page 52 for instructions about adding cameras. Note: The computer used to access the NVR must be on the same subnet as the NVR. If your network is using a DHCP server, the NVR will automatically be in the same subnet. D-Link DNR-312L User Manual 11
-
 1
1 -
2
-
3
-
4
-
5
-
6
-
7
-
8
-
9
-
 10
10 -
 11
11 -
 12
12 -
 13
13 -
 14
14 -
 15
15 -
 16
16 -
 17
17 -
 18
18 -
 19
19 -
 20
20 -
21
-
22
-
23
-
24
-
25
-
26
-
27
-
28
-
29
-
30
-
31
-
32
-
33
-
34
-
35
-
36
-
37
-
38
-
39
-
40
-
41
-
42
-
43
-
44
-
45
-
46
-
47
-
48
-
49
-
50
-
51
-
52
-
53
-
54
-
55
-
56
-
57
-
58
-
59
-
60
-
61
-
62
-
63
-
64
-
65
-
66
-
67
-
68
-
69
-
70
-
71
-
72
-
73
-
74
-
75
-
76
-
77
-
78
-
79
-
80
-
81
-
82
-
83
-
84
-
85
-
86
-
87
-
88
-
89
 |
 |