D-Link DWL-3500AP Administration Guide - Page 25
Installing the Access Point - d link default ip
 |
UPC - 790069297090
View all D-Link DWL-3500AP manuals
Add to My Manuals
Save this manual to your list of manuals |
Page 25 highlights
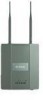
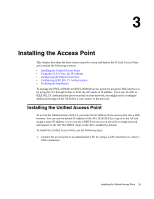
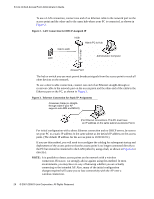
3 Installing the Access Point This chapter describes the basic steps required to setup and deploy the D-Link Access Point and contains the following sections: • Installing the Unified Access Point • Using the CLI to View the IP Address • Configuring the Ethernet Interface • Configuring IEEE 802.1X Authentication • Verifying the Installation To manage the DWL-3500AP and DWL-8500AP access points by using the Web interface or by using the CLI through Telnet or SSH, the AP needs an IP address. If you use VLANs or IEEE 802.1X Authentication (port security) on your network, you might need to configure additional settings on the AP before it can connect to the network. Installing the Unified Access Point To access the Administration Web UI, you enter the IP address of the access point into a Web browser. You can use the default IP address of the AP (10.90.90.91) to log on to the AP and assign a static IP address, or you can use a DHCP server on you network to assign network information to the AP. The DHCP client on the AP is enabled by default. To install the Unified Access Point, use the following steps: 1. Connect the access point to an administrative PC by using a LAN connection or a direct- cable connection. Installing the Unified Access Point 25
-
 1
1 -
2
-
3
-
4
-
5
-
6
-
7
-
8
-
9
-
10
-
11
-
12
-
13
-
14
-
15
-
16
-
17
-
18
-
19
-
 20
20 -
 21
21 -
 22
22 -
 23
23 -
 24
24 -
 25
25 -
 26
26 -
 27
27 -
 28
28 -
 29
29 -
 30
30 -
31
-
32
-
33
-
34
-
35
-
36
-
37
-
38
-
39
-
40
-
41
-
42
-
43
-
44
-
45
-
46
-
47
-
48
-
49
-
50
-
51
-
52
-
53
-
54
-
55
-
56
-
57
-
58
-
59
-
60
-
61
-
62
-
63
-
64
-
65
-
66
-
67
-
68
-
69
-
70
-
71
-
72
-
73
-
74
-
75
-
76
-
77
-
78
-
79
-
80
-
81
-
82
-
83
-
84
-
85
-
86
-
87
-
88
-
89
-
90
-
91
-
92
-
93
-
94
-
95
-
96
-
97
-
98
-
99
-
100
-
101
-
102
-
103
-
104
-
105
-
106
-
107
-
108
-
109
-
110
-
111
-
112
-
113
-
114
-
115
-
116
-
117
-
118
-
119
-
120
-
121
-
122
-
123
-
124
-
125
-
126
-
127
-
128
-
129
-
130
-
131
-
132
-
133
-
134
-
135
-
136
-
137
-
138
-
139
-
140
-
141
-
142
-
143
-
144
-
145
-
146
-
147
-
148
-
149
-
150
-
151
-
152
-
153
-
154
-
155
-
156
-
157
-
158
-
159
-
160
-
161
-
162
-
163
-
164
-
165
-
166
 |
 |