Dell 7130cdn Color Laser Printer System Administrator Guide - Page 28
TCP/IP, Port 9100, Address, Properties, Protocols, TCP/IP v4 Settings, TCP/IP v4, BOOTP/DHCP
 |
View all Dell 7130cdn Color Laser Printer manuals
Add to My Manuals
Save this manual to your list of manuals |
Page 28 highlights
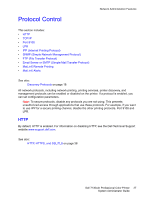
Network Administration Features TCP/IP Both IPv4 and IPv6 are supported. If both are turned off, you will lose access to the EWS. To change TCP/IP settings: 1. Launch your Web browser. 2. Type your printer's IP address in the browser Address field. For details, see Finding the Printer's IP Address on page 13. 3. Click Properties. 4. On the left navigation pane, expand the Protocols folder. 5. Select TCP/IP. 6. If prompted, type in your Admin or Key User name and password. 7. Ensure you are on the TCP/IP (v4) Settings page (if necessary, click the TCP/IP (v4) link at the top of the page). 8. For changing TCP/IP (v6) settings, refer to the help: click the Help button in Online Diagnostics to view the EWS Online Help. 9. In the BOOTP/DHCP field, select one of the following: • On: The printer issues BOOTP and DHCP requests on startup. • Off: The printer does not issue BOOTP or DHCP requests on startup. 10. Click the Save Changes button. Port 9100 The Port 9100 protocol is also known as AppSocket, RAW, or Windows TCPmon. To change Port 9100 settings: 1. Launch your Web browser. 2. Type your printer's IP address in the browser Address field. For details, see Finding the Printer's IP Address on page 13. 3. Click Properties. 4. On the left navigation pane, expand the Protocols folder. 5. Select Port 9100. 6. If prompted, type in your Admin or Key User name and password. 7. In the Port 9100 field, select On or Off. 8. If you selected On, follow the instructions on the page to select Port 9100 settings. For more information, including a description of the fields, click the Help button in the EWS to view the EWS Online Help. 9. Click the Save Changes button. 28 Dell 7130cdn Professional Color Printer System Administrator Guide
-
 1
1 -
2
-
3
-
4
-
5
-
6
-
7
-
8
-
9
-
10
-
11
-
12
-
13
-
14
-
15
-
16
-
17
-
18
-
19
-
20
-
21
-
22
-
 23
23 -
 24
24 -
 25
25 -
 26
26 -
 27
27 -
 28
28 -
 29
29 -
 30
30 -
 31
31 -
 32
32 -
 33
33 -
34
-
35
-
36
-
37
-
38
-
39
-
40
-
41
-
42
-
43
-
44
-
45
-
46
-
47
-
48
-
49
-
50
-
51
-
52
-
53
-
54
-
55
-
56
-
57
-
58
-
59
-
60
-
61
-
62
-
63
-
64
-
65
-
66
-
67
-
68
-
69
-
70
-
71
-
72
-
73
-
74
-
75
-
76
-
77
-
78
-
79
-
80
-
81
-
82
-
83
-
84
-
85
-
86
-
87
-
88
-
89
-
90
-
91
-
92
-
93
-
94
-
95
-
96
-
97
-
98
-
99
-
100
-
101
-
102
-
103
-
104
-
105
-
106
-
107
-
108
-
109
-
110
-
111
-
112
-
113
-
114
-
115
-
116
 |
 |
