Dell 928 All In One Inkjet Printer User Guide - Page 45
Saving an Image on Your Computer, All Programsg Dell Printersg All-In-One Centerg All-In-One
 |
View all Dell 928 All In One Inkjet Printer manuals
Add to My Manuals
Save this manual to your list of manuals |
Page 45 highlights
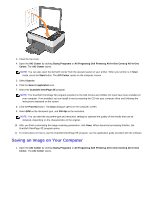
3. Close the top cover. 4. Open the AIO Center by clicking Startg Programs or All Programsg Dell Printersg All-In-One Centerg All-In-One Center. The AIO Center opens. NOTE: You can also open the Dell AIO Center from the operator panel on your printer. When your printer is in Scan mode, press the Start button. The AIO Center opens on the computer screen. 5. Select Scan to. 6. Click the Scan to application icon. 7. Select the ScanSoft OmniPage SE program. NOTE: The ScanSoft OmniPage SE program provided on the Dell Drivers and Utilities CD must have been installed on your computer. If not installed, you can install it now by inserting the CD into your computer drive and following the instructions displayed on the screen. 8. Click the Proceed button. The Scan dialogue opens on the computer screen. 9. Select B/W as the document type, and 300 dpi as the resolution. NOTE: You can alter the document type and resolution settings to optimise the quality of the results that can be obtained, depending on the characteristics of the original. 10. After you finish customising the image scanning parameters, click Scan. When document processing finishes, the ScanSoft OmniPage SE program opens. 11. For instructions on how to use the ScanSoft OmniPage SE program, see the application guide provided with the software. Saving an Image on Your Computer 1. Open the AIO Center by clicking Startg Programs or All Programsg Dell Printersg All-In-One Centerg All-In-One Center. The AIO Center opens.
-
 1
1 -
2
-
3
-
4
-
5
-
6
-
7
-
8
-
9
-
10
-
11
-
12
-
13
-
14
-
15
-
16
-
17
-
18
-
19
-
20
-
21
-
22
-
23
-
24
-
25
-
26
-
27
-
28
-
29
-
30
-
31
-
32
-
33
-
34
-
35
-
36
-
37
-
38
-
39
-
 40
40 -
 41
41 -
 42
42 -
 43
43 -
 44
44 -
 45
45 -
 46
46 -
 47
47 -
 48
48 -
 49
49 -
 50
50 -
51
-
52
-
53
-
54
-
55
-
56
-
57
-
58
-
59
-
60
-
61
-
62
-
63
-
64
-
65
-
66
-
67
-
68
-
69
-
70
-
71
 |
 |
