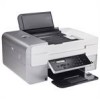
Dell 948 User Guide - Page 21
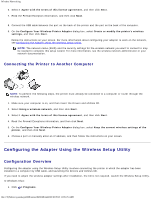
Configuring the Adapter Using the Wireless Setup Utility, Connecting the Printer to Another Computer - wireless adapter
 |
View all Dell 948 manuals
Add to My Manuals
Save this manual to your list of manuals |
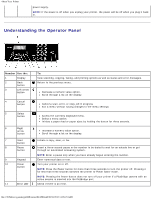
Page 21 highlights
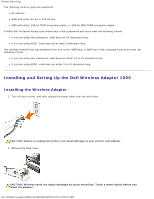
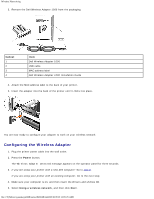
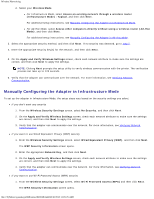
Wireless Networking 6. Select I Agree with the terms of this license agreement, and then click Next. 7. Read the Firewall Exception information, and then click Next. 8. Connect the USB cable between the port on the back of the printer and the port on the back of the computer. 9. On the Configure Your Wireless Printer Adapter dialog box, select Create or modify the printer's wireless settings, and then click Next. Follow the instructions on your screen. For more information about configuring your adapter to work on the network, see Configuring the Adapter Using the Wireless Setup Utility. NOTE: The network name (SSID) and the security settings for the wireless network you want to connect to may be needed to complete this setup wizard. For more information, see the wireless network administrator or your network documentation. Connecting the Printer to Another Computer NOTE: To perform the following steps, the printer must already be connected to a computer or router through the wireless network. 1. Make sure your computer is on, and then insert the Drivers and Utilities CD. 2. Select Using a wireless network, and then click Next. 3. Select I Agree with the terms of this license agreement, and then click Next. 4. Read the Firewall Exceptions information, and then click Next. 5. On the Configure Your Wireless Printer Adapter dialog box, select Keep the current wireless settings of the printer, and then click Next. 6. Choose a port or manually enter an IP address, and then follow the instructions on your screen. Configuring the Adapter Using the Wireless Setup Utility Configuration Overview Configuring the adapter using the Wireless Setup Utility involves connecting the printer in which the adapter has been installed to a computer by USB cable, and launching the Drivers and Utilities CD. If you need to adjust the wireless adapter settings after installation, the CD is not required. Launch the Wireless Setup Utility. In Windows Vista: 1. Click ® Programs. file:///T|/htdocs/systems/prn948/en/en/d0e9548.html[10/10/2012 11:05:25 AM]
-
 1
1 -
2
-
3
-
4
-
5
-
6
-
7
-
8
-
9
-
10
-
11
-
12
-
13
-
14
-
15
-
 16
16 -
 17
17 -
 18
18 -
 19
19 -
 20
20 -
 21
21 -
 22
22 -
 23
23 -
 24
24 -
 25
25 -
 26
26 -
27
-
28
-
29
-
30
-
31
-
32
-
33
-
34
-
35
-
36
-
37
-
38
-
39
-
40
-
41
-
42
-
43
-
44
-
45
-
46
-
47
-
48
-
49
-
50
-
51
-
52
-
53
-
54
-
55
-
56
-
57
-
58
-
59
-
60
-
61
-
62
-
63
-
64
-
65
-
66
-
67
-
68
-
69
-
70
-
71
-
72
-
73
-
74
-
75
-
76
-
77
-
78
-
79
-
80
-
81
-
82
-
83
-
84
-
85
-
86
-
87
-
88
-
89
-
90
-
91
-
92
-
93
-
94
-
95
-
96
-
97
-
98
-
99
-
100
-
101
-
102
-
103
-
104
-
105
-
106
-
107
-
108
-
109
-
110
-
111
-
112
-
113
-
114
-
115
-
116
-
117
-
118
-
119
-
120
-
121
-
122
-
123
-
124
-
125
-
126
-
127
-
128
-
129
-
130
-
131
-
132
-
133
-
134
-
135
-
136
-
137
-
138
-
139
-
140
-
141
-
142
-
143
-
144
 |
 |
