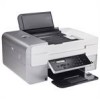
Dell 948 User Guide - Page 6
See More Scan Settings - aio
 |
View all Dell 948 manuals
Add to My Manuals
Save this manual to your list of manuals |
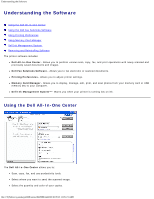
Page 6 highlights
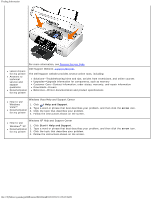
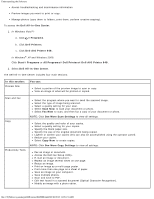
Understanding the Software Access troubleshooting and maintenance information. Preview images you want to print or copy. Manage photos (copy them to folders, print them, perform creative copying). To access the Dell All-In-One Center: 1. In Windows Vista™: a. Click ® Programs. b. Click Dell Printers. c. Click Dell AIO Printer 948. In Windows® XP and Windows 2000: Click Start® Programs or All Programs® Dell Printers® Dell AIO Printer 948. 2. Select Dell All-In-One Center. The Dell All-In-One Center includes four main sections: In this section: Preview Now You can: Select a portion of the preview image to scan or copy. View an image of what will be printed or copied. Scan and Fax Copy Productivity Tools Select the program where you want to send the scanned image. Select the type of image being scanned. Select a quality setting for your scan. Select Scan Now to scan your document or photo. Select Fax Now to scan, and then fax a copy of your document or photo. NOTE: Click See More Scan Settings to view all settings. Select the quality and color of your copies. Select a quality setting for your copies. Specify the blank paper size. Specify the size of the original document being copied. Lighten or darken your copies (this can also be accomplished using the operator panel). Resize your copies. Select Copy Now to create copies. NOTE: Click See More Copy Settings to view all settings. Fax an image or document. Access the Dell Fax Setup Utility. E-mail an image or document. Repeat an image several times on one page. Resize an image. Print an image as a multi-page poster. Print more than one page on a sheet of paper. Save an image on your computer. Save multiple photos. Scan and save to PDF. Edit text found in a scanned document (Optical Character Recognition). Modify an image with a photo editor. file:///T|/htdocs/systems/prn948/en/en/d0e8996.html[10/10/2012 11:05:21 AM]
-
 1
1 -
 2
2 -
 3
3 -
 4
4 -
 5
5 -
 6
6 -
 7
7 -
 8
8 -
 9
9 -
 10
10 -
 11
11 -
 12
12 -
13
-
14
-
15
-
16
-
17
-
18
-
19
-
20
-
21
-
22
-
23
-
24
-
25
-
26
-
27
-
28
-
29
-
30
-
31
-
32
-
33
-
34
-
35
-
36
-
37
-
38
-
39
-
40
-
41
-
42
-
43
-
44
-
45
-
46
-
47
-
48
-
49
-
50
-
51
-
52
-
53
-
54
-
55
-
56
-
57
-
58
-
59
-
60
-
61
-
62
-
63
-
64
-
65
-
66
-
67
-
68
-
69
-
70
-
71
-
72
-
73
-
74
-
75
-
76
-
77
-
78
-
79
-
80
-
81
-
82
-
83
-
84
-
85
-
86
-
87
-
88
-
89
-
90
-
91
-
92
-
93
-
94
-
95
-
96
-
97
-
98
-
99
-
100
-
101
-
102
-
103
-
104
-
105
-
106
-
107
-
108
-
109
-
110
-
111
-
112
-
113
-
114
-
115
-
116
-
117
-
118
-
119
-
120
-
121
-
122
-
123
-
124
-
125
-
126
-
127
-
128
-
129
-
130
-
131
-
132
-
133
-
134
-
135
-
136
-
137
-
138
-
139
-
140
-
141
-
142
-
143
-
144
 |
 |