Dell Force10 S5000 Getting Started Guide - Page 28
Performing the Initial Configuration, Software Configuration Overview
 |
View all Dell Force10 S5000 manuals
Add to My Manuals
Save this manual to your list of manuals |
Page 28 highlights
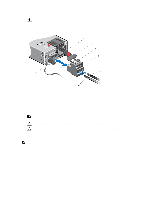
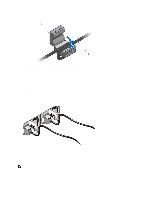
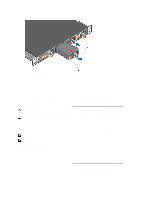
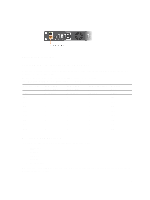
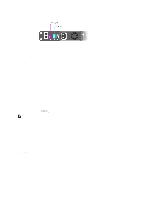
DC Power Connect the plug to each DC receptacle. Make sure that the power cord is secure and the polarity is correct. As soon as the cable is connected between the S5000 and the power source, the chassis is powered-up; there is no on/off switch. Performing the Initial Configuration The S5000 has two management ports available for system access - a console port and a universal serial bus (USB)-B port. The USB-B port acts the same as the console port. The terminal settings are the same for both access ports. The S5000 supports bare metal provisioning (BMP). For information about how to configure BMP, refer to FTOS Configuration Guide for the S5000 Switch. Software Configuration Overview To configure the S5000, follow these steps: 1. Access the RJ-45/RS-232 console port. 2. Enter the initial configuration information. 3. Configure the enable password. 4. Configure a host name. 5. Configure layer 2 (data Link) mode. 6. Configure the management port IP address. 7. Configure a management route. 8. Configure a username and password. 9. Create a port-based VLAN. 10. Assign interfaces to a VLAN. 11. Assign an IP address to a VLAN. 12. Connect the S5000 to the network. Accessing the RJ-45/RS-232 Console Port NOTE: Before starting this procedure, be sure that you have a terminal emulation program already installed on your PC. The DB9 RS-232/RJ-45 console port is labeled on the lower left-hand side of the S5000 as you face the Utility side of the chassis. 1. Install an RJ-45 copper cable into the console port. Use a rollover cable to connect the S5000 console port to a terminal server. 2. Connect the other end of the cable to the DTE terminal server. 3. Set the default terminal settings as follows: a) 9600 baud rate b) No parity c) 8 data bits d) 1 stop bit e) No flow control 28
-
 1
1 -
2
-
3
-
4
-
5
-
6
-
7
-
8
-
9
-
10
-
11
-
12
-
13
-
14
-
15
-
16
-
17
-
18
-
19
-
20
-
21
-
22
-
 23
23 -
 24
24 -
 25
25 -
 26
26 -
 27
27 -
 28
28 -
 29
29 -
 30
30 -
 31
31 -
 32
32 -
 33
33 -
34
-
35
-
36
 |
 |