Dell Force10 S55T Quick Start Guide - Page 17
Install a DC Power Supply, Take the power supply unit out of the shipping box.
 |
View all Dell Force10 S55T manuals
Add to My Manuals
Save this manual to your list of manuals |
Page 17 highlights
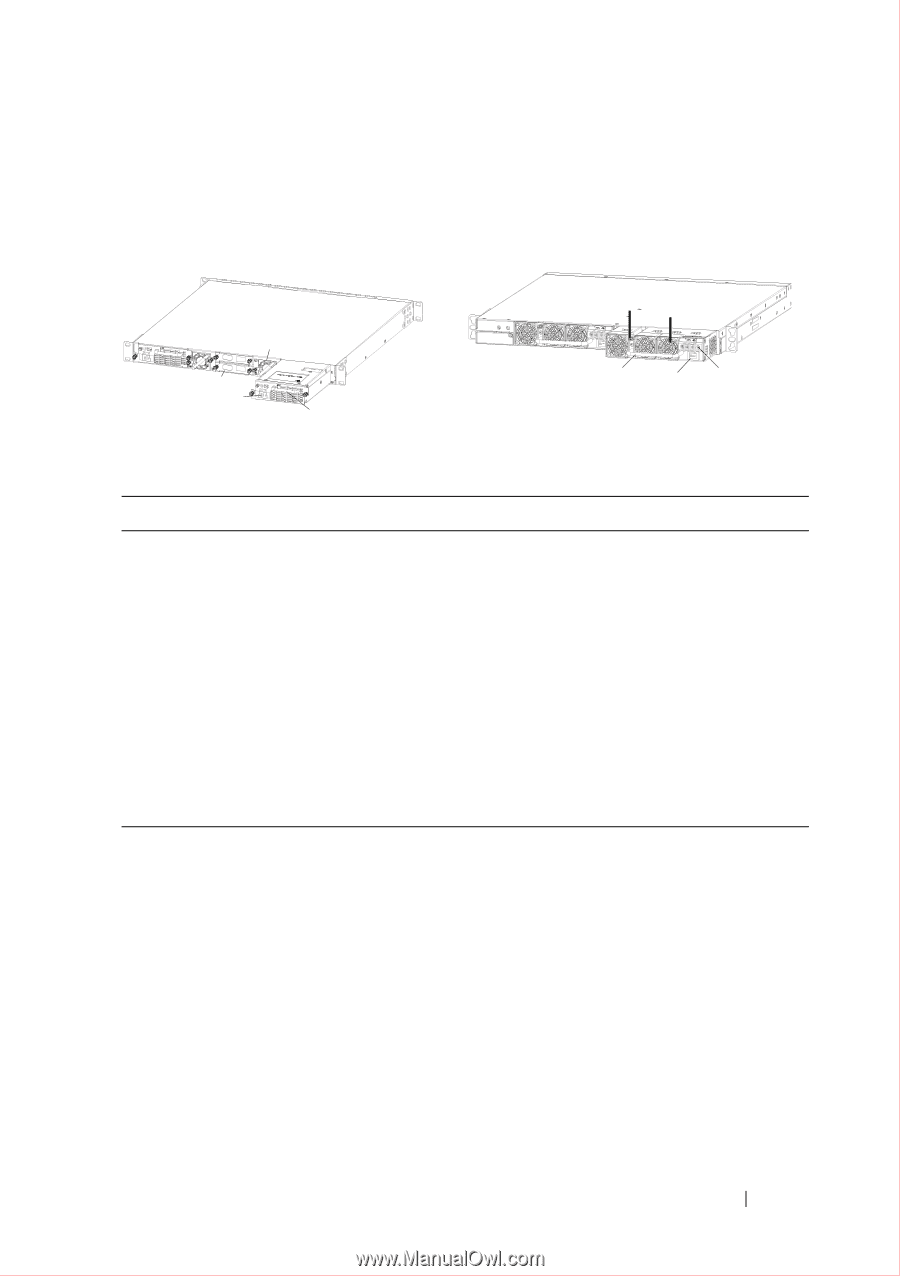
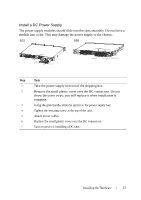
Install a DC Power Supply The power supply modules should slide into the slots smoothly. Do not force a module into a slot. This may damage the power supply or the chassis. S55 S60 PSU0 Fan Module Optional Module Cable Connector PSU1 Grab Handle Securing Screw Fans and Filters PSU0 Grab Handle PSU1 DC Power Connector Power Switch Step Task 1 Take the power supply unit out of the shipping box. 2 Remove the small plastic cover over the DC connectors. Do not throw the cover away; you will replace it when installation is complete. 3 Using the grab handle, slide the unit in to the power supply bay. 4 Tighten the securing screw at the top of the unit. 5 Attach power cables. 6 Replace the small plastic cover over the DC connectors. 7 Turn on power if installing a DC unit. Installing the Hardware 15
-
 1
1 -
2
-
3
-
4
-
5
-
6
-
7
-
8
-
9
-
10
-
11
-
 12
12 -
 13
13 -
 14
14 -
 15
15 -
 16
16 -
 17
17 -
 18
18 -
 19
19 -
 20
20 -
 21
21 -
 22
22 -
23
-
24
-
25
-
26
-
27
-
28
 |
 |