Dell OptiPlex GX100 User Guide - Page 59
Replacing the Small-Form-Factor Computer Cover, Replacing the Low-Profile
 |
View all Dell OptiPlex GX100 manuals
Add to My Manuals
Save this manual to your list of manuals |
Page 59 highlights
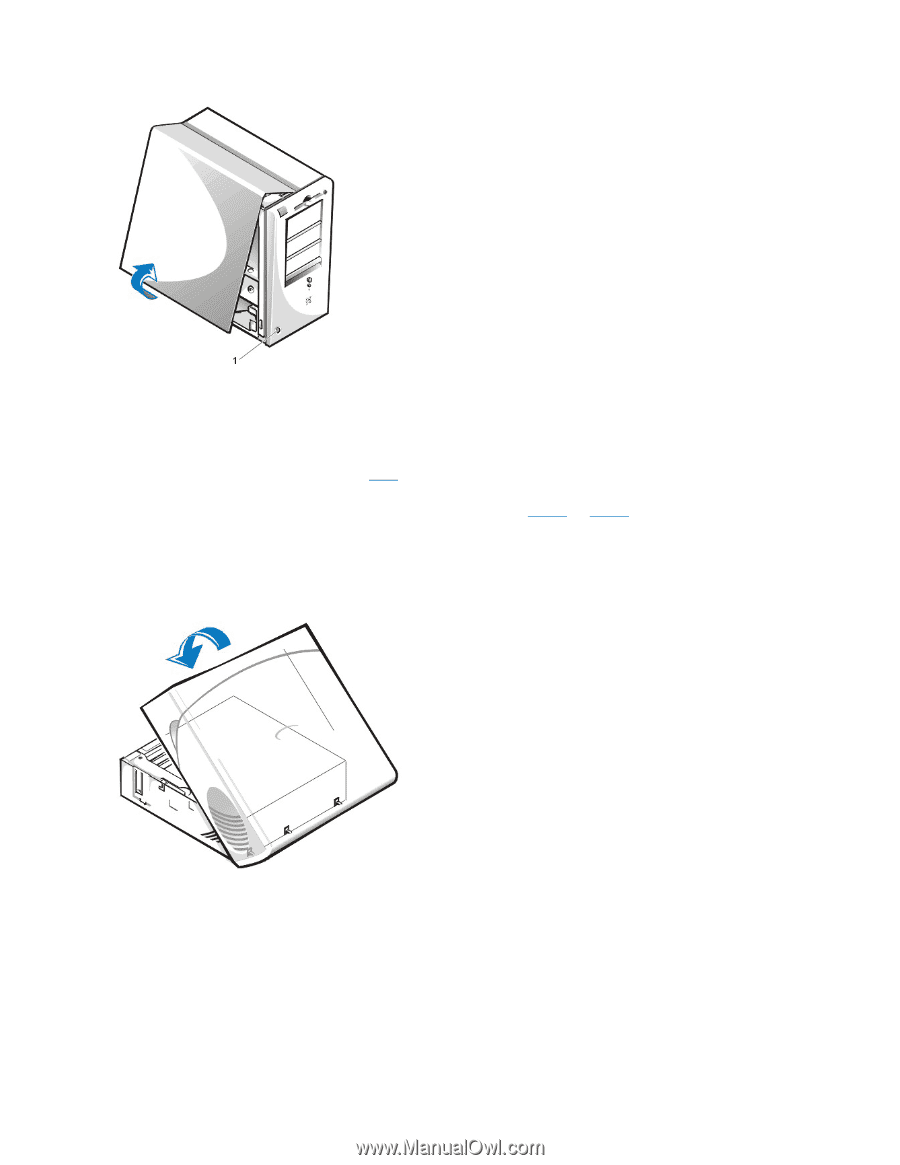
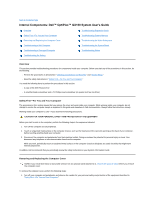
1 Release button To replace the computer cover, perform the following steps: 1. Check all cable connections, especially those that might have come loose during your work. Fold cables out of the way so that they do not catch on the computer cover. Make sure cables are not routed over the drive cage-they will prevent the cover from closing properly. 2. Check to see that no tools or extra parts (including screws) are left inside the computer's chassis. 3. If your computer has a mini tower chassis, skip to step 4 . If your computer has a small-form-factor or low-profile chassis, replace the computer cover as follows: a. Face the front of the computer and hold the cover at a slight angle as shown in Figure 4 and Figure 5. b. Align the bottom of the cover with the bottom of the chassis, and insert the hooks on the cover into the recessed slots on the computer chassis so that the tabs catch the hooks inside the slots. c. Pivot the cover down toward the back of the chassis and into position. Make sure that the securing buttons click into place. Figure 4. Replacing the Small-Form-Factor Computer Cover Figure 5. Replacing the Low-Profile Computer Cover
-
 1
1 -
2
-
3
-
4
-
5
-
6
-
7
-
8
-
9
-
10
-
11
-
12
-
13
-
14
-
15
-
16
-
17
-
18
-
19
-
20
-
21
-
22
-
23
-
24
-
25
-
26
-
27
-
28
-
29
-
30
-
31
-
32
-
33
-
34
-
35
-
36
-
37
-
38
-
39
-
40
-
41
-
42
-
43
-
44
-
45
-
46
-
47
-
48
-
49
-
50
-
51
-
52
-
53
-
 54
54 -
 55
55 -
 56
56 -
 57
57 -
 58
58 -
 59
59 -
 60
60 -
 61
61 -
 62
62 -
 63
63 -
 64
64 -
65
-
66
-
67
-
68
-
69
-
70
-
71
-
72
-
73
-
74
-
75
-
76
-
77
-
78
-
79
-
80
-
81
-
82
-
83
-
84
-
85
-
86
-
87
-
88
-
89
-
90
-
91
-
92
-
93
-
94
-
95
-
96
-
97
-
98
-
99
-
100
-
101
-
102
-
103
-
104
-
105
-
106
-
107
 |
 |