Dell PowerConnect B - MLXe 4 Hardware Installation Guide - Page 50
Installing power supplies in a PowerConnect B-MLXe-4 router
 |
View all Dell PowerConnect B - MLXe 4 manuals
Add to My Manuals
Save this manual to your list of manuals |
Page 50 highlights
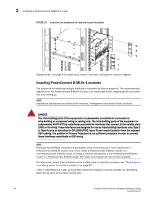
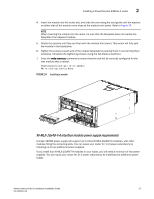
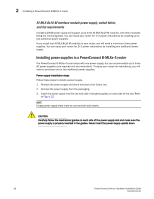
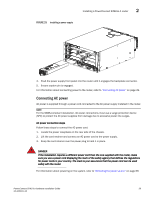
2 Installing a PowerConnect B-MLXe-4 router NI-MLX-8x10-M interface module power supply, switch fabric, and fan requirements A single 1200W power supply will support up to three NI-MLX-8x10-M modules, with other modules filling the remaining slots. You can equip your router for 1+2 power redundancy by installing up to two additional power supplies. If you install four NI-MLX-8x10-M modules in your router, you will need a minimum of two power supplies. You can equip your router for 2+1 power redundancy by installing one additional power supply. Installing power supplies in a PowerConnect B-MLXe-4 router The PowerConnect B-MLXe-4 router ships with one power supply, but can accommodate up to three AC power supplies (one required and two redundant). To equip your router for redundancy, you will need to purchase one or two additional power supplies. Power supply installation steps Follow these steps to install a power supply. 1. Remove the power supply slot blank and store it for future use. 2. Remove the power supply from the packaging. 3. Insert the power supply into the slot and slide it along the guides on each side of the slot. Refer to Figure 25. NOTE Empty power supply slots must be covered with slot blanks. CAUTION Carefully follow the mechanical guides on each side of the power supply slot and make sure the power supply is properly inserted in the guides. Never insert the power supply upside down. 38 PowerConnect B-MLXe Hardware Installation Guide 53-1002111-01
-
 1
1 -
2
-
3
-
4
-
5
-
6
-
7
-
8
-
9
-
10
-
11
-
12
-
13
-
14
-
15
-
16
-
17
-
18
-
19
-
20
-
21
-
22
-
23
-
24
-
25
-
26
-
27
-
28
-
29
-
30
-
31
-
32
-
33
-
34
-
35
-
36
-
37
-
38
-
39
-
40
-
41
-
42
-
43
-
44
-
 45
45 -
 46
46 -
 47
47 -
 48
48 -
 49
49 -
 50
50 -
 51
51 -
 52
52 -
 53
53 -
 54
54 -
 55
55 -
56
-
57
-
58
-
59
-
60
-
61
-
62
-
63
-
64
-
65
-
66
-
67
-
68
-
69
-
70
-
71
-
72
-
73
-
74
-
75
-
76
-
77
-
78
-
79
-
80
-
81
-
82
-
83
-
84
-
85
-
86
-
87
-
88
-
89
-
90
-
91
-
92
-
93
-
94
-
95
-
96
-
97
-
98
-
99
-
100
-
101
-
102
-
103
-
104
-
105
-
106
-
107
-
108
-
109
-
110
-
111
-
112
-
113
-
114
-
115
-
116
-
117
-
118
-
119
-
120
-
121
-
122
-
123
-
124
-
125
-
126
-
127
-
128
-
129
-
130
-
131
-
132
-
133
-
134
-
135
-
136
-
137
-
138
-
139
-
140
-
141
-
142
-
143
-
144
-
145
-
146
-
147
-
148
-
149
-
150
-
151
-
152
-
153
-
154
-
155
-
156
-
157
-
158
-
159
-
160
-
161
-
162
-
163
-
164
-
165
-
166
-
167
-
168
-
169
-
170
-
171
-
172
-
173
-
174
-
175
-
176
-
177
-
178
-
179
-
180
-
181
-
182
-
183
-
184
-
185
-
186
-
187
-
188
-
189
-
190
-
191
-
192
-
193
-
194
-
195
-
196
-
197
-
198
-
199
-
200
-
201
-
202
-
203
-
204
-
205
-
206
-
207
-
208
-
209
-
210
-
211
-
212
 |
 |