Dell PowerEdge 2800 Rack- to-Tower Conversion Guide - Page 10
Recommended Tools and Supplies, Conversion Tasks - drivers
 |
View all Dell PowerEdge 2800 manuals
Add to My Manuals
Save this manual to your list of manuals |
Page 10 highlights
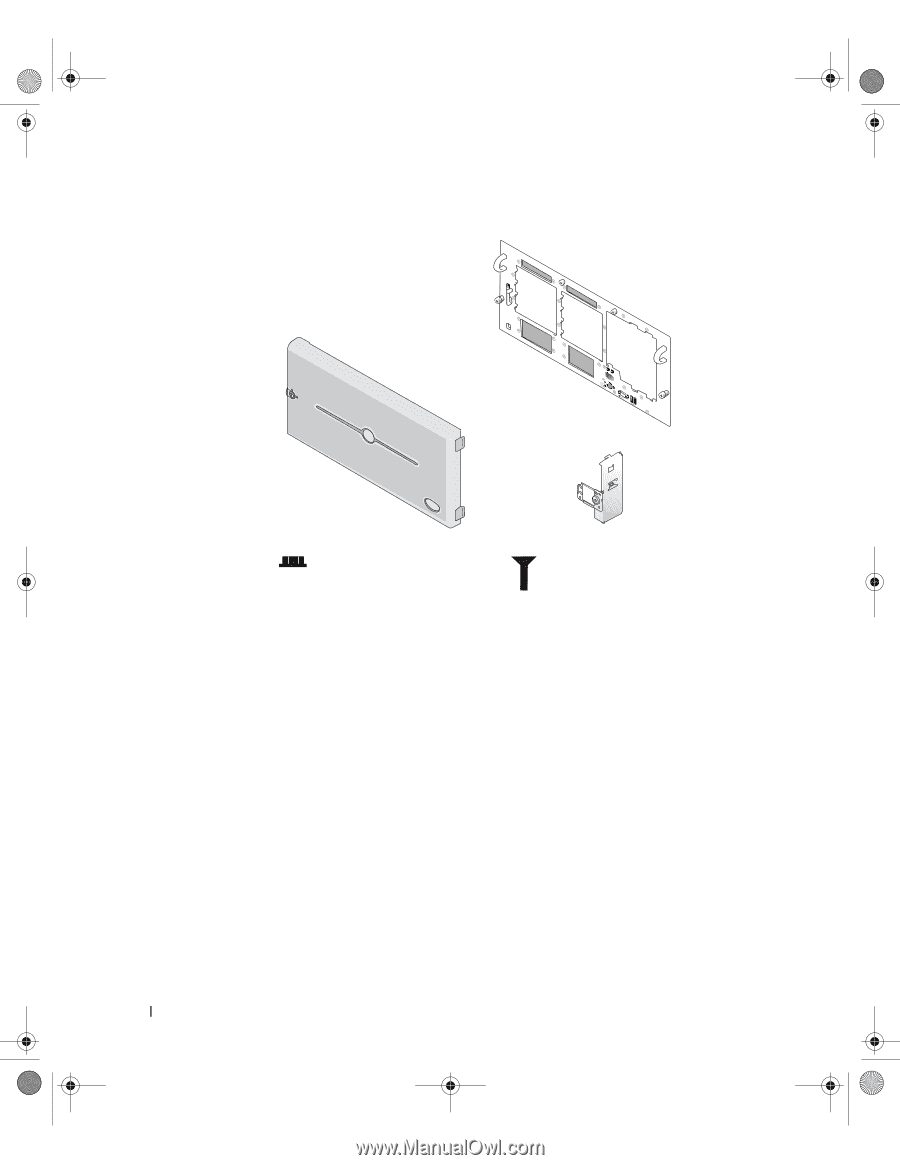
Y1001bk0.book Page 8 Thursday, July 8, 2004 4:32 PM Figure 1-1. Tower-To-Rack Kit Contents www.dell.com | support.dell.com rack bezel rack front panel rack control panel carrier shoulder nuts (6) 6-32 x 0.312 Torx screws (22) Recommended Tools and Supplies • #2 Phillips screwdriver • 1/4-inch nut driver • T-10 Torx driver (for removing and installing the front panels) Conversion Tasks Installing a rack kit involves performing the following tasks: • Removing the bezel, feet, and cover • Removing the control panel assembly and tower front panel • Installing the rack front panel and control panel assembly • Removing the trim panel • Installing shoulder nuts • Removing the rack doors 8 Tower-to-Rack and Rack-to-Tower Conversion Guide
-
 1
1 -
2
-
3
-
4
-
 5
5 -
 6
6 -
 7
7 -
 8
8 -
 9
9 -
 10
10 -
 11
11 -
 12
12 -
 13
13 -
 14
14 -
 15
15 -
16
-
17
-
18
-
19
-
20
-
21
-
22
-
23
-
24
-
25
-
26
-
27
-
28
-
29
-
30
-
31
-
32
-
33
-
34
-
35
-
36
 |
 |
8
Tower-to-Rack and Rack-to-Tower Conversion Guide
www.dell.com | support.dell.com
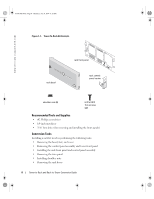
Figure 1-1.
Tower-To-Rack Kit Contents
Recommended Tools and Supplies
•
#2 Phillips screwdriver
•
1/4-inch nut driver
•
T-10 Torx driver (for removing and installing the front panels)
Conversion Tasks
Installing a rack kit involves performing the following tasks:
•
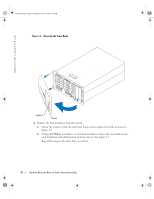
Removing the bezel, feet, and cover
•
Removing the control panel assembly and tower front panel
•
Installing the rack front panel and control panel assembly
•
Removing the trim panel
•
Installing shoulder nuts
•
Removing the rack doors
rack front panel
rack control
panel carrier
rack bezel
shoulder nuts (6)
6-32 x 0.312
Torx screws
(22)
Y1001bk0.book
Page 8
Thursday, July 8, 2004
4:32 PM