Dell PowerEdge 2800 Rack- to-Tower Conversion Guide - Page 25
Installing the Tower Trim Panel
 |
View all Dell PowerEdge 2800 manuals
Add to My Manuals
Save this manual to your list of manuals |
Page 25 highlights
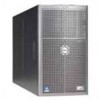
Y1001bk0.book Page 23 Thursday, July 8, 2004 4:32 PM Figure 1-12. Removing the System system locking mechanism system locking mechanism release button Installing the Tower Trim Panel 1 Lay the system on its cover as shown in Figure 1-13. 2 Position the tower trim panel with the back end extending 12.7 millimeters (0.5-inch) beyond the back of the chassis. See Figure 1-13 3 Slide the trim panel toward the front panel until it stops. 4 Using a #2 Phillips screwdriver or 1/4-inch nut driver, install the two screws that secure the trim panel to the back of the chassis. 5 Using a #2 Phillips screwdriver or 1/4-inch nut driver, install the three screws that secure the trim panel to the side of the chassis. Tower-to-Rack and Rack-to-Tower Conversion Guide 23
-
 1
1 -
2
-
3
-
4
-
5
-
6
-
7
-
8
-
9
-
10
-
11
-
12
-
13
-
14
-
15
-
16
-
17
-
18
-
19
-
 20
20 -
 21
21 -
 22
22 -
 23
23 -
 24
24 -
 25
25 -
 26
26 -
 27
27 -
 28
28 -
 29
29 -
 30
30 -
31
-
32
-
33
-
34
-
35
-
36
 |
 |
