Dell PowerEdge 6800 Installation and Troubleshooting Guide (.htm) - Page 15
Removing the Trim Panel
 |
View all Dell PowerEdge 6800 manuals
Add to My Manuals
Save this manual to your list of manuals |
Page 15 highlights
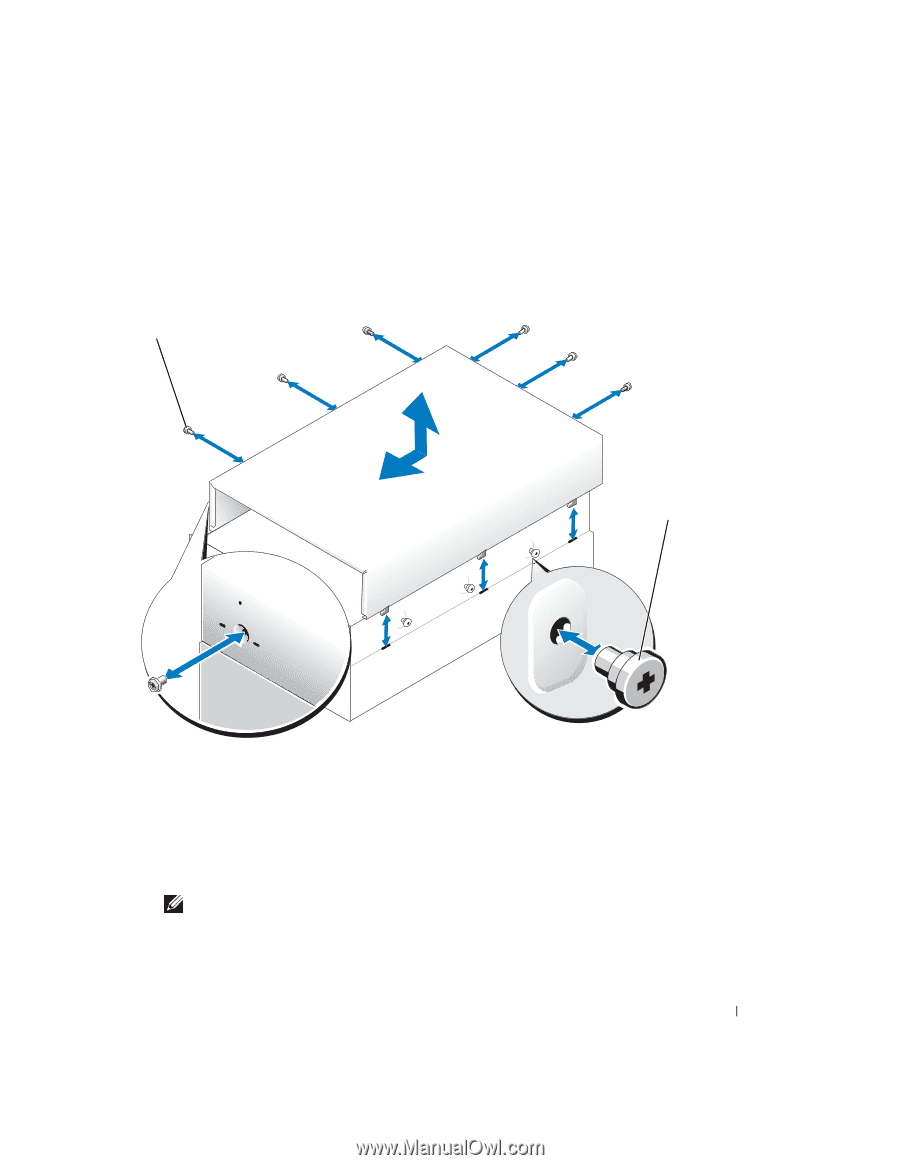
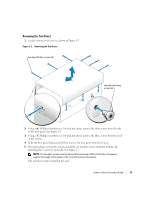
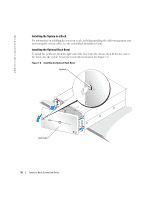
Removing the Trim Panel 1 Lay the system on its cover as shown in Figure 1-7. Figure 1-7. Removing the Trim Panel hex-head Phillips screws (6) shoulder mounting screws (6) 2 Using a #2 Phillips screwdriver or 1/4-inch nut driver, remove the three screws from the side of the trim panel. See Figure 1-7. 3 Using a #2 Phillips screwdriver or 1/4-inch nut driver, remove the three screws from the back of the system. 4 Slide the trim panel backward and then remove the trim panel from the chassis. 5 If not already present on the system, install the six shoulder screws included with the kit, attaching three screws to each side. See Figure 1-7. NOTE: The shoulder screws must be tightened firmly enough (10.8 to 13.2 in-lbs of torque) to support the weight of the system in the rack and to prevent loosening. The system is ready to install in the rack. Tower-to-Rack Conversion Guide 15
-
 1
1 -
2
-
3
-
4
-
5
-
6
-
7
-
8
-
9
-
 10
10 -
 11
11 -
 12
12 -
 13
13 -
 14
14 -
 15
15 -
 16
16
 |
 |