Dell PowerEdge R7525 EMC PowerEdge RAID Controller S150 Users Guide - Page 45
Dell PowerEdge R7525 Manual
 |
View all Dell PowerEdge R7525 manuals
Add to My Manuals
Save this manual to your list of manuals |
Page 45 highlights
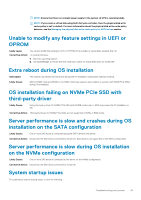
A Non-RAID virtual disk is no longer in first position in the BIOS configuration utility list after a system reboot NOTE: When booting from a Non-RAID virtual disk, creating a virtual disk in OpenManage Server Administrator changes the virtual disk order and displaces the bootable Non-RAID virtual disk from the first position. PERC S150 then attempts to boot from the first virtual disk. NOTE: A Non-RAID virtual disk can be created from Non-RAID physical disks-which are physical disks initialized by a controller other than PERC S150. 1. When prompted at system startup, press Ctrl+R to access the BIOS configuration utility. 2. Check Virtual Disks and determine if the bootable Non-RAID virtual disk is no longer in the first position. 3. Use the Swap Two Virtual Disks option to swap the virtual disks and place the bootable Non-RAID virtual disk in the first position of the Virtual Disks field. The BIOS configuration utility option does not display The BIOS configuration utility Ctrl+R option does not display if the PERC S150 mode is set incorrectly in the system BIOS. For the correct SATA Setting, see Controller mode is set incorrectly at System Setup on page 44. Configuring RAID using the Option ROM Utility is disabled Use the PERC S150 Configuration Utility to configure RAID on systems with NVMe PCIe SSD(s). Warning Messages The Dell Inc. PERC S150 Controller system BIOS screen is one of the first screens to appear during your system's boot sequence. If the system's virtual disks were in Normal or Ready status before a system boot, the boot sequence continues normally to the Microsoft Windows Server operating system. But, if a virtual disk is in Degraded or Failed status, or if specific options in the Controller Options field were changed previously at the BIOS Configuration Utility (), the following warning messages appear during the boot sequence. WARNING- Found virtual disks that are degraded This warning message is displayed when at least one virtual disk is in a Degraded state and Pause if Degraded is set to ON at the BIOS Configuration Utility Ctrl+R. The following message is displayed after the warning is displayed: --- Press Enter to continue, or Ctrl+R to enter setup ---. Press Enter to allow the operating system to continue with the boot sequence, or press Ctrl+R to enter into the BIOS Configuration Utility Ctrl+R to investigate the cause of the Degraded virtual disk. To investigate the cause, check for the following: • Whether a physical disk in the virtual disk has failed or has gone offline. Check the status at the Physical Disks field. A Degraded status depends on the RAID level of the virtual disk and the number of physical disks that have failed: -For a virtual disk at RAID 1 or RAID 5, a single physical disk failure causes a Degraded status. -For a virtual disk at RAID 10, the failure of a physical disk in each of the mirror sets creates a Degraded status for the RAID 10. The failure of two physical disks in the same mirror set creates a Failed status for the RAID 10. • Whether the controller has failed due to a firmware failure or a component failure. A failed controller causes a virtual disk not to boot. Troubleshooting your system 45
-
 1
1 -
2
-
3
-
4
-
5
-
6
-
7
-
8
-
9
-
10
-
11
-
12
-
13
-
14
-
15
-
16
-
17
-
18
-
19
-
20
-
21
-
22
-
23
-
24
-
25
-
26
-
27
-
28
-
29
-
30
-
31
-
32
-
33
-
34
-
35
-
36
-
37
-
38
-
39
-
 40
40 -
 41
41 -
 42
42 -
 43
43 -
 44
44 -
 45
45 -
 46
46 -
 47
47 -
 48
48 -
 49
49 -
 50
50 -
51
-
52
-
53
-
54
-
55
-
56
 |
 |
