Dell PowerEdge SC1430 Hardware Owner's Manual - Page 61
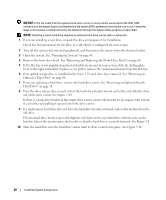
Gently slide the drive into place until you hear a click or feel the drive securely installed.
 |
View all Dell PowerEdge SC1430 manuals
Add to My Manuals
Save this manual to your list of manuals |
Page 61 highlights
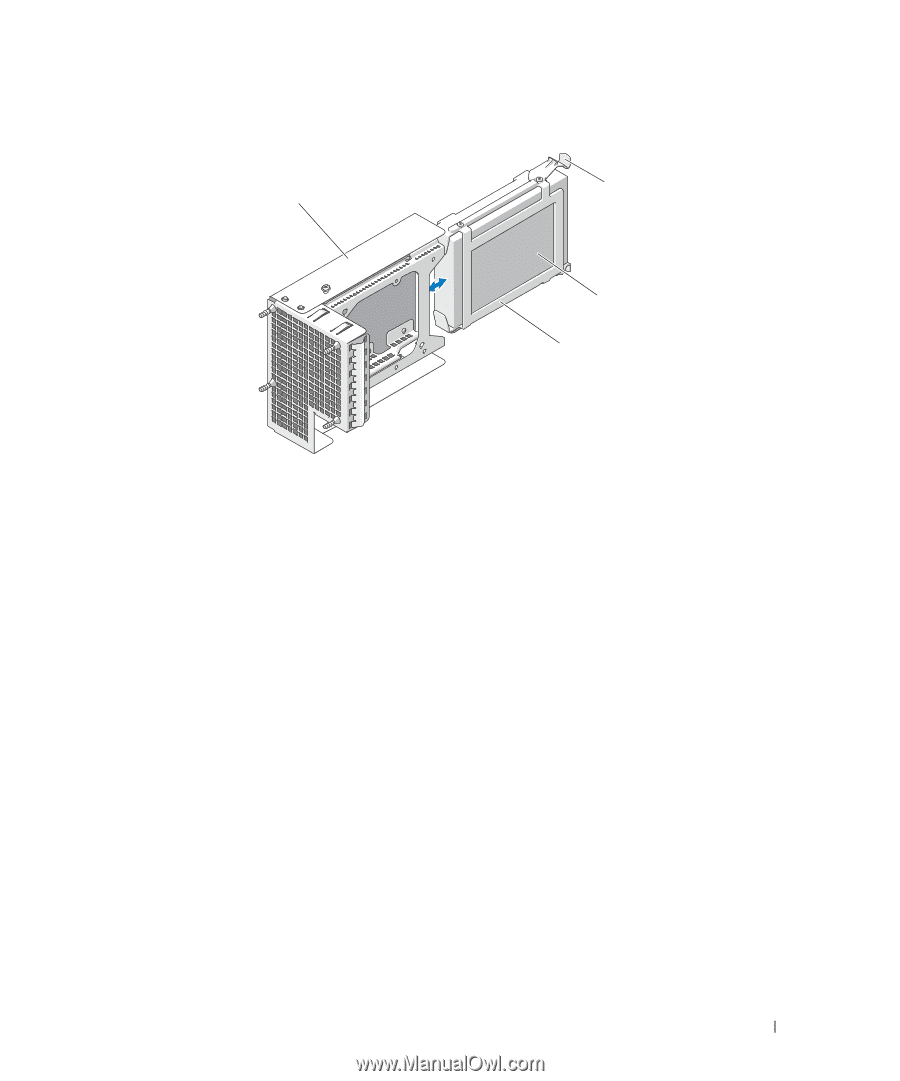
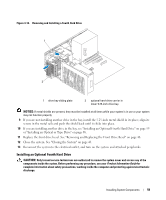
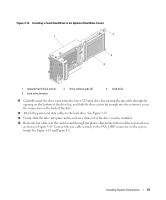
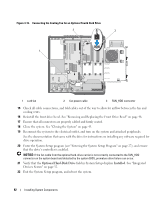
Figure 3-14. Installing a Fourth Hard Drive in the Optional Hard-Drive Carrier 2 1 3 4 1 optional hard-drive carrier 4 hard-drive bracket 2 drive release tabs (2) 3 hard drive 11 Carefully insert the drive carrier into the lower 5.25-inch drive bay, passing the fan cable through the opening on the bottom of the drive bay, and slide the drive carrier far enough into the system to access the connectors on the back of the drive. 12 Attach the power and data cables to the hard drive. See Figure 3-12. 13 Gently slide the drive into place until you hear a click or feel the drive securely installed. 14 Route the fan cable over the card fan and through the plastic clips on the bottom of the system chassis, as shown in Figure 3-15. Connect the fan cable securely to the FAN_HDD connector on the system board. See Figure 3-15 and Figure 6-2. Installing System Components 61
-
 1
1 -
2
-
3
-
4
-
5
-
6
-
7
-
8
-
9
-
10
-
11
-
12
-
13
-
14
-
15
-
16
-
17
-
18
-
19
-
20
-
21
-
22
-
23
-
24
-
25
-
26
-
27
-
28
-
29
-
30
-
31
-
32
-
33
-
34
-
35
-
36
-
37
-
38
-
39
-
40
-
41
-
42
-
43
-
44
-
45
-
46
-
47
-
48
-
49
-
50
-
51
-
52
-
53
-
54
-
55
-
 56
56 -
 57
57 -
 58
58 -
 59
59 -
 60
60 -
 61
61 -
 62
62 -
 63
63 -
 64
64 -
 65
65 -
 66
66 -
67
-
68
-
69
-
70
-
71
-
72
-
73
-
74
-
75
-
76
-
77
-
78
-
79
-
80
-
81
-
82
-
83
-
84
-
85
-
86
-
87
-
88
-
89
-
90
-
91
-
92
-
93
-
94
-
95
-
96
-
97
-
98
-
99
-
100
-
101
-
102
-
103
-
104
-
105
-
106
-
107
-
108
-
109
-
110
-
111
-
112
-
113
-
114
-
115
-
116
-
117
-
118
-
119
-
120
-
121
-
122
-
123
-
124
-
125
-
126
-
127
-
128
-
129
-
130
-
131
-
132
-
133
-
134
-
135
-
136
-
137
-
138
-
139
-
140
-
141
-
142
-
143
-
144
-
145
-
146
-
147
-
148
-
149
-
150
-
151
-
152
-
153
-
154
-
155
-
156
-
157
-
158
-
159
-
160
 |
 |