Dell S5840cdn Color Smart Printer Print from SharePoint Administrators Guide - Page 6
Configuring the SharePoint server settings, Enabling authentication types, Configuring site bindings
 |
View all Dell S5840cdn manuals
Add to My Manuals
Save this manual to your list of manuals |
Page 6 highlights
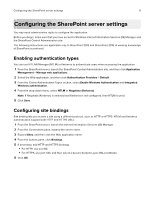
Configuring the SharePoint server settings 6 Configuring the SharePoint server settings You may need administrative rights to configure the application. Before you begin, make sure that you have access to Windows Internet Information Services (IIS) Manager and the SharePoint Central Administration site. The following instructions are applicable only to SharePoint 2013 and SharePoint 2010. A working knowledge of SharePoint is preferred. Enabling authentication types You can use NT LAN Manager (NTLM) or Kerberos to authenticate users when accessing the application. 1 From the SharePoint server, launch the SharePoint Central Administration site, and then click Application Management > Manage web applications. 2 Select the Web application, and then click Authentication Providers > Default. 3 From the Claims Authentication Types section, select Enable Windows Authentication and Integrated Windows authentication. 4 From the drop-down menu, select NTLM or Negotiate (Kerberos). Note: If Negotiate (Kerberos) is selected and Kerberos is not configured, then NTLM is used. 5 Click Save. Configuring site bindings Site binding lets you access a site using a different protocol, such as HTTP or HTTPS. NTLM and Kerberos authentication support both HTTP and HTTPS URLs. 1 From the SharePoint server, launch the Internet Information Services (IIS) Manager. 2 From the Connections pane, expand the server name. 3 Expand Sites, and then click the Web application name. 4 From the Actions pane, click Bindings. 5 If necessary, add HTTP and HTTPS bindings. • For HTTP, use port 80. • For HTTPS, use port 443, and then select a Secure Sockets Layer (SSL) certificate. 6 Click OK.
-
 1
1 -
 2
2 -
 3
3 -
 4
4 -
 5
5 -
 6
6 -
 7
7 -
 8
8 -
 9
9 -
 10
10 -
 11
11 -
 12
12 -
13
-
14
-
15
-
16
-
17
-
18
-
19
-
20
-
21
-
22
-
23
-
24
-
25
-
26
 |
 |
