Dell S5840cdn Color Smart Printer Print from SharePoint Administrators Guide - Page 9
Configuring the application, Accessing the Embedded Web Server, Configuring NTLM authentication,
 |
View all Dell S5840cdn manuals
Add to My Manuals
Save this manual to your list of manuals |
Page 9 highlights
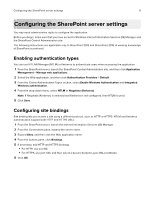
Configuring the application 9 Configuring the application Accessing the Embedded Web Server 1 Obtain the printer IP address. Do either of the following: • Locate the IP address on the top of the printer home screen. • From the printer home screen, touch Settings > Network/Ports > Network Overview. 2 Open a Web browser, and then type the printer IP address. Configuring NTLM authentication Before you begin, make sure that NTLM authentication is enabled in the SharePoint server. For more information, see "Enabling authentication types" on page 6. 1 From the Embedded Web Server, navigate to the configuration page for the application: Apps > Print from SharePoint > Configure 2 Add or edit a profile. 3 From the Authentication section, set the authentication type to NTLM or NTLMv2. Notes: • If your SharePoint server is running on Windows Server® 2008 R2 or later, then select NTLMv2. • If your SharePoint server is running on Windows Server 2008 or earlier, then select NTLM. 4 Specify how SSL is used to connect to the SharePoint server. For more information, see "Configuring SSL settings" on page 7. 5 From the NTLM Settings section, do one of the following: • If you selected Use default credentials, then type the default user name and password. • If you selected Use session credentials, then the application uses the assigned function access control user credentials. For example, Internal Accounts, LDAP, or Active Directory. • If you selected Prompt for user credentials, then you will be prompted for the assigned function access control user credentials. 6 Click Apply. Configuring Kerberos authentication Before you begin, make sure that Kerberos authentication is enabled in the SharePoint server. For more information, see "Enabling authentication types" on page 6. 1 From the Embedded Web Server, navigate to the configuration page for the application: Apps > Print from SharePoint > Configure 2 Add or edit a profile. 3 From the Authentication section, set the authentication type to Device Security.
-
 1
1 -
2
-
3
-
 4
4 -
 5
5 -
 6
6 -
 7
7 -
 8
8 -
 9
9 -
 10
10 -
 11
11 -
 12
12 -
 13
13 -
 14
14 -
15
-
16
-
17
-
18
-
19
-
20
-
21
-
22
-
23
-
24
-
25
-
26
 |
 |
