Dell U2723QE Monitor Simplified Service Manual - Page 14
screws for locking the rear cover with the unit. Stick
 |
View all Dell U2723QE manuals
Add to My Manuals
Save this manual to your list of manuals |
Page 14 highlights
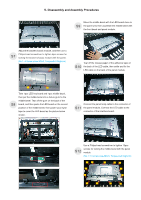
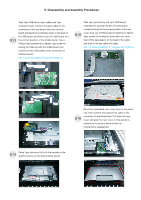
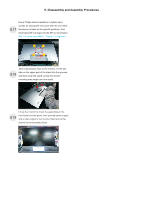
5. Disassembly and Assembly Procedures Use a Philips-head screwdriver to tighten 4pcs screws for locking the rear cover with the unit. Stick S17 two pieces of label on the specific positions, then insert 2pcs DP out Caps into the DP out connectors. (No.1~4 screw size=M4x11; Torque=11±1kgfxcm) 2 3 4 1 Take a stand base close to the monitor. Fit the two tabs on the upper part of the stand into the grooves, S18 and then lower the stand so that the monitor mounting area snaps onto the stand. Lift up the monitor to check the gap between the front bezel and the panel, then provide power supply S19 and a video signal to the monitor, then turn on the monitor for functionality check.
-
 1
1 -
2
-
3
-
4
-
5
-
6
-
7
-
8
-
 9
9 -
 10
10 -
 11
11 -
 12
12 -
 13
13 -
 14
14 -
 15
15 -
 16
16 -
 17
17 -
 18
18 -
 19
19 -
20
-
21
-
22
-
23
-
24
-
25
-
26
 |
 |

5. Disassembly and Assembly Procedures
Take a stand base close to the monitor. Fit the two
tabs on the upper part of the stand into the grooves,
and then lower the stand so that the monitor
mounting area snaps onto the stand.
Lift up the monitor to check the gap between the
front bezel and the panel, then provide power supply
and a video signal to the monitor
, then turn on the
monitor for functionality check.
S18
S19
Use a Philips-head screwdriver to tighten 4pcs
screws for locking the rear cover with the unit. Stick
two pieces of label on the specific positions, then
insert 2pcs DP out Caps into the DP out connectors.
(No.1~4 screw size=M4x11; Torque=11
±
1kgfxcm)
S17
2
3
4
1