Dell Vostro 230s Service Manual - Slim Tower
Dell Vostro 230s Manual
 |
View all Dell Vostro 230s manuals
Add to My Manuals
Save this manual to your list of manuals |
Dell Vostro 230s manual content summary:
- Dell Vostro 230s | Service Manual - Slim Tower - Page 1
Dell™ Vostro™ 230s Service Manual-Slim Tower Working on Your Computer Removing and Replacing Parts Specifications Diagnostics System Setup System Board Inc. and is used by Dell under license; Microsoft, Windows, Windows Vista, and the Windows Vista start button are either trademarks or registered - Dell Vostro 230s | Service Manual - Slim Tower - Page 2
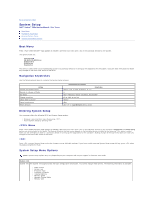
to Contents Page System Setup Dell™ Vostro™ 230s Service Manual-Slim Tower Boot Menu Navigation Keystrokes Entering System Setup System Setup Menu Options Boot Menu Press when the Dell™ logo appears to initiate a one-time boot menu with a list of the valid boot devices for the system. The - Dell Vostro 230s | Service Manual - Slim Tower - Page 3
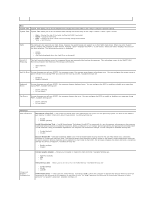
week, defined by BIOS (read-only) l Month - Choose the month l Date - Choose the date, which you can change using the keyboard. l Year - Set the year. SATA The computer only supports two hard drives, however the system setup can support up to four SATA hard drives. When you enter System Setup it - Dell Vostro 230s | Service Manual - Slim Tower - Page 4
STR is saved in memory, and the computer can quickly return to that previous status when the STR function wakes. Allows the system to wake up from USB peripheral that supports wake from USB. Available settings are: l Enabled (default) l Disabled Restore on AC Power Loss Determines what action - Dell Vostro 230s | Service Manual - Slim Tower - Page 5
) l Disabled Resume on LAN Allows the system to resume from an onboard LAN, PCIE-X1 LAN card, or a PCI LAN card. Available settings are: l Enabled l Disabled (default) Resume on RTC You can set the alarm to enabled and key in Data/time to power on system Available settings are: Alarm l Enabled - Dell Vostro 230s | Service Manual - Slim Tower - Page 6
™ Vostro™ 230s Service Manual-Slim Tower Dell Diagnostics Power Button Light Codes Beep Codes Dell Diagnostics When to Use the Dell Diagnostics It is recommended that you print these procedures before you begin. NOTE: The Dell Diagnostics software works only on Dell computers. NOTE: The Drivers - Dell Vostro 230s | Service Manual - Slim Tower - Page 7
computer. 3. If the problem persists, contact Dell. 5 Real-time clock failure. Possible Replace the battery. If the problem persists, contact Dell. battery failure or system board failure. 6 Video BIOS Test Failure Contact Dell. 7 CPU-cache test failure Contact Dell. Back to Contents Page - Dell Vostro 230s | Service Manual - Slim Tower - Page 8
- Dell Vostro 230s | Service Manual - Slim Tower - Page 9
Replacing Parts Dell™ Vostro™ 230s Service Manual-Slim Tower Cover Chassis Support Bracket Memory Hard Drive Power Button and Card Reader Light Cables Coin-Cell Battery Power Supply Rubber Foot Front Bezel Expansion Card Optical Drive Fan Front I/O Panel and SD Card Reader Heat Sink and Processor - Dell Vostro 230s | Service Manual - Slim Tower - Page 10
Back to Contents Page Specifications Dell™ Vostro™ 230s Service Manual-Slim Tower Processor Memory Audio Expansion Bus Drives Systemboard Connectors Power Environmental System Information Video Network Cards External Connectors Controls and Lights Physical NOTE: Offerings may vary by region. For - Dell Vostro 230s | Service Manual - Slim Tower - Page 11
ATA Memory Internal USB device Processor fan System fan Front panel control Front panel audio HDA header Processor Power 12V Power Controls and Lights Front of the computer: Power button Power light two PCI two full height and ¾ length cards (for Mini Tower) two low profile cards (for Slim Tower - Dell Vostro 230s | Service Manual - Slim Tower - Page 12
using the power supply wattage rating. NOTE: See the safety information that shipped with your computer for important voltage setting information. Physical Height Width Depth Weight Mini Tower 37.00 cm (14.50 inches) 17.00 cm (6.70 inches) 42.70 cm (16.90 inches) 6.10 kg (13.50 lb) Slim Tower 37 - Dell Vostro 230s | Service Manual - Slim Tower - Page 13
to Contents Page Chassis Support Bracket Dell™ Vostro™ 230s Service Manual-Slim Tower WARNING: Before working inside your computer, read the safety information that shipped with your computer. For additional safety best practices information, see the Regulatory Compliance Homepage at www.dell.com - Dell Vostro 230s | Service Manual - Slim Tower - Page 14
Page Fan Dell™ Vostro™ 230s Service Manual-Slim Tower WARNING: Before working inside your computer, read the safety information that shipped with your computer. For additional safety best practices information, see the Regulatory Compliance Homepage at www.dell.com/regulatory_compliance. Removing - Dell Vostro 230s | Service Manual - Slim Tower - Page 15
Coin-cell Battery Dell™ Vostro™ 230s Service Manual-Slim Tower WARNING: Before working inside your computer, read the safety information that shipped with your computer. For additional safety best practices information, see the Regulatory Compliance Homepage at www.dell.com/regulatory_compliance - Dell Vostro 230s | Service Manual - Slim Tower - Page 16
Contents Page Cover Dell™ Vostro™ 230s Service Manual-Slim Tower WARNING: Before working inside your computer, read the safety information that shipped with your computer. For additional safety best practices information, see the Regulatory Compliance Homepage at www.dell.com/regulatory_compliance - Dell Vostro 230s | Service Manual - Slim Tower - Page 17
Expansion Card(s) Dell™ Vostro™ 230s Service Manual-Slim Tower WARNING: Before working inside your computer, read the safety information that shipped with your computer. For additional safety best practices information, see the Regulatory Compliance Homepage at www.dell.com/regulatory_compliance - Dell Vostro 230s | Service Manual - Slim Tower - Page 18
Page Front Bezel Dell™ Vostro™ 230s Service Manual-Slim Tower WARNING: Before working inside your computer, read the safety information that shipped with your computer. For additional safety best practices information, see the Regulatory Compliance Homepage at www.dell.com/regulatory_compliance - Dell Vostro 230s | Service Manual - Slim Tower - Page 19
Page Front I/O Panel and SD Card Reader Dell™ Vostro™ 230s Service Manual-Slim Tower WARNING: Before working inside your support bracket. 5. Remove the hard drive. 6. Remove the optical drive. 7. Remove the power button and card reader light cables. 8. Disconnect all the cables from the system - Dell Vostro 230s | Service Manual - Slim Tower - Page 20
Page Hard Drive Dell™ Vostro™ 230s Service Manual-Slim Tower WARNING: Before working inside your computer, read the safety information that shipped with your computer. For additional safety best practices information, see the Regulatory Compliance Homepage at www.dell.com/regulatory_compliance - Dell Vostro 230s | Service Manual - Slim Tower - Page 21
Sink and Processor Dell™ Vostro™ 230s Service Manual-Slim Tower WARNING: Before working inside your computer, read the safety information that shipped with your computer. For additional safety best practices information, see the Regulatory Compliance Homepage at www.dell.com/regulatory_compliance - Dell Vostro 230s | Service Manual - Slim Tower - Page 22
Dell™ Vostro™ 230s Service Manual-Slim Tower WARNING: Before working inside your computer, read the safety information that shipped with your computer. For additional safety best practices information, see the Regulatory Compliance Homepage at www.dell.com/regulatory_compliance. Removing a Memory - Dell Vostro 230s | Service Manual - Slim Tower - Page 23
Page Optical Drive Dell™ Vostro™ 230s Service Manual-Slim Tower WARNING: Before working inside your computer, read the safety information that shipped with your computer. For additional safety best practices information, see the Regulatory Compliance Homepage at www.dell.com/regulatory_compliance - Dell Vostro 230s | Service Manual - Slim Tower - Page 24
to Contents Page Power Button and Card Reader Light Dell™ Vostro™ 230s Service Manual-Slim Tower WARNING: Before power button and card reader light cables from the system board and remove them from the computer. Replacing the Power Button and Card Reader Light To replace the power button and card - Dell Vostro 230s | Service Manual - Slim Tower - Page 25
Page Power Supply Dell™ Vostro™ 230s Service Manual-Slim Tower WARNING: Before working inside your computer, read the safety information that shipped with your computer. For additional safety best practices information, see the Regulatory Compliance Homepage at www.dell.com/regulatory_compliance - Dell Vostro 230s | Service Manual - Slim Tower - Page 26
Page Rubber Foot Dell™ Vostro™ 230s Service Manual-Slim Tower WARNING: Before working inside your computer, read the safety information that shipped with your computer. For additional safety best practices information, see the Regulatory Compliance Homepage at www.dell.com/regulatory_compliance - Dell Vostro 230s | Service Manual - Slim Tower - Page 27
Page System Board Dell™ Vostro™ 230s Service Manual-Slim Tower WARNING: Before working inside your computer, read the safety information that shipped with your computer. For additional safety best practices information, see the Regulatory Compliance Homepage at www.dell.com/regulatory_compliance - Dell Vostro 230s | Service Manual - Slim Tower - Page 28
Contents Page System Board Layout Dell™ Vostro™ 230s Service Manual-Slim Tower 1 Power connector (PWR1) 2 Processor heat sink/fan assembly power (CPUFAN1) 3 Memory module connectors (2) 4 Main power connector 5 Battery socket 6 Serial ATA drive connector (SATA3) 7 Serial ATA drive connector - Dell Vostro 230s | Service Manual - Slim Tower - Page 29
Working on Your Computer Dell™ Vostro™ 230s Service Manual-Slim Tower Before Working Inside Your Computer Recommended Tools devices from their electrical outlets. 5. Press and hold the power button while the system is unplugged to ground the system board. 6. Remove the cover (see Cover). CAUTION: - Dell Vostro 230s | Service Manual - Slim Tower - Page 30
system, press and hold the power button for about 6 seconds to turn them off. After Working Inside Your Computer After you complete any replacement procedure, ensure you connect any external devices, cards works correctly by running the Dell Diagnostics. See Dell Diagnostics. Back to Contents Page
-
 1
1 -
 2
2 -
 3
3 -
 4
4 -
 5
5 -
 6
6 -
 7
7 -
8
-
9
-
10
-
11
-
12
-
13
-
14
-
15
-
16
-
17
-
18
-
19
-
20
-
21
-
22
-
23
-
24
-
25
-
26
-
27
-
28
-
29
-
30
 |
 |
Dell™ Vostro™ 230s Service Manual—
Slim Tower
Notes, Cautions, and Warnings
If you purchased a Dell™ n Series computer, any references in this document to Microsoft®
Windows
®
operating systems are not applicable.
Information in this document is subject to change without notice.
© 2010 Dell Inc. All rights reserved.
Reproduction of this material in any manner whatsoever without the written permission of Dell Inc. is strictly forbidden.
Trademarks used in this text:
Dell
, the
DELL
logo, and
Vostro
are trademarks of Dell Inc.;
Intel
,
Pentium, Celeron
, and
Core
are either trademarks or registered trademarks of Intel
Corporation;
Bluetooth
is a registered trademark owned by Bluetooth SIG, Inc. and is used by Dell under license;
Microsoft
,
Windows, Windows Vista
,
and the
Windows Vista
start
button
are either trademarks or registered trademarks of Microsoft Corporation in the United States and/or other countries;
Adobe
, the
Adobe
logo, and
Flash
are either registered
trademarks or trademarks of Adobe Systems Incorporated in the United States and/or other countries;
ATI FirePro
is a trademark of Advanced Micro Devices, Inc.
Other trademarks and trade names may be used in this document to refer to either the entities claiming the marks and names or their products. Dell Inc. disclaims any
proprietary interest in trademarks and trade names other than its own.
March 2010
Rev. A00
Working on Your Computer
Removing and Replacing Parts
Specifications
Diagnostics
System Setup
System Board Diagram
NOTE:
A NOTE indicates important information that helps you make better use of your computer.
CAUTION:
A CAUTION indicates potential damage to hardware or loss of data if instructions are not followed.
WARNING:
A WARNING indicates a potential for property damage, personal injury, or death.