Dell XPS M140 MXC051 XPS M140 Service Manual - Page 24
Preparing to Work Inside the Computer, Removing a Memory, Module, Replacing the Keyboard
 |
View all Dell XPS M140 MXC051 manuals
Add to My Manuals
Save this manual to your list of manuals |
Page 24 highlights
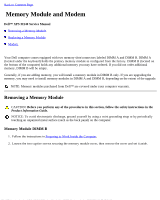
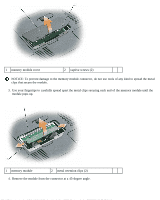
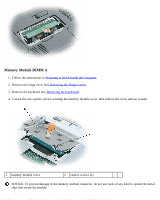
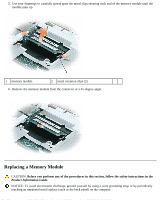
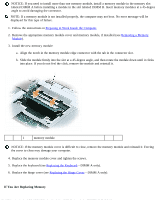
NOTICE: If you need to install more than one memory module, install a memory module in the memory slot labeled DIMM A before installing a module in the slot labeled DIMM B. Insert memory modules at a 45-degree angle to avoid damaging the connector. NOTE: If a memory module is not installed properly, the computer may not boot. No error message will be displayed for this type of failure. 1. Follow the instructions in Preparing to Work Inside the Computer. 2. Remove the appropriate memory module cover and memory module, if installed (see Removing a Memory Module). 3. Install the new memory module: a. Align the notch in the memory module edge connector with the tab in the connector slot. b. Slide the module firmly into the slot at a 45-degree angle, and then rotate the module down until it clicks into place. If you do not feel the click, remove the module and reinstall it. 1 memory module NOTICE: If the memory module cover is difficult to close, remove the memory module and reinstall it. Forcing the cover to close may damage your computer. 4. Replace the memory module cover and tighten the screws. 5. Replace the keyboard (see Replacing the Keyboard-DIMM A only). 6. Replace the hinge cover (see Replacing the Hinge Cover-DIMM A only). If You Are Replacing Memory
-
 1
1 -
2
-
3
-
4
-
5
-
6
-
7
-
8
-
9
-
10
-
11
-
12
-
13
-
14
-
15
-
16
-
17
-
18
-
 19
19 -
 20
20 -
 21
21 -
 22
22 -
 23
23 -
 24
24 -
 25
25 -
 26
26 -
 27
27 -
 28
28 -
 29
29 -
30
-
31
-
32
-
33
-
34
-
35
-
36
-
37
-
38
-
39
-
40
-
41
-
42
-
43
-
44
-
45
-
46
-
47
-
48
-
49
-
50
-
51
-
52
-
53
-
54
-
55
-
56
-
57
-
58
-
59
-
60
-
61
-
62
-
63
-
64
-
65
-
66
-
67
-
68
-
69
-
70
-
71
-
72
 |
 |
