Denon AVR-2106 Owners Manual - Page 59
Troubleshooting
 |
View all Denon AVR-2106 manuals
Add to My Manuals
Save this manual to your list of manuals |
Page 59 highlights
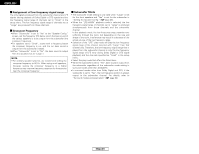
ENGLISH Troubleshooting Troubleshooting If a problem should arise, first check the following. 1. Are the connections correct? 2. Have you operated the receiver according to the operating instructions? 3. Are the speakers and other components operating properly? If this unit is not operating properly, check the items listed in the table below. Should the problem persist, there may be a malfunction. Disconnect the power immediately and contact your store of purchase. Symptom Display not lit and sound not produced when POWER switch set to on. Display lit but sound not produced. Cause Measures Page • Power supply cord not plugged in • Check the insertion of the power 18 securely. supply cord plug. • Turn the power on with the remote 8 control unit after turning the POWER switch on. • Speaker cables not securely • Connect securely. connected. • Improper setting of the FUNCTION • Set to a suitable position. knob. • Volume control set to minimum. • Turn volume up to suitable level. • MUTING is on. • Switch off MUTING. • Digital signals not input. Digital • Input digital signals or select input input selected. terminals to which digital signals are being input. 6 19 19 19 20, 21 Symptom Cause Measures Page • Batteries dead. • Replace with new batteries. 3 • Remote control unit too far from • Move closer. 3 This unit does not this unit. operate properly when • Obstacle between this unit and • Remove obstacle. 3 remote control unit is remote control unit. used. • Different button is being pressed. • Press the proper button. - • < and > ends of batteries inserted • Insert batteries properly. 3 in reverse. "CHECK ANTENNA" is displayed. • AVR-2106's XM terminal and the XM Connect-and-Play antenna is not properly connected. • Check that the connection are correct. 16 "NO SIGNAL" is displayed. • The signal cannot be received. • Reposition your XM Connect-and- 32 Play antenna. "OFF AIR" is displayed. • The selected channel is not • Select the another channel. 32 currently broadcasting. Receiving only XM • The XM Tuner is not activated. • Contact XM Radio. 32 channels 0 and 1. 2 NOTE ON USE Display not lit and power indicator is flashing rapidly. • Speaker terminals are short- • Switch power off, connect 5, 6 circuited. speakers properly, then switch power back on. • The ventilation holes of the set are • Turn off the set's power, then 2, 5 blocked. ventilate it well and allow it to cool down. Once the set has cooled down, turn the power back on. • The unit is operating at continuous • Turn off the set's power, then 2, 5 high power conditions and/or with ventilate it well and allow it to cool inadequate ventilation. down. Once the set has cooled down, turn the power back on. Do not let foreign objects into the Keep the apparatus free from apparatus. moisture, water, and dust. Avoid high temperatures. Allow for sufficient heat dispersion when installed in a rack. Sound produced only from one channel. • Incomplete connection of speaker • Connect securely. cables. • Incomplete connection of input/ • Connect securely. output cables. 5, 6 5~7, 11~18 Unplug the power cord when not Do not let insecticides, benzene, using the apparatus for long and thinner come in contact with periods of time. the apparatus. Positions of • Reverse connections of left and • Check left and right connections. 6 instruments reversed right speakers or left and right during stereo playback. input/output cables. Howling noise produced when volume is high. Sound is distorted. • Speaker systems too close • Separate as much as possible. - together. • Floor is unstable and vibrates • Use cushions to absorb speaker - easily. vibrations transmitted by floor. • Stylus pressure too weak. • Apply proper stylus pressure. - • Dust or dirt on stylus. • Check stylus. - Handle the power cord carefully. Hold the plug when unplugging the cord. * (For apparatuses with ventilation holes) Do not obstruct the ventilation holes. Never disassemble or modify the apparatus in any way. 56 ENGLISH
-
 1
1 -
2
-
3
-
4
-
5
-
6
-
7
-
8
-
9
-
10
-
11
-
12
-
13
-
14
-
15
-
16
-
17
-
18
-
19
-
20
-
21
-
22
-
23
-
24
-
25
-
26
-
27
-
28
-
29
-
30
-
31
-
32
-
33
-
34
-
35
-
36
-
37
-
38
-
39
-
40
-
41
-
42
-
43
-
44
-
45
-
46
-
47
-
48
-
49
-
50
-
51
-
52
-
53
-
 54
54 -
 55
55 -
 56
56 -
 57
57 -
 58
58 -
 59
59 -
 60
60 -
 61
61 -
 62
62 -
 63
63 -
 64
64 -
65
-
66
-
67
-
68
-
69
-
70
-
71
-
72
 |
 |
