Electrolux E42BS75ETT Owners Manual - Page 26
Grille, Panel, Upper, Freezer, Lower, Spacer, Assembly
 |
View all Electrolux E42BS75ETT manuals
Add to My Manuals
Save this manual to your list of manuals |
Page 26 highlights
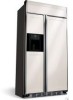
Installation Instructions 3/4" FULL-WIDTH OVERLAY CUSTOM PANELS This panel design provides a nearly trimless appearance. Assemble the spacer panel onto the backer panel. Allow 1/2" clearance on all four sides of the grille spacer panel, Allow 1/2" clearance on the top and hinge side, 15116" on the bottom and 3-5/8" on the handle side of the upper freezer door panel. Allow 15116" on the top, 1/2" clearance on the bottom and hinge side and 3-5/8" on the handle side of the lower freezer door panel. Secure the panels with glue. Be sure to observe clearances on all sides. Secure the appearance panel to the assembled backer/spacer panel. Use glue and screws, Countersink screws into the backer panel. Grille Panel _la 2_L'_ 114" Backer Panel 0.10" Spacer Panel 3/4" Overlay Panel r;1 39-15/16" 38-15116" 40-3/16" I:] 10-314" 9-3/4" 11" 3q/8" Required for Optimal Handle Clearance Upper Freezer Panel _la _r__ 1/4" Backer Panel 0.10" Spacer Panel 3/4" Overlay Panel r;1 16-7/16" 12-5/16" 13-7/16" I:] 17-13/16" 16-3/8" 17-5/8" 5/I 6" 3-I/8" Lower Freezer Panel _la _r__ 1/4" Backer Panel 0.10" Spacer Panel 3/4" Overlay Panel r;1 16-7/16" 12-5/16" 13-7/16" I:] 35-118" 33-11116" 34-15116" 5/16" B Upper Freezer Panel Spacer Assembly 112" 3-5/8" Spacer Panel 15/16"_ J Finished BackerPanel 26 Lower Freezer Panel Spacer Assembly 3-5/8" 1/2"_ Spacer 1/2,,_C: Finished BackerPanel
-
 1
1 -
2
-
3
-
4
-
5
-
6
-
7
-
8
-
9
-
10
-
11
-
12
-
13
-
14
-
15
-
16
-
17
-
18
-
19
-
20
-
 21
21 -
 22
22 -
 23
23 -
 24
24 -
 25
25 -
 26
26 -
 27
27 -
 28
28 -
 29
29 -
 30
30 -
 31
31 -
32
-
33
-
34
-
35
-
36
-
37
-
38
-
39
-
40
-
41
-
42
-
43
-
44
 |
 |
