Electrolux E42BS75ETT Owners Manual - Page 36
Icemaker, Install, Toekick
 |
View all Electrolux E42BS75ETT manuals
Add to My Manuals
Save this manual to your list of manuals |
Page 36 highlights
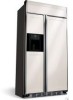
Installation Instructions START ICEMAKER F P0wer Switch DOOR ALIGNMENT • Stand back from the refrigerator to inspect the door alignment. • Shipping or the addition of heavy door panels may have caused the doors to move slightly out of alignment. • Flip the switch to I (ON). The icemaker will begin operation automatically. • Make sure nothing interferes with the sweep of the feeler arm. • Discard the first full bucket of ice cubes. To turn the icemaker off, set the switch to O (OFF). INSTALL TOEKICK • Locate the supplied toekick (shipped taped to the top of the refrigerator). Install with 2 screws provided. Supplied kickplate % "% • The vented toekick must remain unobstructed for proper air flow. Raise Clockwise • If necessary, the Fresh Food door may be adjusted up or down to align with the Freezer door. • Loosen the leveling mechanism. • Use a 7/32" wrench to adjust the hinge pin as shown. • Tighten the leveling mechanism. IMPORTANT NOTE: After the unit has been leveled, if the fresh food door is higher than the freezer door, adjust the front right leveling leg lower to align the doors and, if required, raise the left leveling leg to level the unit side to side. 36
-
 1
1 -
2
-
3
-
4
-
5
-
6
-
7
-
8
-
9
-
10
-
11
-
12
-
13
-
14
-
15
-
16
-
17
-
18
-
19
-
20
-
21
-
22
-
23
-
24
-
25
-
26
-
27
-
28
-
29
-
30
-
 31
31 -
 32
32 -
 33
33 -
 34
34 -
 35
35 -
 36
36 -
 37
37 -
 38
38 -
 39
39 -
 40
40 -
 41
41 -
42
-
43
-
44
 |
 |
