Epson 830p User Manual - Page 107
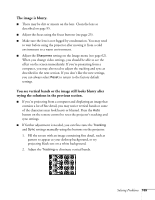
The message, is displayed., Only part of the computer image is displayed.
 |
UPC - 010343851177
View all Epson 830p manuals
Add to My Manuals
Save this manual to your list of manuals |
Page 107 highlights
If you're using Macintosh OS 8.6 to 9.x: 1. From the Apple menu, select Control Panels, then click Monitors and Sound. 2. Click the Arrange icon. 3. Drag one monitor icon on top of the other. This lets you display on the projector screen as well as the LCD screen. 4. If this option isn't available, click the Monitor icon. 5. Select one of the listed Simulscan resolutions. (Allow a few seconds for the projector to sync up after making the selection.) The message Not Supported is displayed. ■ Make sure the correct input signal is selected in the Signal menu (see page 63). ■ Make sure your computer's resolution doesn't exceed UXGA (1600 × 1200) and the frequency is supported by the projector (see page 119). If necessary, change your computer's resolution setting as described below. Only part of the computer image is displayed. ■ Press the Auto button on the remote control. ■ Make sure the image Position setting is correct on the Signal menu. See page 64 for more information. ■ Make sure your computer's resolution setting is correct. Ideally, it should be 1024 × 768 to match the projector's native resolution. If this option isn't available, select one of the other compatible video formats listed on page 119. ■ Windows: Right-click the desktop, select Properties, click the Settings tab, and select a different resolution. ■ Macintosh OS X: Open System Preferences, click Displays, and select a different resolution. Solving Problems 107
-
 1
1 -
2
-
3
-
4
-
5
-
6
-
7
-
8
-
9
-
10
-
11
-
12
-
13
-
14
-
15
-
16
-
17
-
18
-
19
-
20
-
21
-
22
-
23
-
24
-
25
-
26
-
27
-
28
-
29
-
30
-
31
-
32
-
33
-
34
-
35
-
36
-
37
-
38
-
39
-
40
-
41
-
42
-
43
-
44
-
45
-
46
-
47
-
48
-
49
-
50
-
51
-
52
-
53
-
54
-
55
-
56
-
57
-
58
-
59
-
60
-
61
-
62
-
63
-
64
-
65
-
66
-
67
-
68
-
69
-
70
-
71
-
72
-
73
-
74
-
75
-
76
-
77
-
78
-
79
-
80
-
81
-
82
-
83
-
84
-
85
-
86
-
87
-
88
-
89
-
90
-
91
-
92
-
93
-
94
-
95
-
96
-
97
-
98
-
99
-
100
-
101
-
 102
102 -
 103
103 -
 104
104 -
 105
105 -
 106
106 -
 107
107 -
 108
108 -
 109
109 -
 110
110 -
 111
111 -
 112
112 -
113
-
114
-
115
-
116
-
117
-
118
-
119
-
120
-
121
-
122
-
123
-
124
-
125
-
126
-
127
-
128
-
129
-
130
-
131
-
132
-
133
-
134
-
135
-
136
 |
 |
