Epson 9600 Product Support Bulletin(s) - Page 74
Test Range, Sample Prints, Sample
 |
UPC - 010343841888
View all Epson 9600 manuals
Add to My Manuals
Save this manual to your list of manuals |
Page 74 highlights
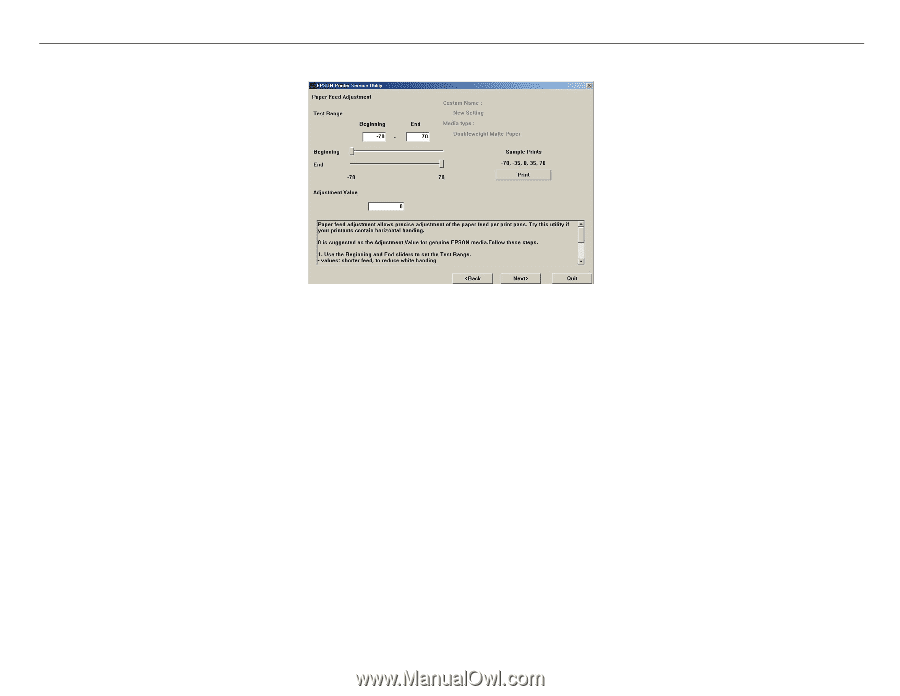
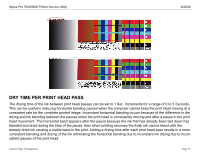
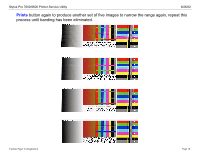
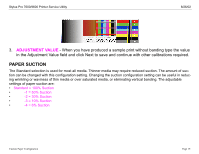
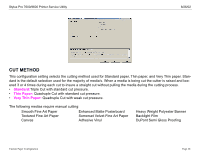
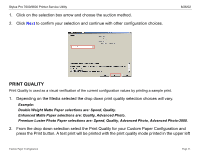
Stylus Pro 7600/9600 Printer Service Utility 8/26/02 1. TEST RANGE - This represents the range paper feeding will be adjusted. This value can be typed in the Beginning and End fields, or by using the sliders labeled Beginning and End, both methods achieve the same results. To remove white bands move the sliders toward -70. To remove dark bands move the sliders toward +70. You will need to reprint the image with each new setting until the banding is eliminated. 2. SAMPLE PRINTS BUTTON - The Sample Prints button will print a test image five times within the range specified with the Beginning and End value. You will then make a visual observation of the test prints and determine which image has the least amount of banding, a value is printed next to each image. Then you will change the new Beginning and End values slightly above and below the value of the image you determined had the least amount of banding previously. Click the Sample Custom Paper Configuration Page 17.
-
 1
1 -
2
-
3
-
4
-
5
-
6
-
7
-
8
-
9
-
10
-
11
-
12
-
13
-
14
-
15
-
16
-
17
-
18
-
19
-
20
-
21
-
22
-
23
-
24
-
25
-
26
-
27
-
28
-
29
-
30
-
31
-
32
-
33
-
34
-
35
-
36
-
37
-
38
-
39
-
40
-
41
-
42
-
43
-
44
-
45
-
46
-
47
-
48
-
49
-
50
-
51
-
52
-
53
-
54
-
55
-
56
-
57
-
58
-
59
-
60
-
61
-
62
-
63
-
64
-
65
-
66
-
67
-
68
-
 69
69 -
 70
70 -
 71
71 -
 72
72 -
 73
73 -
 74
74 -
 75
75 -
 76
76 -
 77
77 -
 78
78 -
 79
79 -
80
-
81
-
82
-
83
-
84
-
85
-
86
-
87
-
88
-
89
-
90
-
91
-
92
-
93
-
94
-
95
-
96
-
97
-
98
-
99
-
100
-
101
-
102
-
103
-
104
 |
 |