Epson CX3810 Quick Reference Guide - Page 16
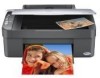
You see the File Save Settings window, Choose the location where you want - how to scan
 |
UPC - 010343855151
View all Epson CX3810 manuals
Add to My Manuals
Save this manual to your list of manuals |
Page 16 highlights
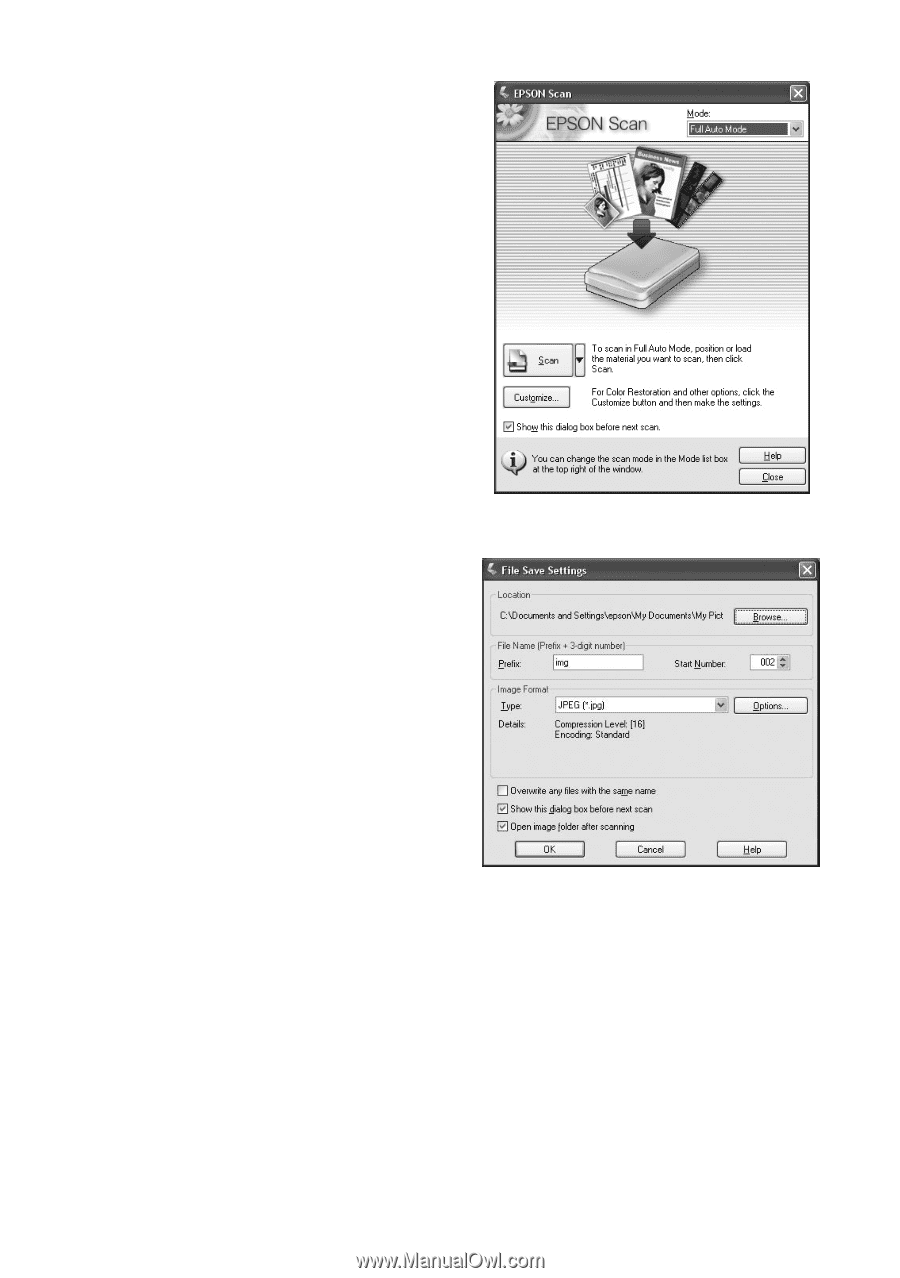
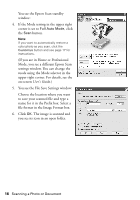
You see the Epson Scan standby window: 4. If the Mode setting in the upper right corner is set to Full Auto Mode, click the Scan button. Note: If you want to automatically restore a color photo as you scan, click the Customize button and see page 17 for instructions. (If you are in Home or Professional Mode, you see a different Epson Scan settings window. You can change the mode using the Mode selector in the upper right corner. For details, see the on-screen User's Guide.) 5. You see the File Save Settings window: Choose the location where you want to save your scanned file and type a name for it in the Prefix box. Select a file format in the Image Format box. 6. Click OK. The image is scanned and you see its icon in an open folder. 16 Scanning a Photo or Document
-
 1
1 -
2
-
3
-
4
-
5
-
6
-
7
-
8
-
9
-
10
-
 11
11 -
 12
12 -
 13
13 -
 14
14 -
 15
15 -
 16
16 -
 17
17 -
 18
18 -
 19
19 -
 20
20 -
 21
21 -
22
-
23
-
24
-
25
-
26
-
27
-
28
-
29
-
30
-
31
-
32
-
33
-
34
-
35
-
36
 |
 |