Epson CX3810 Quick Reference Guide - Page 21
ink button. The ink cartridge holder moves to the, check position and - printer scanner
 |
UPC - 010343855151
View all Epson CX3810 manuals
Add to My Manuals
Save this manual to your list of manuals |
Page 21 highlights
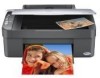
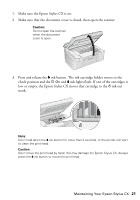
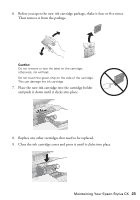
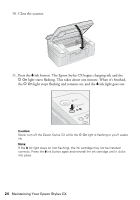
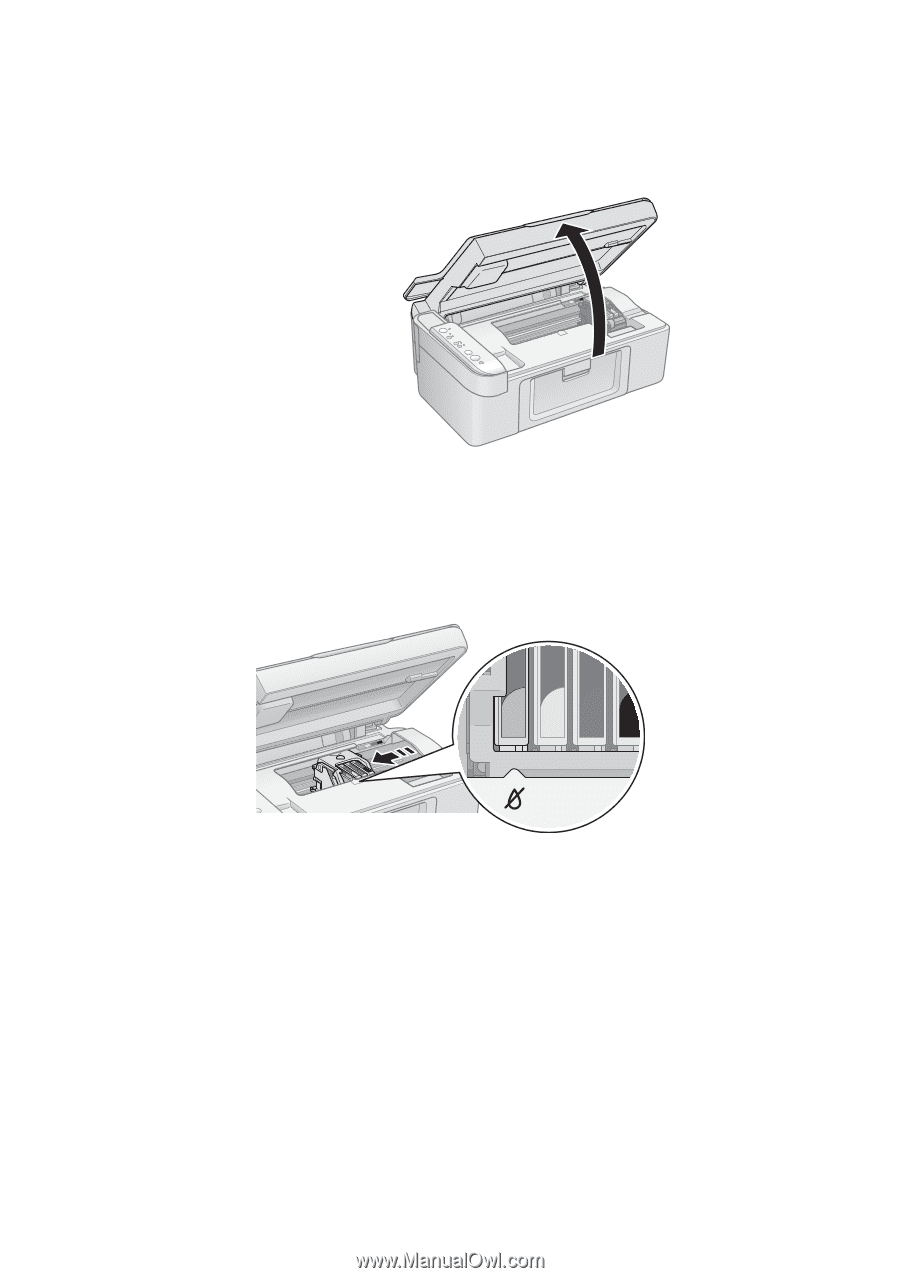
1. Make sure the Epson Stylus CX is on. 2. Make sure that the document cover is closed, then open the scanner. Caution: Do not open the scanner when the document cover is open. 3. Press and release the B ink button. The ink cartridge holder moves to the check position and the P On and B ink lights flash. If one of the cartridges is low or empty, the Epson Stylus CX moves that cartridge to the _ ink out mark. Note: Don't hold down the B ink button for more than 3 seconds, or the printer will start to clean the print head. Caution: Don't move the print head by hand; this may damage the Epson Stylus CX. Always press the B ink button to move the print head. Maintaining Your Epson Stylus CX 21
-
 1
1 -
2
-
3
-
4
-
5
-
6
-
7
-
8
-
9
-
10
-
11
-
12
-
13
-
14
-
15
-
 16
16 -
 17
17 -
 18
18 -
 19
19 -
 20
20 -
 21
21 -
 22
22 -
 23
23 -
 24
24 -
 25
25 -
 26
26 -
27
-
28
-
29
-
30
-
31
-
32
-
33
-
34
-
35
-
36
 |
 |
Maintaining Your Epson Stylus CX
21
1.
Make sure the Epson Stylus CX is on.
2.
Make sure that the document cover is closed, then open the scanner.
3.
Press and release the
B
ink button. The ink cartridge holder moves to the
check position and the
P
On
and
B
ink lights flash. If one of the cartridges is
low or empty, the Epson Stylus CX moves that cartridge to the
_
ink out
mark.
Note:
Don’t hold down the
B
ink button for more than 3 seconds, or the printer will start
to clean the print head.
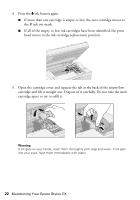
Caution:
Don’t move the print head by hand; this may damage the Epson Stylus CX. Always
press the
B
ink button to move the print head.
Caution:
Do not open the scanner
when the document
cover is open.