Epson R1800 Product Information Guide - Page 12
Printing Your Design, Use Epson Print CD to design your CD or DVD - stylus photo photo printer
 |
UPC - 010343853072
View all Epson R1800 manuals
Add to My Manuals
Save this manual to your list of manuals |
Page 12 highlights
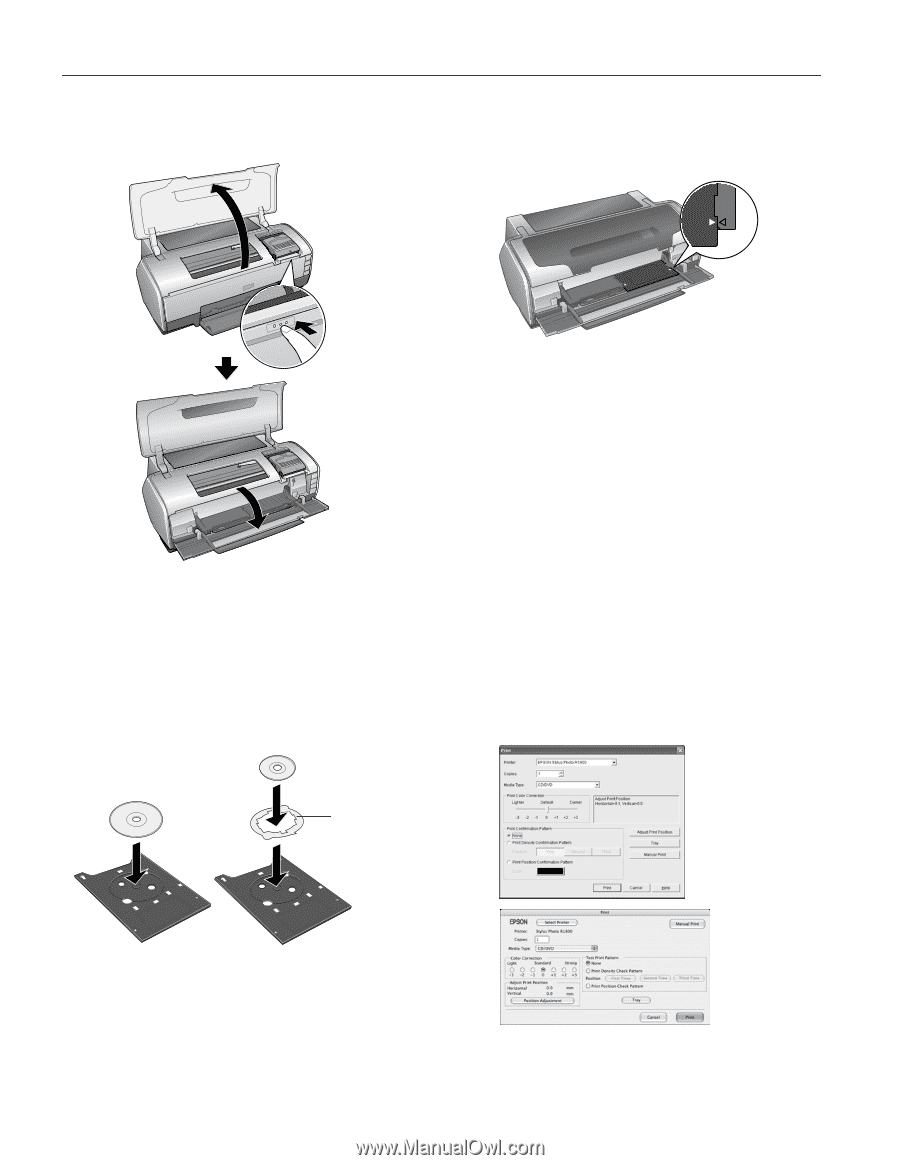
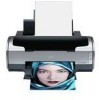
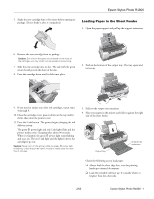
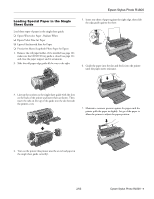
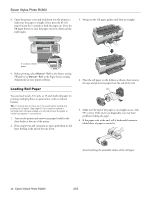
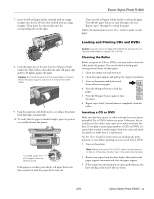
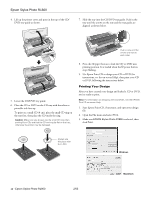
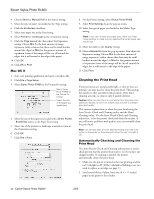
Epson Stylus Photo R1800 4. Lift up the printer cover and press in the top of the CD/ DVD tray guide as shown. 7. Slide the tray into the CD/DVD tray guide. Push in the tray until the arrows on the tray and the tray guide are aligned, as shown below. Push in only until the arrows are next to each other 5. Lower the CD/DVD tray guide. 6. Place the CD or DVD on the CD tray with the white or printable side face-up. To print on a small CD (8 cm), place the small CD ring on the tray first, then place the CD inside the ring. Caution: Make sure you always use the small CD ring when printing 8-cm CDs and that the CD and ring lay flat on the tray; otherwise the printer may be damaged. 8. Press the ) paper button to load the CD or DVD into printing position. It is loaded when the P power button stops flashing. 9. Use Epson Print CD to design your CD or DVD (for instructions, see the on-screen Help), then print your CD or DVD, following the instructions below. Printing Your Design After you have created your design and loaded a CD or DVD, you're ready to print. Note: For information on designing CDs and DVDs, see the EPSON Print CD on-screen Help. 1. Start Epson Print CD, if necessary, and open your design file. 2. Open the File menu and select Print. 3. Make sure EPSON Stylus Photo R1800 is selected, then click Print. Always use this piece with 8-cm CDs Windows 12 - Epson Stylus Photo R1800 2/05 Macintosh
-
 1
1 -
2
-
3
-
4
-
5
-
6
-
 7
7 -
 8
8 -
 9
9 -
 10
10 -
 11
11 -
 12
12 -
 13
13 -
 14
14 -
 15
15 -
 16
16 -
 17
17 -
18
 |
 |