Epson RX595 Product Information Guide - Page 8
Copying Onto a CD or DVD, Load CD/DVD - ink
 |
UPC - 010343866157
View all Epson RX595 manuals
Add to My Manuals
Save this manual to your list of manuals |
Page 8 highlights
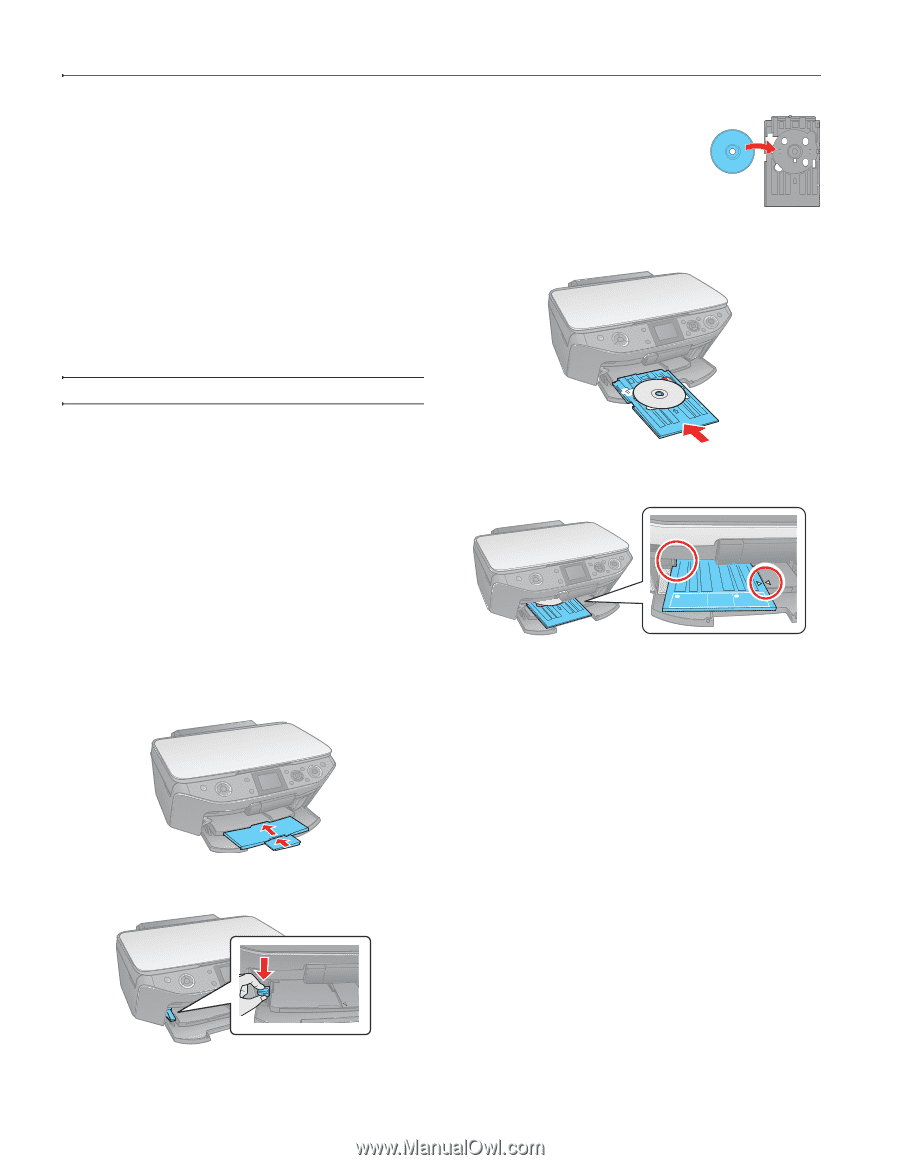
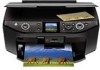
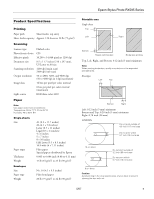
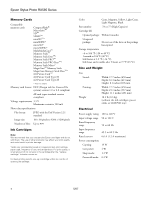
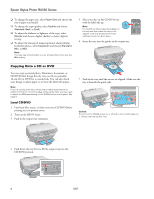
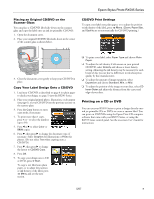
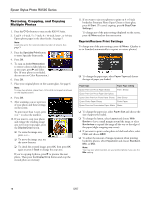
Epson Stylus Photo RX595 Series ❏ To change the paper size, select Paper Size and choose the size of paper you loaded. ❏ To change the copy quality, select Quality and choose Standard, Best, or Draft. ❏ To adjust the darkness or lightness of the copy, select Density and choose a higher (darker) or lower (lighter) setting. ❏ To adjust the amount of image expansion when printing borderless photos, select Expansion and choose Standard, Min, or Mid. Note: You may see white borders on your printed photo if you use the Min setting. 5. Place your disc on the CD/DVD tray with the label side up. Note: For small 8-cm discs, place the adapter on the tray and then place the disc in the adapter. Use only the Epson Print CD software to print on 8-cm discs. 6. Insert the tray into the guides in the output tray. Copying Onto a CD or DVD You can copy a printed photo, illustration, document, or CD/DVD label design directly onto an ink jet-printable 12-cm CD or DVD for a custom look. You can also check your design on plain paper to see how the label will appear. Note: If you're copying onto discs where the printable area extends to within 0.16 inch (4 mm) of the edge of the center hole, you may need to adjust the CD-Inner setting on the RX595 Series control panel. See page 9. Load CD/DVD 1. First burn files, music, or video onto your CD/DVD before printing on it to prevent errors. 2. Turn on the RX595 Series. 3. Push in the output tray extensions. 7. Push in the tray until the arrows are aligned. Make sure the tray is beneath the guide rails. Caution: Do not turn the RX595 Series on or off with a CD or DVD loaded in it. Always remove the disc first. 4. Push down the tray lever to lift the output tray into the CD/DVD position. 8 5/07
-
 1
1 -
2
-
 3
3 -
 4
4 -
 5
5 -
 6
6 -
 7
7 -
 8
8 -
 9
9 -
 10
10 -
 11
11 -
 12
12 -
 13
13 -
14
-
15
-
16
 |
 |