Epson SureColor T3000 User Manual - Page 175
Setup menu, button to proceed. If the administrator password has been
 |
View all Epson SureColor T3000 manuals
Add to My Manuals
Save this manual to your list of manuals |
Page 175 highlights
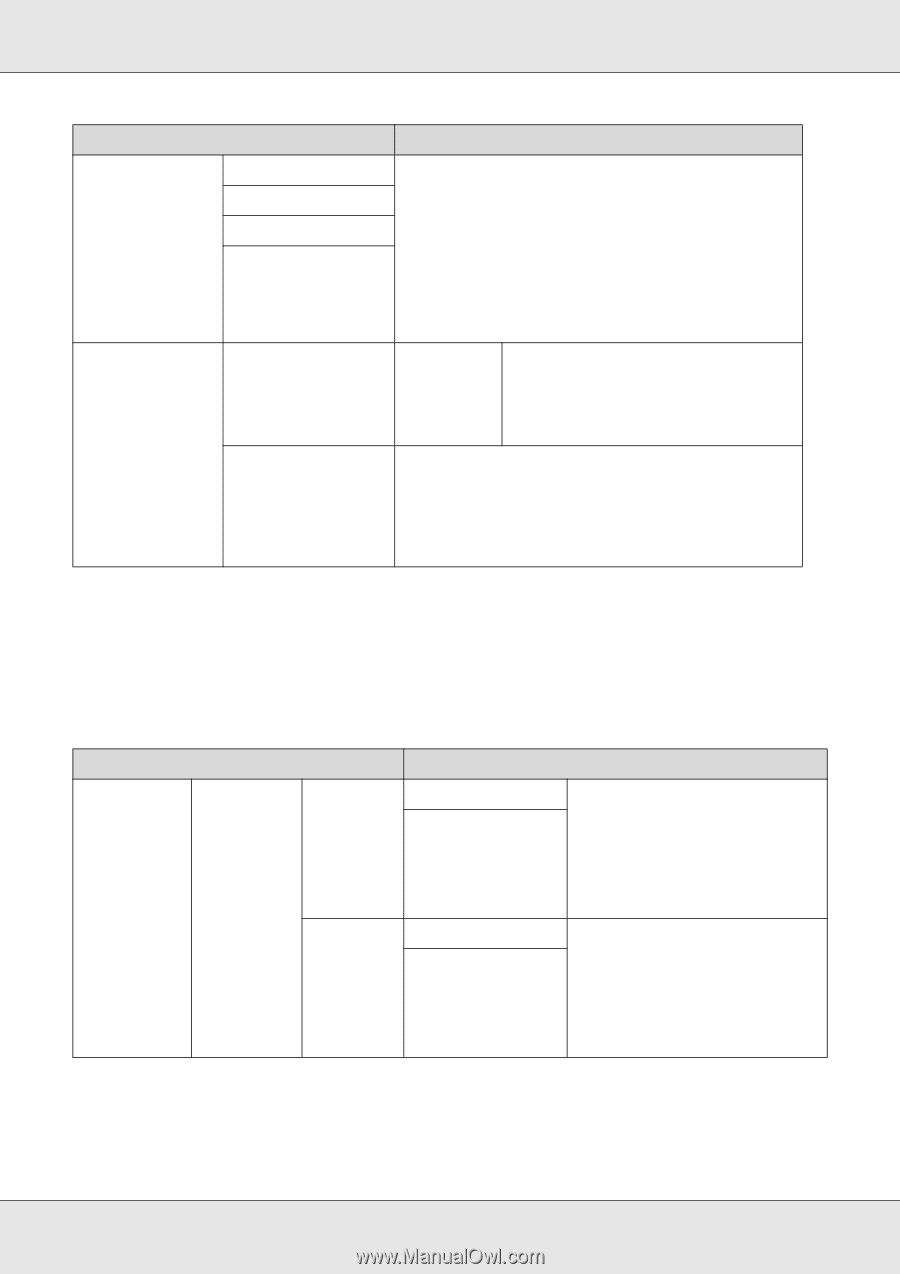
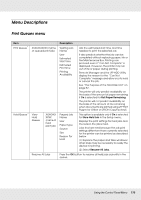
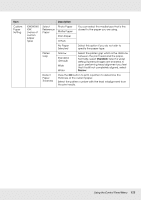
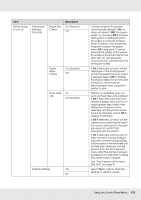
Item Head Alignment Auto (Uni-D) Auto (Bi-D) Manual (Uni-D) Manual (Bi-D) Cutter Maintenance Adjust Cut Position Replace Cutter Description If print results are grainy or out of focus, perform head alignment to realign the print head. If Auto is selected, the printer will scan the printed pattern during printing and realign the head automatically. If Manual is selected, a pattern will be printed; inspect the pattern visually and enter the value you think appropriate. See "Minimizing Print Misalignments (Head Alignment)" on page 189. -3 to 3 mm You can fine tune the cut position when printing to roll paper with no margins in all directions. The cut position can be adjusted in increments of 0.2 mm. Moves the cutter to the replacement position so it can be replaced. Press the OK button to move the cutter to the replacement position. The paper must be removed before the cutter can be replaced. Remove the paper before proceeding. See "Replacing the Cutter" on page 197. Setup menu Selecting Administrator Menu displays a password prompt. No password is entered at shipment; press the OK button to proceed. If the administrator password has been changed, enter the administrator password. Item Printer Setup Roll Paper Setup Auto Cut Description On (Default) Off Refresh Margin On (Default) Off Choose On to automatically cut roll paper using the built-in cutter as each page is printed, Off to disable auto paper cutting. The setting selected with the printer driver takes priority when the printer driver is used. If On is selected during borderless printing, the printer will automatically trim the leading edge to remove any ink stains that may have been left by the previous copy; to disable this feature, choose Off. Using the Control Panel Menu 175
-
 1
1 -
2
-
3
-
4
-
5
-
6
-
7
-
8
-
9
-
10
-
11
-
12
-
13
-
14
-
15
-
16
-
17
-
18
-
19
-
20
-
21
-
22
-
23
-
24
-
25
-
26
-
27
-
28
-
29
-
30
-
31
-
32
-
33
-
34
-
35
-
36
-
37
-
38
-
39
-
40
-
41
-
42
-
43
-
44
-
45
-
46
-
47
-
48
-
49
-
50
-
51
-
52
-
53
-
54
-
55
-
56
-
57
-
58
-
59
-
60
-
61
-
62
-
63
-
64
-
65
-
66
-
67
-
68
-
69
-
70
-
71
-
72
-
73
-
74
-
75
-
76
-
77
-
78
-
79
-
80
-
81
-
82
-
83
-
84
-
85
-
86
-
87
-
88
-
89
-
90
-
91
-
92
-
93
-
94
-
95
-
96
-
97
-
98
-
99
-
100
-
101
-
102
-
103
-
104
-
105
-
106
-
107
-
108
-
109
-
110
-
111
-
112
-
113
-
114
-
115
-
116
-
117
-
118
-
119
-
120
-
121
-
122
-
123
-
124
-
125
-
126
-
127
-
128
-
129
-
130
-
131
-
132
-
133
-
134
-
135
-
136
-
137
-
138
-
139
-
140
-
141
-
142
-
143
-
144
-
145
-
146
-
147
-
148
-
149
-
150
-
151
-
152
-
153
-
154
-
155
-
156
-
157
-
158
-
159
-
160
-
161
-
162
-
163
-
164
-
165
-
166
-
167
-
168
-
169
-
 170
170 -
 171
171 -
 172
172 -
 173
173 -
 174
174 -
 175
175 -
 176
176 -
 177
177 -
 178
178 -
 179
179 -
 180
180 -
181
-
182
-
183
-
184
-
185
-
186
-
187
-
188
-
189
-
190
-
191
-
192
-
193
-
194
-
195
-
196
-
197
-
198
-
199
-
200
-
201
-
202
-
203
-
204
-
205
-
206
-
207
-
208
-
209
-
210
-
211
-
212
-
213
-
214
-
215
-
216
-
217
-
218
-
219
-
220
-
221
-
222
-
223
-
224
-
225
-
226
-
227
-
228
-
229
-
230
-
231
-
232
-
233
-
234
-
235
-
236
-
237
-
238
-
239
-
240
-
241
-
242
-
243
-
244
-
245
-
246
-
247
-
248
-
249
-
250
-
251
 |
 |