Epson SureColor T3000 User Manual - Page 194
Remove the new ink cartridge from the bag. Shake the ink cartridge for 10 seconds 30
 |
View all Epson SureColor T3000 manuals
Add to My Manuals
Save this manual to your list of manuals |
Page 194 highlights
3. Hook a finger into the indentation on top of the ink cartridge and pull it straight out. Important: Removed ink cartridges may have ink around the ink supply port, so be careful not to get any ink on the surrounding area when removing the cartridges. 4. Remove the new ink cartridge from the bag. Shake the ink cartridge for 10 seconds 30 times horizontally in approximately 5 cm movements as shown in the illustration. Important: Do not touch the IC chips on the tops of the ink cartridges. You may not be able to print properly. 5. Holding the cartridge with the label out, slide it all the way into the slot. Maintenance 194
-
 1
1 -
2
-
3
-
4
-
5
-
6
-
7
-
8
-
9
-
10
-
11
-
12
-
13
-
14
-
15
-
16
-
17
-
18
-
19
-
20
-
21
-
22
-
23
-
24
-
25
-
26
-
27
-
28
-
29
-
30
-
31
-
32
-
33
-
34
-
35
-
36
-
37
-
38
-
39
-
40
-
41
-
42
-
43
-
44
-
45
-
46
-
47
-
48
-
49
-
50
-
51
-
52
-
53
-
54
-
55
-
56
-
57
-
58
-
59
-
60
-
61
-
62
-
63
-
64
-
65
-
66
-
67
-
68
-
69
-
70
-
71
-
72
-
73
-
74
-
75
-
76
-
77
-
78
-
79
-
80
-
81
-
82
-
83
-
84
-
85
-
86
-
87
-
88
-
89
-
90
-
91
-
92
-
93
-
94
-
95
-
96
-
97
-
98
-
99
-
100
-
101
-
102
-
103
-
104
-
105
-
106
-
107
-
108
-
109
-
110
-
111
-
112
-
113
-
114
-
115
-
116
-
117
-
118
-
119
-
120
-
121
-
122
-
123
-
124
-
125
-
126
-
127
-
128
-
129
-
130
-
131
-
132
-
133
-
134
-
135
-
136
-
137
-
138
-
139
-
140
-
141
-
142
-
143
-
144
-
145
-
146
-
147
-
148
-
149
-
150
-
151
-
152
-
153
-
154
-
155
-
156
-
157
-
158
-
159
-
160
-
161
-
162
-
163
-
164
-
165
-
166
-
167
-
168
-
169
-
170
-
171
-
172
-
173
-
174
-
175
-
176
-
177
-
178
-
179
-
180
-
181
-
182
-
183
-
184
-
185
-
186
-
187
-
188
-
 189
189 -
 190
190 -
 191
191 -
 192
192 -
 193
193 -
 194
194 -
 195
195 -
 196
196 -
 197
197 -
 198
198 -
 199
199 -
200
-
201
-
202
-
203
-
204
-
205
-
206
-
207
-
208
-
209
-
210
-
211
-
212
-
213
-
214
-
215
-
216
-
217
-
218
-
219
-
220
-
221
-
222
-
223
-
224
-
225
-
226
-
227
-
228
-
229
-
230
-
231
-
232
-
233
-
234
-
235
-
236
-
237
-
238
-
239
-
240
-
241
-
242
-
243
-
244
-
245
-
246
-
247
-
248
-
249
-
250
-
251
 |
 |
Maintenance
194
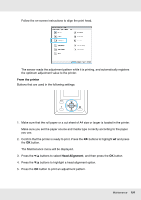
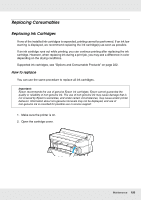
3.
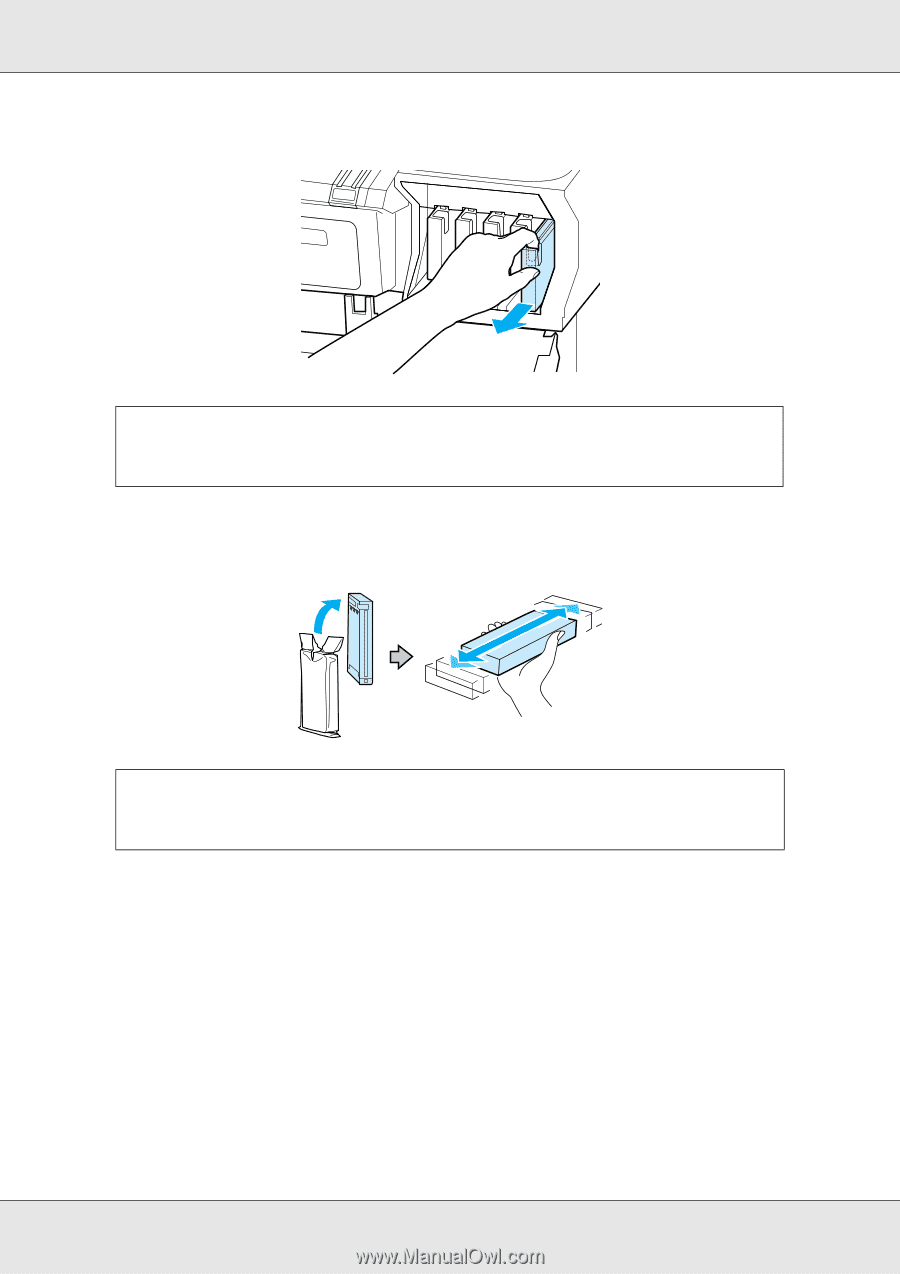
Hook a finger into the indentation on top of the ink cartridge and pull it straight out.
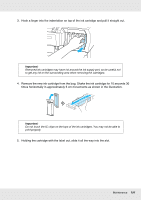
4.
Remove the new ink cartridge from the bag. Shake the ink cartridge for 10 seconds 30
times horizontally in approximately 5 cm movements as shown in the illustration.
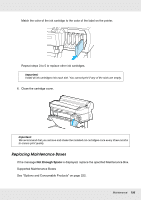
5.
Holding the cartridge with the label out, slide it all the way into the slot.
Important:
Removed ink cartridges may have ink around the ink supply port, so be careful not
to get any ink on the surrounding area when removing the cartridges.
Important:
Do not touch the IC chips on the tops of the ink cartridges. You may not be able to
print properly.