Epson SureColor T3000 User Manual - Page 197
Replacing the Cutter, See Options and Consumable Products
 |
View all Epson SureColor T3000 manuals
Add to My Manuals
Save this manual to your list of manuals |
Page 197 highlights
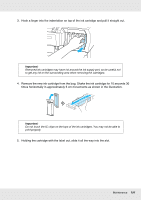
3. Place the used Maintenance Box in the clear bag included with your new Maintenance Box, and make sure that the zipper is closed tight. 4. Install the new Maintenance Box. Important: Do not touch the IC chip on the side of Maintenance Box. Doing so may prevent normal operation and printing. 5. Close the maintenance box cover. Replacing the Cutter Replace the cutter when it is not cutting paper cleanly. Supported cutter See "Options and Consumable Products" on page 222. Use a cross-head screwdriver to replace the cutter. Make sure you have a cross-head screwdriver with you before replacing the cutter. Important: Take care not to damage the cutter blade. Dropping it or knocking it against hard objects may chip the blade. Maintenance 197
-
 1
1 -
2
-
3
-
4
-
5
-
6
-
7
-
8
-
9
-
10
-
11
-
12
-
13
-
14
-
15
-
16
-
17
-
18
-
19
-
20
-
21
-
22
-
23
-
24
-
25
-
26
-
27
-
28
-
29
-
30
-
31
-
32
-
33
-
34
-
35
-
36
-
37
-
38
-
39
-
40
-
41
-
42
-
43
-
44
-
45
-
46
-
47
-
48
-
49
-
50
-
51
-
52
-
53
-
54
-
55
-
56
-
57
-
58
-
59
-
60
-
61
-
62
-
63
-
64
-
65
-
66
-
67
-
68
-
69
-
70
-
71
-
72
-
73
-
74
-
75
-
76
-
77
-
78
-
79
-
80
-
81
-
82
-
83
-
84
-
85
-
86
-
87
-
88
-
89
-
90
-
91
-
92
-
93
-
94
-
95
-
96
-
97
-
98
-
99
-
100
-
101
-
102
-
103
-
104
-
105
-
106
-
107
-
108
-
109
-
110
-
111
-
112
-
113
-
114
-
115
-
116
-
117
-
118
-
119
-
120
-
121
-
122
-
123
-
124
-
125
-
126
-
127
-
128
-
129
-
130
-
131
-
132
-
133
-
134
-
135
-
136
-
137
-
138
-
139
-
140
-
141
-
142
-
143
-
144
-
145
-
146
-
147
-
148
-
149
-
150
-
151
-
152
-
153
-
154
-
155
-
156
-
157
-
158
-
159
-
160
-
161
-
162
-
163
-
164
-
165
-
166
-
167
-
168
-
169
-
170
-
171
-
172
-
173
-
174
-
175
-
176
-
177
-
178
-
179
-
180
-
181
-
182
-
183
-
184
-
185
-
186
-
187
-
188
-
189
-
190
-
191
-
 192
192 -
 193
193 -
 194
194 -
 195
195 -
 196
196 -
 197
197 -
 198
198 -
 199
199 -
 200
200 -
 201
201 -
 202
202 -
203
-
204
-
205
-
206
-
207
-
208
-
209
-
210
-
211
-
212
-
213
-
214
-
215
-
216
-
217
-
218
-
219
-
220
-
221
-
222
-
223
-
224
-
225
-
226
-
227
-
228
-
229
-
230
-
231
-
232
-
233
-
234
-
235
-
236
-
237
-
238
-
239
-
240
-
241
-
242
-
243
-
244
-
245
-
246
-
247
-
248
-
249
-
250
-
251
 |
 |
Maintenance
197
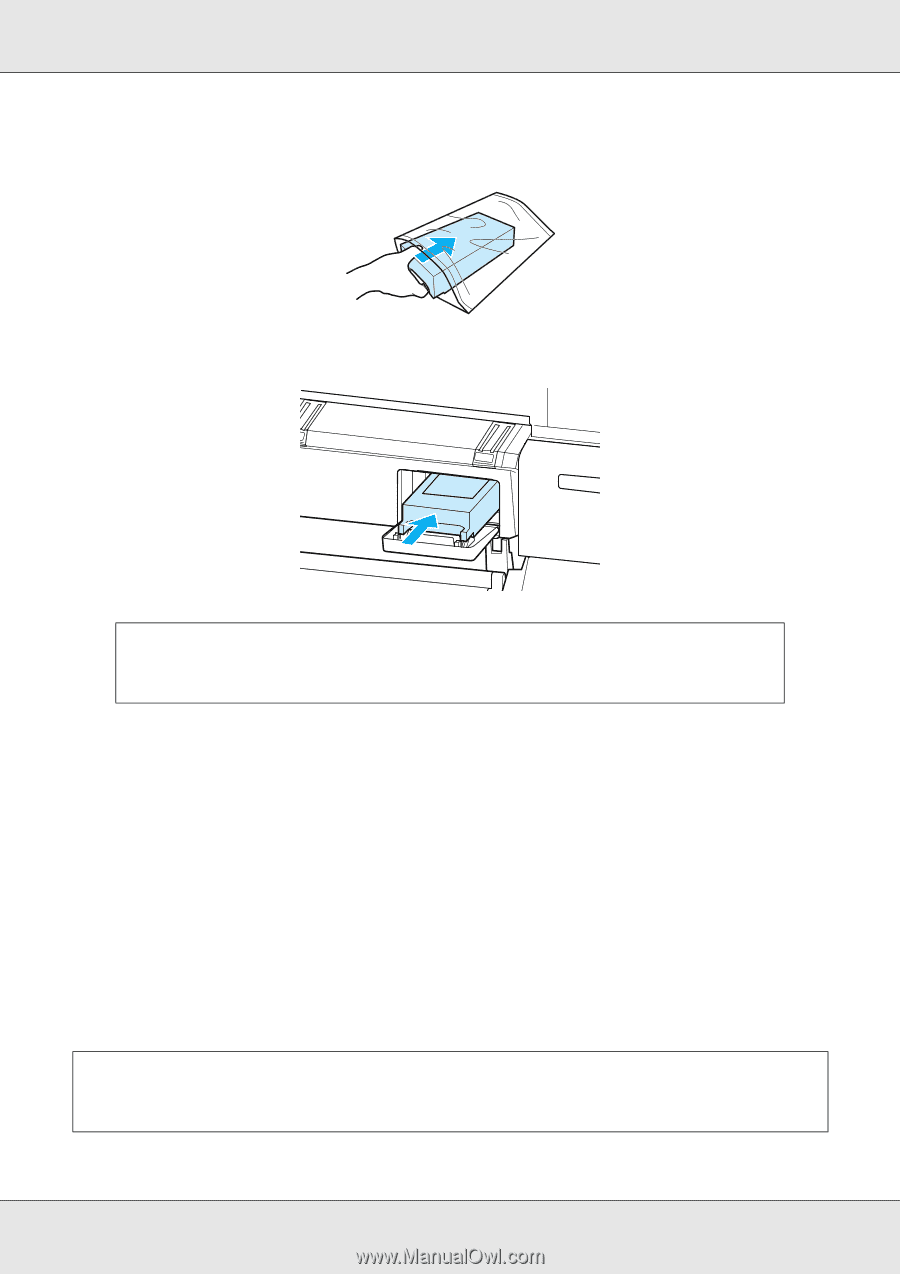
3.
Place the used Maintenance Box in the clear bag included with your new Maintenance
Box, and make sure that the zipper is closed tight.
4.
Install the new Maintenance Box.
5.
Close the maintenance box cover.
Replacing the Cutter
Replace the cutter when it is not cutting paper cleanly.
Supported cutter
See “Options and Consumable Products” on page 222.
Use a cross-head screwdriver to replace the cutter. Make sure you have a cross-head
screwdriver with you before replacing the cutter.
Important:
Do not touch the IC chip on the side of Maintenance Box. Doing so may prevent
normal operation and printing.
Important:
Take care not to damage the cutter blade. Dropping it or knocking it against hard objects may
chip the blade.