Garmin RINO 110 Owner's Manual - Page 55
Route Creating and Using a Route
 |
UPC - 753759031947
View all Garmin RINO 110 manuals
Add to My Manuals
Save this manual to your list of manuals |
Page 55 highlights
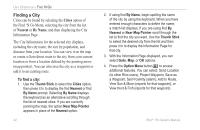
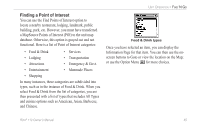
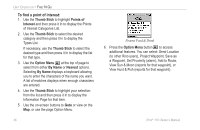
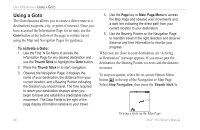
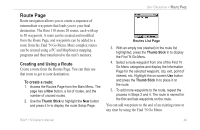
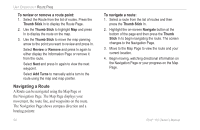
Route Page Route navigation allows you to create a sequence of intermediate waypoints that leads you to your final destination. The Rino 110 stores 20 routes, each with up to 50 waypoints. A route can be created and modified from the Route Page, and waypoints can be added to a route from the Find 'N Go Menu. More complex routes can be created using a PC and MapSource mapping programs and then transferred to the unit's memory. Creating and Using a Route Create a route from the Routes Page. You can then use that route to get to your destination. To create a route: 1. Access the Routes Page from the Main Menu. The page has a New button, a list of routes, and the number of unused routes. 2. Use the Thumb Stick to highlight the New button and press it In to display the route Setup Page. UNIT OPERATION > ROUTE PAGE Routes List Page 3. With an empty row (dashed) in the route list highlighted, press the Thumb Stick In to display the Find 'N Go Menu. 4. Select a route waypoint from one of the Find 'N Go Menu categories and display the Information Page for the selected waypoint, city, exit, point of interest, etc. Highlight the on-screen Use button and press the Thumb Stick In to place it on the route. 5. To add more waypoints to the route, repeat the process in Steps 3 and 4. The route is named for the first and last waypoints on the route. You can add waypoints to the end of an existing route at any time by using the Find 'N Go Menu. Rino® 110 Owner's Manual 49
-
 1
1 -
2
-
3
-
4
-
5
-
6
-
7
-
8
-
9
-
10
-
11
-
12
-
13
-
14
-
15
-
16
-
17
-
18
-
19
-
20
-
21
-
22
-
23
-
24
-
25
-
26
-
27
-
28
-
29
-
30
-
31
-
32
-
33
-
34
-
35
-
36
-
37
-
38
-
39
-
40
-
41
-
42
-
43
-
44
-
45
-
46
-
47
-
48
-
49
-
 50
50 -
 51
51 -
 52
52 -
 53
53 -
 54
54 -
 55
55 -
 56
56 -
 57
57 -
 58
58 -
 59
59 -
 60
60 -
61
-
62
-
63
-
64
-
65
-
66
-
67
-
68
-
69
-
70
-
71
-
72
-
73
-
74
-
75
-
76
-
77
-
78
-
79
-
80
-
81
-
82
-
83
-
84
-
85
-
86
-
87
-
88
-
89
-
90
-
91
-
92
-
93
-
94
-
95
-
96
-
97
-
98
-
99
-
100
-
101
-
102
-
103
-
104
-
105
-
106
-
107
-
108
-
109
-
110
 |
 |