Gateway E-9425R Gateway E-9425R Server User Guide - Page 35
Opening the server case
 |
View all Gateway E-9425R manuals
Add to My Manuals
Save this manual to your list of manuals |
Page 35 highlights
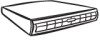
www.gateway.com • Wear a grounding wrist strap (available at most electronics stores) and attach it to a bare metal part of the server. You can also touch a bare metal surface on the back of the server with your finger. • Avoid static-causing surfaces such as carpeted floors, plastic, and packing foam. • Avoid working on the server when your work area is extremely humid. • Remove components from their antistatic bags only when you are ready to use them. Do not lay components on the outside of antistatic bags because only the inside of the bags provide electrostatic protection. • Always hold expansion cards by their edges or their metal mounting brackets. Avoid touching the edge connectors and components on the cards. Never slide expansion cards or components over any surface. Opening the server case Warning This server may have two power cords. To disconnect internal AC power, you must unplug both power cords. Because the components inside your server are extremely sensitive to static electricity, make sure that you follow the instructions at the beginning of this chapter to avoid static electricity damage. Warning Screws are required to support the front of the server when using the standard cabinet rails. You must support the server while removing the front screws and while sliding the server off the cabinet rails. If the server is not supported, damage to the server or injury may result. To open the server: 1 Follow the instructions in "Preventing static electricity discharge" on page 28. Make sure that you turn off the server, then unplug the power cord(s) and all other cables connected to the server. 2 If the bezel is installed, unlock it, then pull it off. 3 If the server is mounted in a cabinet, remove the server from the cabinet. For instructions, see "Removing the server from a cabinet" on page 15. 4 Place the server on a stable, non-skid surface. 5 Remove the screw (1) at the front of the rear top cover (3), then press and hold the release button (2). Important The hard drive carriers shown in these illustrations may look different than the actual hard drive carriers in your server. 6 Slide the rear cover (3) toward the back of the case, then lift it off the case. 29
-
 1
1 -
2
-
3
-
4
-
5
-
6
-
7
-
8
-
9
-
10
-
11
-
12
-
13
-
14
-
15
-
16
-
17
-
18
-
19
-
20
-
21
-
22
-
23
-
24
-
25
-
26
-
27
-
28
-
29
-
 30
30 -
 31
31 -
 32
32 -
 33
33 -
 34
34 -
 35
35 -
 36
36 -
 37
37 -
 38
38 -
 39
39 -
 40
40 -
41
-
42
-
43
-
44
-
45
-
46
-
47
-
48
-
49
-
50
-
51
-
52
-
53
-
54
-
55
-
56
-
57
-
58
-
59
-
60
-
61
-
62
-
63
-
64
-
65
-
66
-
67
-
68
-
69
-
70
-
71
-
72
-
73
-
74
-
75
-
76
-
77
-
78
-
79
-
80
-
81
-
82
-
83
-
84
-
85
-
86
-
87
-
88
-
89
-
90
-
91
-
92
-
93
-
94
-
95
-
96
-
97
-
98
-
99
-
100
-
101
-
102
-
103
-
104
-
105
-
106
-
107
-
108
-
109
-
110
-
111
-
112
-
113
-
114
-
115
-
116
 |
 |
