Gateway E-9425R Gateway E-9425R Server User Guide - Page 48
Important, To replace the system fans and the fan board
 |
View all Gateway E-9425R manuals
Add to My Manuals
Save this manual to your list of manuals |
Page 48 highlights
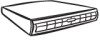
CHAPTER 4: Installing Components To replace the system fans and the fan board: 1 Follow the instructions in "Preventing static electricity discharge" on page 28. Make sure that you turn off the server, then unplug the power cord(s) and all other cables connected to the server. 2 Follow the instructions in "Opening the server case" on page 29. 3 Disconnect the 6-pin fan tach cables from the fan board. 4 Lift the fan cage and fans (1) out of the server. 5 Push the fan board lock (2) toward the back of the server case to release the fan board. 6 Push the fan board toward the fan board lock to disengage it from the locking tabs (3), then lift the fan board out of the server case. 7 Insert the replacement fan board into the server case, aligning the locking slots in the board with the locking tabs in the case. 8 Push the fan board away from the fan board lock, then move the lock into position to hold the fan board in place. 9 Place the system fan cage and fans onto the fan board, making sure to engage the fan cage with the locking tabs on the chassis. Important Make sure that the arrows on top of the fans indicating airflow point to the back of the chassis. The fan cable should exit the fan module toward the back of the chassis. 42
-
 1
1 -
2
-
3
-
4
-
5
-
6
-
7
-
8
-
9
-
10
-
11
-
12
-
13
-
14
-
15
-
16
-
17
-
18
-
19
-
20
-
21
-
22
-
23
-
24
-
25
-
26
-
27
-
28
-
29
-
30
-
31
-
32
-
33
-
34
-
35
-
36
-
37
-
38
-
39
-
40
-
41
-
42
-
 43
43 -
 44
44 -
 45
45 -
 46
46 -
 47
47 -
 48
48 -
 49
49 -
 50
50 -
 51
51 -
 52
52 -
 53
53 -
54
-
55
-
56
-
57
-
58
-
59
-
60
-
61
-
62
-
63
-
64
-
65
-
66
-
67
-
68
-
69
-
70
-
71
-
72
-
73
-
74
-
75
-
76
-
77
-
78
-
79
-
80
-
81
-
82
-
83
-
84
-
85
-
86
-
87
-
88
-
89
-
90
-
91
-
92
-
93
-
94
-
95
-
96
-
97
-
98
-
99
-
100
-
101
-
102
-
103
-
104
-
105
-
106
-
107
-
108
-
109
-
110
-
111
-
112
-
113
-
114
-
115
-
116
 |
 |
