Gateway UC78 MUW7600001 - Gateway Notebook Reference Guide - Page 56
Adjusting the display properties, New Display Detected, Windows, Mobility Center
 |
View all Gateway UC78 manuals
Add to My Manuals
Save this manual to your list of manuals |
Page 56 highlights
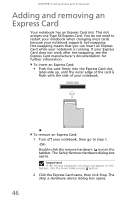
CHAPTER 4: Using Drives and Accessories 5 Plug the projector's, monitor's, or television's power cord into an AC power source and turn it on. Windows recognizes the new hardware and the New Display Detected dialog box opens. 6 Select the options for the projector, monitor, or television, then click OK. 7 Press FN+F4 to switch between viewing the display on the LCD panel, viewing the display on the projector, monitor, or television, and viewing the display on both the LCD panel and the projector, monitor, or television. Important If a monitor, projector, or television is connected and you close the LCD panel, your notebook may turn off the LCD panel, but will not enter Sleep mode. Adjusting the display properties If the image on the projector, monitor, or television does not appear correctly, or if you want to use the display as an extension of your notebook desktop, you should adjust the display properties. To adjust the display properties on a projector, monitor, or television: 1 Click (Start), All Programs, Accessories, then click Windows Mobility Center. The Windows Mobility Center window opens. Tip For more information about the Windows Mobility Center, see "Using the Windows Mobility Center" in your online User Guide. 50
-
 1
1 -
2
-
3
-
4
-
5
-
6
-
7
-
8
-
9
-
10
-
11
-
12
-
13
-
14
-
15
-
16
-
17
-
18
-
19
-
20
-
21
-
22
-
23
-
24
-
25
-
26
-
27
-
28
-
29
-
30
-
31
-
32
-
33
-
34
-
35
-
36
-
37
-
38
-
39
-
40
-
41
-
42
-
43
-
44
-
45
-
46
-
47
-
48
-
49
-
50
-
 51
51 -
 52
52 -
 53
53 -
 54
54 -
 55
55 -
 56
56 -
 57
57 -
 58
58 -
 59
59 -
 60
60 -
 61
61 -
62
-
63
-
64
-
65
-
66
-
67
-
68
-
69
-
70
-
71
-
72
-
73
-
74
-
75
-
76
-
77
-
78
-
79
-
80
-
81
-
82
-
83
-
84
-
85
-
86
-
87
-
88
-
89
-
90
-
91
-
92
-
93
-
94
-
95
-
96
-
97
-
98
-
99
-
100
-
101
-
102
-
103
-
104
-
105
-
106
-
107
-
108
-
109
-
110
-
111
-
112
-
113
-
114
-
115
-
116
-
117
-
118
-
119
-
120
-
121
-
122
-
123
-
124
-
125
-
126
-
127
-
128
-
129
-
130
-
131
-
132
-
133
-
134
-
135
-
136
-
137
-
138
-
139
-
140
-
141
-
142
-
143
-
144
 |
 |
