Gigabyte g-Smart User Manual - GSmart English Version - Page 44
On the ActiveSync pop-up window, check Synchronize with Microsoft Exchange Server
 |
View all Gigabyte g-Smart manuals
Add to My Manuals
Save this manual to your list of manuals |
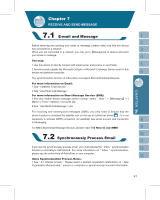
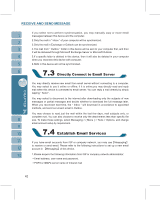
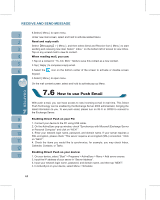
Page 44 highlights
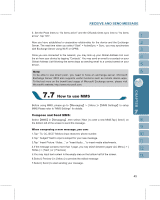
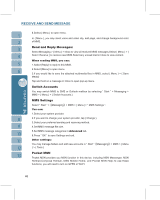
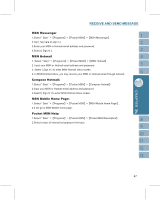
6.Select { Menu } to open menu. Under new mail screen, select and hold to activate related Menu. Read and reply mail: SelectʲMessagingʳ> { Menu }, and then select Send and Receive from { Menu } to start sending and receiving new mail. Select " Inbox " on the bottom left of screen to view Inbox. Tap on any unread mail to view its content. When reading mail, you can: 1.Tap on a contact in " To, CC, BCC " fields to save this contact as a new contact. 2.Tap { Reply } to compose a reply email. 3.Select the keypad. icon on the bottom center of the screen to activate or disable screen 4.Select { Menu } to open menu. On the mail content screen, select and hold to activate pop-up Menu. With push e-mail, you can have access to new incoming e-mail in real time. This Direct Push Technology can be enabled by the Exchange Server 2003 administrator, bringing the latest information to you. To use push email, please turn on Wi-Fi or GPRS to connect to the Exchange Server. Enabling Direct Push on your PC: 1. Connect your device to the PC using USB cable. 2. On the ActiveSync pop-up window, check "Synchronize with Microsoft Exchange Server or Personal Computer" and click on "NEXT". 3. Enter your network login name, password, and domain name. If your server requires a SSL encryption, please check "This server requires an encrypted (SSL) connection." Click on "NEXT". 4. Check the items you would like to synchronize, for example, you may check Inbox, Calendar, Contacts, or Tasks. Enabling Direct Push on your device: 1. On your device, select "Start" > Programs > ActiveSync > Menu > Add server source. 2. Input the IP address of your server in "Server Address". 3. Input your network login name, password, and domain name, and then tap "NEXT". 4. In ActiveSync on your device, select Menu > Schedule 44
-
 1
1 -
2
-
3
-
4
-
5
-
6
-
7
-
8
-
9
-
10
-
11
-
12
-
13
-
14
-
15
-
16
-
17
-
18
-
19
-
20
-
21
-
22
-
23
-
24
-
25
-
26
-
27
-
28
-
29
-
30
-
31
-
32
-
33
-
34
-
35
-
36
-
37
-
38
-
 39
39 -
 40
40 -
 41
41 -
 42
42 -
 43
43 -
 44
44 -
 45
45 -
 46
46 -
 47
47 -
 48
48 -
 49
49 -
50
-
51
-
52
-
53
-
54
-
55
-
56
-
57
-
58
-
59
-
60
-
61
-
62
-
63
-
64
-
65
-
66
-
67
-
68
-
69
-
70
-
71
-
72
-
73
-
74
-
75
 |
 |
