Harman Kardon AVR85 Owners Manual - Page 21
System Setup
 |
View all Harman Kardon AVR85 manuals
Add to My Manuals
Save this manual to your list of manuals |
Page 21 highlights
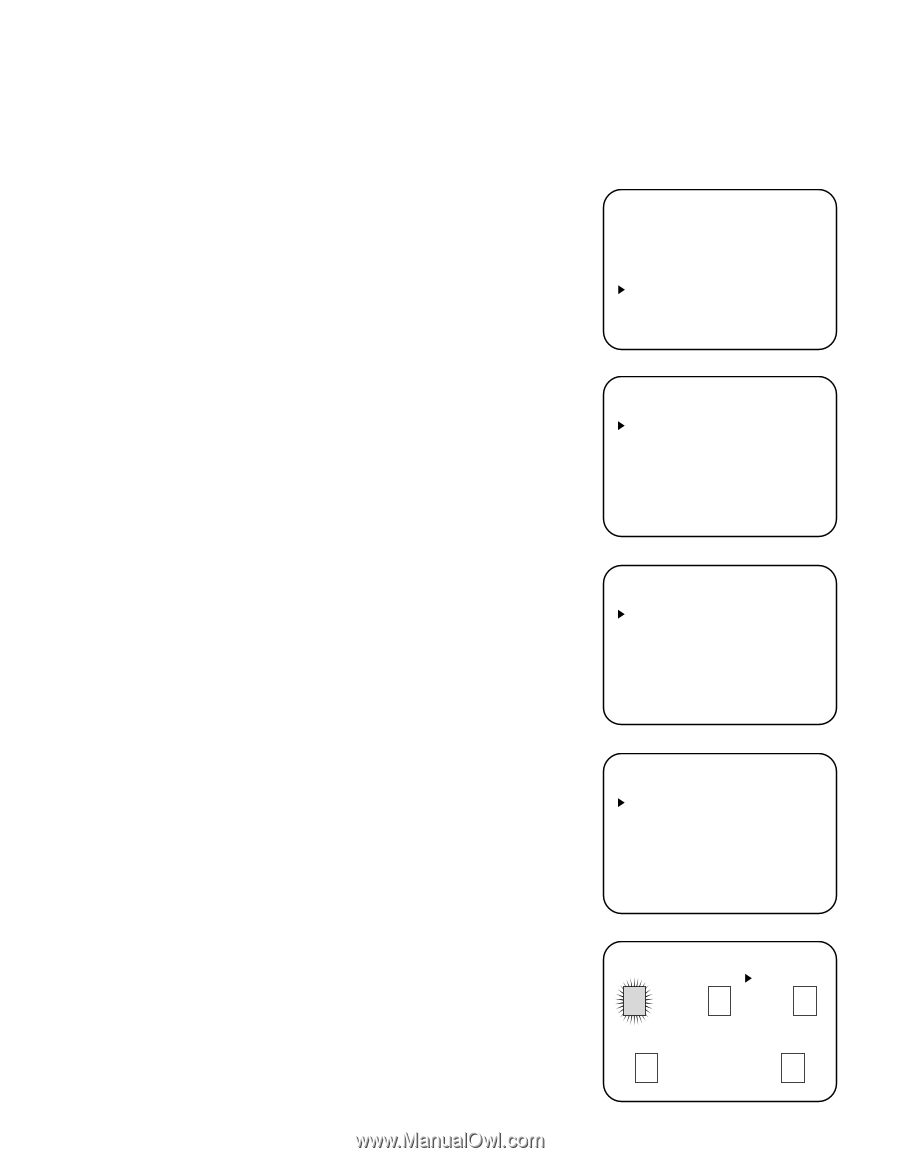
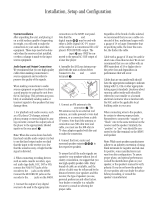
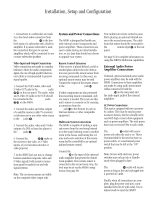
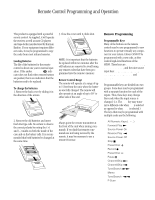
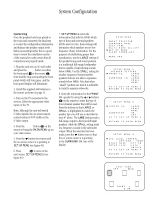
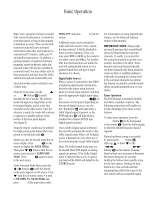
System Configuration 18 System Setup Once the speakers have been placed in the room and connected, the final step is to enter the configuration information and balance the speaker output levels. Before proceeding further this is a good time to review the installation section of the manual to make certain that all connections are properly made. 1. Plug the unit into an AC wall outlet and press the Power button on either the front panel 1 or the remote c. Note that the ring surrounding the front panel switch will turn green, and the front panel display will illuminate. 2. Install the supplied AAA batteries in the remote as shown on page 15. 3. Turn on the TV connected to the receiver. Select the appropriate video input on the TV. Note: Although the unit will switch S-Video signals, the on-screen menus control system is NOT visible on the S-Video output. 4. Press the Select button j on the remote to bring the MAIN MENU up on your video screen. 5. Press the ¤ button four times until the on-screen cursor > is pointing to SET UP MENU (see figure #1). 6. Press Select j to move to the next screen, SET UP MENU 1 (see figure #2). 7. SET UP MENU 1 enters the information that tells the AVR85 which type of front and surround speakers will be used. In turn, these settings will determine which speakers receive low frequency (bass) information. For the purposes of establishing proper bass reproduction, use the LARGE settings if the speaker being used at any position is a traditional full-range loudspeaker that is capable of reproducing sounds below 100Hz. Use the SMALL setting for smaller, frequency-limited satellite speakers that are not able to reproduce sounds below 100Hz. Note that when "small" speakers are used it is advisable to install a separate subwoofer. 8. Enter the information for the FRONT CH. speaker by using the ‹ or › buttons i on the remote to select the type of front channel speaker that will be used. Press the buttons so that LARGE or SMALL is highlighted to match the speaker type you will use as described in item #7 above. The LARGE setting sends a full-range output to the front left/right speakers, while the SMALL setting sends low-frequency sounds to the subwoofer output. When the selection has been made, press the ¤ button once so that the on-screen cursor > is pointing to the SURROUND CH. line of the display. MAIN MENU INPUT SELECTOR SURROUND MODE TEST TONE MULTI ROOM SEL:OFF SET UP MENU SLEEP TIMER:OFF MENU OFF Figure 1 SETUP MENU 1 SPEAKER SETTING F R O N T C H. LARGE SMALL S U R R O U N D C H. L A R G E SMALL NONE GO TO SET UP MENU 2 RETURN TO MAIN MENU Figure 2 SETUP MENU 2 C E N T E R C H. SUBWOOFER GO TO SET UP LARGE SMALL NONE ON OFF MENU 3 RETURN TO MAIN MENU Figure 3 SETUP MENU 3 LFE LEVEL CONTROL OFF:0dB - 10dB NIGHT MODE :OFF ON SETUP LOCK :LOCK UNLOCK GO TO SET UP MENU 4 RETURN TO MAIN MENU Figure 4 TEST TONE OFF ON Figure 5 FRONT L 0 dB
-
 1
1 -
2
-
3
-
4
-
5
-
6
-
7
-
8
-
9
-
10
-
11
-
12
-
13
-
14
-
15
-
 16
16 -
 17
17 -
 18
18 -
 19
19 -
 20
20 -
 21
21 -
 22
22 -
 23
23 -
 24
24 -
 25
25 -
 26
26 -
27
-
28
-
29
-
30
-
31
-
32
-
33
-
34
-
35
-
36
-
37
-
38
-
39
-
40
 |
 |