HP 3310 User Guide - Page 153
Align the printer, Setup, Tools, HP Image Zone - photosmart all in one ink
 |
UPC - 829160970424
View all HP 3310 manuals
Add to My Manuals
Save this manual to your list of manuals |
Page 153 highlights
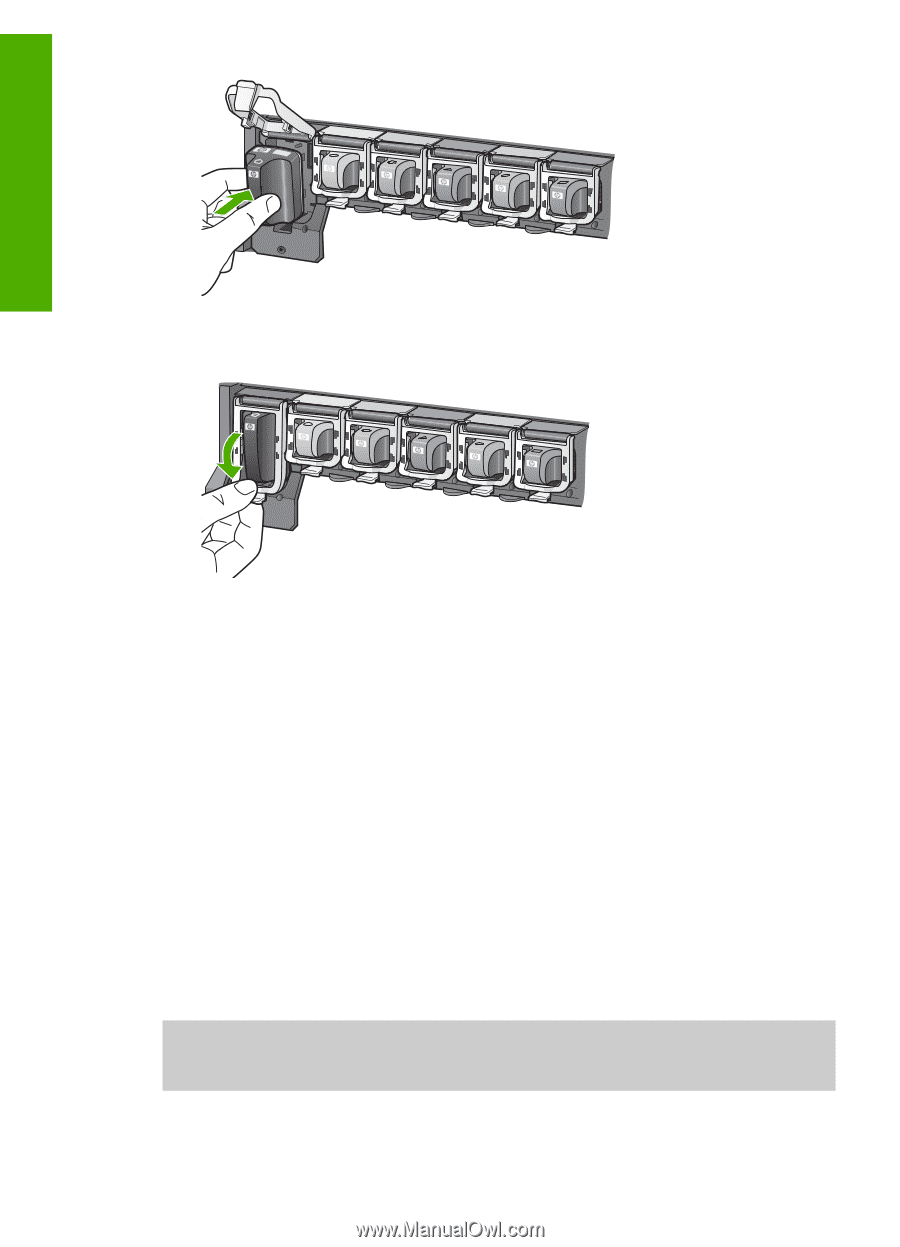
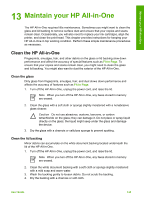
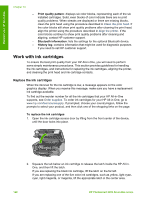
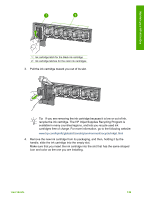
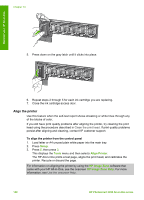
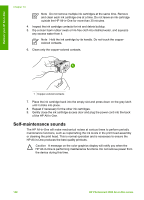
Chapter 13 Maintain your HP All-in-One 5. Press down on the gray latch until it clicks into place. 6. Repeat steps 2 through 5 for each ink cartridge you are replacing. 7. Close the ink cartridge access door. Align the printer Use this feature when the self-test report shows streaking or white lines through any of the blocks of color. If you still have print quality problems after aligning the printer, try cleaning the print head using the procedure described in Clean the print head. If print quality problems persist after aligning and cleaning, contact HP customer support. To align the printer from the control panel 1. Load letter or A4 unused plain white paper into the main tray. 2. Press Setup. 3. Press 5, then press 3. This displays the Tools menu and then selects Align Printer. The HP All-in-One prints a test page, aligns the print head, and calibrates the printer. Recycle or discard the page. For information on aligning the printer by using the HP Image Zone software that came with your HP All-in-One, see the onscreen HP Image Zone Help. For more information, see Use the onscreen Help. 150 HP Photosmart 3300 All-in-One series
-
 1
1 -
2
-
3
-
4
-
5
-
6
-
7
-
8
-
9
-
10
-
11
-
12
-
13
-
14
-
15
-
16
-
17
-
18
-
19
-
20
-
21
-
22
-
23
-
24
-
25
-
26
-
27
-
28
-
29
-
30
-
31
-
32
-
33
-
34
-
35
-
36
-
37
-
38
-
39
-
40
-
41
-
42
-
43
-
44
-
45
-
46
-
47
-
48
-
49
-
50
-
51
-
52
-
53
-
54
-
55
-
56
-
57
-
58
-
59
-
60
-
61
-
62
-
63
-
64
-
65
-
66
-
67
-
68
-
69
-
70
-
71
-
72
-
73
-
74
-
75
-
76
-
77
-
78
-
79
-
80
-
81
-
82
-
83
-
84
-
85
-
86
-
87
-
88
-
89
-
90
-
91
-
92
-
93
-
94
-
95
-
96
-
97
-
98
-
99
-
100
-
101
-
102
-
103
-
104
-
105
-
106
-
107
-
108
-
109
-
110
-
111
-
112
-
113
-
114
-
115
-
116
-
117
-
118
-
119
-
120
-
121
-
122
-
123
-
124
-
125
-
126
-
127
-
128
-
129
-
130
-
131
-
132
-
133
-
134
-
135
-
136
-
137
-
138
-
139
-
140
-
141
-
142
-
143
-
144
-
145
-
146
-
147
-
 148
148 -
 149
149 -
 150
150 -
 151
151 -
 152
152 -
 153
153 -
 154
154 -
 155
155 -
 156
156 -
 157
157 -
 158
158 -
159
-
160
-
161
-
162
-
163
-
164
-
165
-
166
-
167
-
168
-
169
-
170
-
171
-
172
-
173
-
174
-
175
-
176
-
177
-
178
-
179
-
180
-
181
-
182
-
183
-
184
-
185
-
186
-
187
-
188
-
189
-
190
-
191
-
192
-
193
-
194
-
195
-
196
-
197
-
198
-
199
-
200
-
201
-
202
-
203
-
204
-
205
-
206
-
207
-
208
-
209
-
210
-
211
-
212
 |
 |