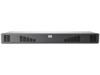
HP 4x1Ex32 HP IP Console Viewer User Guide - Page 16
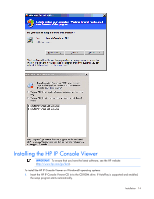
From the second HP IP Console Viewer client, select, New Console Switch wizard appears.
 |
View all HP 4x1Ex32 manuals
Add to My Manuals
Save this manual to your list of manuals |
Page 16 highlights
3. Click New Console Switch to add the new console switch to the HP IP Console Viewer database. The New Console Switch wizard appears. 4. Select one of the following options: o If you previously configured the IP address, select Yes, the product already has an IP address. You are prompted to provide the IP address of the console switch and complete the wizard. o If you did not configure the IP address, select No, the product does not have an IP address. You are prompted to assign an IP address, network mask, and gateway. The HP IP Console Viewer finds the console switch and all interface adapters, or ports (for serial console switches), attached to it. These names appear in the HP IP Console Viewer main window. o If the console switch you are adding is not listed in the Product window, select Other. 5. (Optional) Add additional console switches. 6. Set properties and group servers as desired into Sites or Folders through the main window. NOTE: If your console switch has OBWI and you want to manage your configuration using the feature, see your product-specific user documentation for information. 7. Configure the console switch for access by clicking Manage Console Switch. When prompted for login credentials, login using the Override Administrator User name (Admin). The password is not set on new console switches. Remember to set the Override Admin Password and keep it secure. If local authentication is to be used select the User category and configure user names. For information on adding internal users, see "Configuring user accounts (on page 43)" or "Configuring user accounts for serial console switches (on page 112)." If LDAP is to be used for authentication and authorization the console switch must be configured to access the directory server. For information on configuring LDAP Authentication, see "Using directory services integration (on page 200)." Serial console switches can be configured for internal authentication, LDAP authentication, and also RADIUS authentication. For more information, see "Configuring authentication parameters for serial console switches (on page 103)." 8. After one HP IP Console Viewer client is configured, select File>Database>Save to save a copy of the database with all the settings, and then share the file so that it can be loaded. 9. From the second HP IP Console Viewer client, select File>Database>Load, and browse to find the file you saved. 10. If interface adapters are added, moved, deleted, or renamed after you loaded this file, resynchronize your local database with the console switch by clicking Manage Console Switch, selecting Settings>Servers, and then clicking Resync. 11. Select one of the following options: o To access a server attached to your console switch, select the desired server in the main window, and click Launch KVM Session to launch a server session. o To access a server attached to your serial console switch, select the desired server in the main window, and click Launch Serial Session to launch a server session. If SSH is enabled on the serial console switch to which the selected server is connected, then HP IP Console Viewer automatically launches a secure session using SSH2. If SSH is not enabled, then a plaintext Telnet session launches. Installation 16
-
 1
1 -
2
-
3
-
4
-
5
-
6
-
7
-
8
-
9
-
10
-
 11
11 -
 12
12 -
 13
13 -
 14
14 -
 15
15 -
 16
16 -
 17
17 -
 18
18 -
 19
19 -
 20
20 -
 21
21 -
22
-
23
-
24
-
25
-
26
-
27
-
28
-
29
-
30
-
31
-
32
-
33
-
34
-
35
-
36
-
37
-
38
-
39
-
40
-
41
-
42
-
43
-
44
-
45
-
46
-
47
-
48
-
49
-
50
-
51
-
52
-
53
-
54
-
55
-
56
-
57
-
58
-
59
-
60
-
61
-
62
-
63
-
64
-
65
-
66
-
67
-
68
-
69
-
70
-
71
-
72
-
73
-
74
-
75
-
76
-
77
-
78
-
79
-
80
-
81
-
82
-
83
-
84
-
85
-
86
-
87
-
88
-
89
-
90
-
91
-
92
-
93
-
94
-
95
-
96
-
97
-
98
-
99
-
100
-
101
-
102
-
103
-
104
-
105
-
106
-
107
-
108
-
109
-
110
-
111
-
112
-
113
-
114
-
115
-
116
-
117
-
118
-
119
-
120
-
121
-
122
-
123
-
124
-
125
-
126
-
127
-
128
-
129
-
130
-
131
-
132
-
133
-
134
-
135
-
136
-
137
-
138
-
139
-
140
-
141
-
142
-
143
-
144
-
145
-
146
-
147
-
148
-
149
-
150
-
151
-
152
-
153
-
154
-
155
-
156
-
157
-
158
-
159
-
160
-
161
-
162
-
163
-
164
-
165
-
166
-
167
-
168
-
169
-
170
-
171
-
172
-
173
-
174
-
175
-
176
-
177
-
178
-
179
-
180
-
181
-
182
-
183
-
184
-
185
-
186
-
187
-
188
-
189
-
190
-
191
-
192
-
193
-
194
-
195
-
196
-
197
-
198
-
199
-
200
-
201
-
202
-
203
-
204
-
205
-
206
-
207
-
208
-
209
-
210
-
211
-
212
-
213
-
214
-
215
-
216
-
217
-
218
-
219
-
220
-
221
-
222
-
223
-
224
-
225
-
226
-
227
-
228
-
229
-
230
-
231
-
232
-
233
-
234
-
235
-
236
-
237
-
238
-
239
-
240
-
241
-
242
-
243
-
244
-
245
-
246
-
247
-
248
-
249
-
250
-
251
-
252
-
253
-
254
-
255
-
256
-
257
-
258
-
259
-
260
-
261
-
262
-
263
-
264
-
265
-
266
-
267
-
268
-
269
-
270
-
271
-
272
-
273
-
274
-
275
-
276
-
277
-
278
-
279
-
280
-
281
-
282
-
283
-
284
-
285
-
286
-
287
-
288
-
289
-
290
-
291
-
292
-
293
-
294
-
295
-
296
-
297
-
298
-
299
-
300
-
301
-
302
-
303
-
304
-
305
-
306
-
307
-
308
-
309
-
310
-
311
-
312
-
313
-
314
-
315
-
316
-
317
-
318
-
319
-
320
-
321
-
322
-
323
-
324
-
325
-
326
-
327
-
328
-
329
-
330
-
331
-
332
-
333
-
334
-
335
-
336
-
337
-
338
-
339
 |
 |
