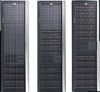
HP 6100 HP 4x00/6x00/8x00 Enterprise Virtual Array Updating Product Software G - Page 8
Required kits, HP Command View EVA and XCS compatibility, see Table 2.0, HP Command View EVA - software download full
 |
View all HP 6100 manuals
Add to My Manuals
Save this manual to your list of manuals |
Page 8 highlights
Required kits Before you begin the Enterprise Virtual Array upgrade, you must download the XCS 6.240 controller software from the following website: http://www.software.hp.com Click Storage and NAS under Product, and select HP EVA XCS v6.240. Follow the instructions to enter your information and download the .ISO image. You must also obtain a supported version of HP Command View EVA. When you purchase HP Command View EVA, you can choose to receive a software CD or an E-Delivery kit. If you choose an E-Delivery kit, you will receive an email from HP with download instructions. Be sure to save the HP email with the download instructions. You will need them if you need to download the software again. IMPORTANT: HP Command View EVA 9.2 or later is required with XCS 6.240. For the latest HP Command View EVA and XCS compatibility, see Table 2.0, HP Command View EVA interoperability support, in the HP Enterprise Virtual Array Compatibility Reference. See Table 1 (page 7) for the link to this document. If you have a support contract with HP, you can download the software from the IT Resource Center (ITRC) as follows: 1. Go to http://www.itrc.hp.com. 2. Do one of the following: a. If you have not previously registered with ITRC: 1) Click register. 2) Enter your details and a password. 3) Click finish. You will be assigned a user ID. 4) If you have multiple users, complete these steps for each user. b. If you have previously registered: 1) Click login. 2) Enter your user ID and password. 3) Click login. 3. Link your support agreement to your ITRC user ID: NOTE: If you have previously linked your support agreements, skip this step and continue with Step 4. To learn more about why you need to link your Service Agreement ID or System Handle(s) to your user ID on the IT Resource Center and the information you will need to link your support agreement, go to: http://www.itrc.hp.com/service/help/ aboutSupportAgreementLinking.do. a. Go to http://www.itrc.hp.com/service/entitlements/linkSupportAgreement.do. b. Log on with your ITRC user ID and password, if prompted. c. Enter the System Handle or SAID (Service Agreement Identifer) specified on your support agreement and click link. Perform this step once per support agreement. 4. To manage the software updates for your linked support agreements, select software update manager (SUM). 5. Select either user ID or Support Agreement and enter the appropriate information. Click submit. 6. If you entered a Support Agreement in Step 5, you are prompted to select a user ID. Select the user ID and click submit. 7. To receive physical media, click request updates. To request a download of the .ISO image to create a CD, click download updates. 8. Select the appropriate support agreement or select All Support Agreements. 8 Getting started
-
 1
1 -
2
-
 3
3 -
 4
4 -
 5
5 -
 6
6 -
 7
7 -
 8
8 -
 9
9 -
 10
10 -
 11
11 -
 12
12 -
 13
13 -
14
-
15
-
16
-
17
-
18
-
19
-
20
-
21
-
22
-
23
-
24
-
25
-
26
-
27
-
28
-
29
-
30
-
31
-
32
-
33
-
34
-
35
-
36
-
37
-
38
-
39
-
40
-
41
-
42
-
43
-
44
-
45
-
46
-
47
-
48
-
49
-
50
-
51
-
52
-
53
-
54
-
55
-
56
-
57
-
58
-
59
-
60
-
61
-
62
-
63
-
64
-
65
-
66
 |
 |
