HP 6520 HP Deskjet 6500 Printer series - (Windows) User's Guide - Page 10
Using the Print Quality Selector button, Lights
 |
View all HP 6520 manuals
Add to My Manuals
Save this manual to your list of manuals |
Page 10 highlights
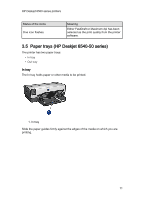
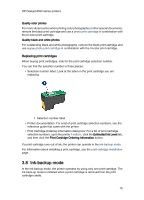
HP Deskjet 6500 series printers 4. Click OK. Using the Print Quality Selector button Use the Print Quality Selector button to specify the print quality for documents that you plan to print. You cannot change the print quality for a document after the document begins printing. Follow these steps to use the Print Quality Selector button: 1. Verify that the Print Quality Selector button is enabled from the printer software. 2. Press the Print Quality Selector button to select one of the following print qualities: Fast normal Normal Best Note: FastDraft and Maximum dpi can only be selected in the printer software. If a document is printed in either FastDraft or Maximum dpi mode, the currently selected print-quality icon flashes until the document is complete. Lights The Print Quality Selector icons light up or flash to indicate the selected print quality: Status of the icons Meaning One icon is lit. The illuminated icon is the selected print quality. The illuminated icon is the selected print quality for the current print job. One icon is lit and another flashes. The flashing icon is the selected print quality for the next print job. 10
-
 1
1 -
2
-
3
-
4
-
 5
5 -
 6
6 -
 7
7 -
 8
8 -
 9
9 -
 10
10 -
 11
11 -
 12
12 -
 13
13 -
 14
14 -
 15
15 -
16
-
17
-
18
-
19
-
20
-
21
-
22
-
23
-
24
-
25
-
26
-
27
-
28
-
29
-
30
-
31
-
32
-
33
-
34
-
35
-
36
-
37
-
38
-
39
-
40
-
41
-
42
-
43
-
44
-
45
-
46
-
47
-
48
-
49
-
50
-
51
-
52
-
53
-
54
-
55
-
56
-
57
-
58
-
59
-
60
-
61
-
62
-
63
-
64
-
65
-
66
-
67
-
68
-
69
-
70
-
71
-
72
-
73
-
74
-
75
-
76
-
77
-
78
-
79
-
80
-
81
-
82
-
83
-
84
-
85
-
86
-
87
-
88
-
89
-
90
-
91
-
92
-
93
-
94
-
95
-
96
-
97
-
98
-
99
-
100
-
101
-
102
-
103
-
104
-
105
-
106
-
107
-
108
-
109
-
110
-
111
-
112
-
113
-
114
-
115
-
116
-
117
-
118
-
119
-
120
-
121
-
122
-
123
-
124
-
125
-
126
-
127
-
128
-
129
-
130
-
131
-
132
-
133
-
134
-
135
-
136
-
137
-
138
-
139
-
140
-
141
-
142
-
143
-
144
-
145
-
146
-
147
-
148
-
149
-
150
-
151
-
152
-
153
-
154
-
155
-
156
-
157
-
158
-
159
-
160
-
161
-
162
-
163
-
164
-
165
-
166
-
167
-
168
-
169
-
170
-
171
-
172
-
173
-
174
-
175
-
176
-
177
-
178
-
179
-
180
-
181
-
182
-
183
-
184
-
185
-
186
-
187
-
188
-
189
-
190
-
191
-
192
-
193
-
194
-
195
-
196
-
197
-
198
-
199
-
200
-
201
 |
 |
