HP 9110 HP Officejet 9100 (Digital Send Authentication Solution) - Getting Sta - Page 7
To install the digital send authentication DIMM, English
 |
UPC - 829160117492
View all HP 9110 manuals
Add to My Manuals
Save this manual to your list of manuals |
Page 7 highlights
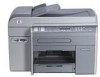
English To install the digital send authentication DIMM 1. Press (Power) to turn off the all-in-one. 2. Unplug the power cord and disconnect any cables. 3. On the left side of the all-in-one, unlatch and remove the side cover. 4. Remove the DIMM cover. 5. Remove the DIMM from the antistatic package. 6. Align the DIMM so that the notches on the lower edge line up with the raised marks in the DIMM slot. You can use any empty slot. 7. Insert and press the DIMM into the slot until the DIMM snaps into place. 8. Replace the DIMM cover, and then replace the side cover. Setting up the digital send authentication solution 7
-
 1
1 -
 2
2 -
 3
3 -
 4
4 -
 5
5 -
 6
6 -
 7
7 -
 8
8 -
 9
9 -
 10
10 -
 11
11 -
 12
12 -
13
-
14
-
15
-
16
-
17
-
18
-
19
-
20
-
21
-
22
-
23
-
24
-
25
-
26
-
27
-
28
-
29
-
30
-
31
-
32
-
33
-
34
-
35
-
36
-
37
-
38
-
39
-
40
-
41
-
42
-
43
-
44
-
45
-
46
-
47
-
48
-
49
-
50
-
51
-
52
-
53
-
54
-
55
-
56
-
57
-
58
-
59
-
60
-
61
-
62
-
63
-
64
-
65
-
66
-
67
-
68
-
69
-
70
-
71
-
72
-
73
-
74
-
75
-
76
-
77
-
78
-
79
-
80
-
81
-
82
-
83
-
84
-
85
-
86
-
87
-
88
-
89
-
90
-
91
-
92
-
93
-
94
-
95
-
96
-
97
-
98
-
99
-
100
-
101
-
102
-
103
-
104
-
105
-
106
-
107
-
108
-
109
-
110
-
111
-
112
-
113
-
114
-
115
-
116
-
117
-
118
-
119
-
120
-
121
-
122
-
123
-
124
-
125
-
126
-
127
-
128
-
129
-
130
-
131
-
132
-
133
-
134
-
135
-
136
-
137
-
138
-
139
-
140
-
141
-
142
-
143
-
144
 |
 |

Setting up the digital send authentication solution
7
English
To install the digital send authentication DIMM
1.
Press
(Power) to turn off the all-in-one.
2.
Unplug the power cord and disconnect any cables.
3.
On the left side of the all-in-one, unlatch and remove the side cover.
4.
Remove the DIMM cover.
5.
Remove the DIMM from the antistatic package.
6.
Align the DIMM so that the notches on the lower edge line up with the raised marks in the
DIMM slot. You can use any empty slot.
7.
Insert and press the DIMM into the slot until the DIMM snaps into place.
8.
Replace the DIMM cover, and then replace the side cover.