HP A440 Basics Guide - Page 14
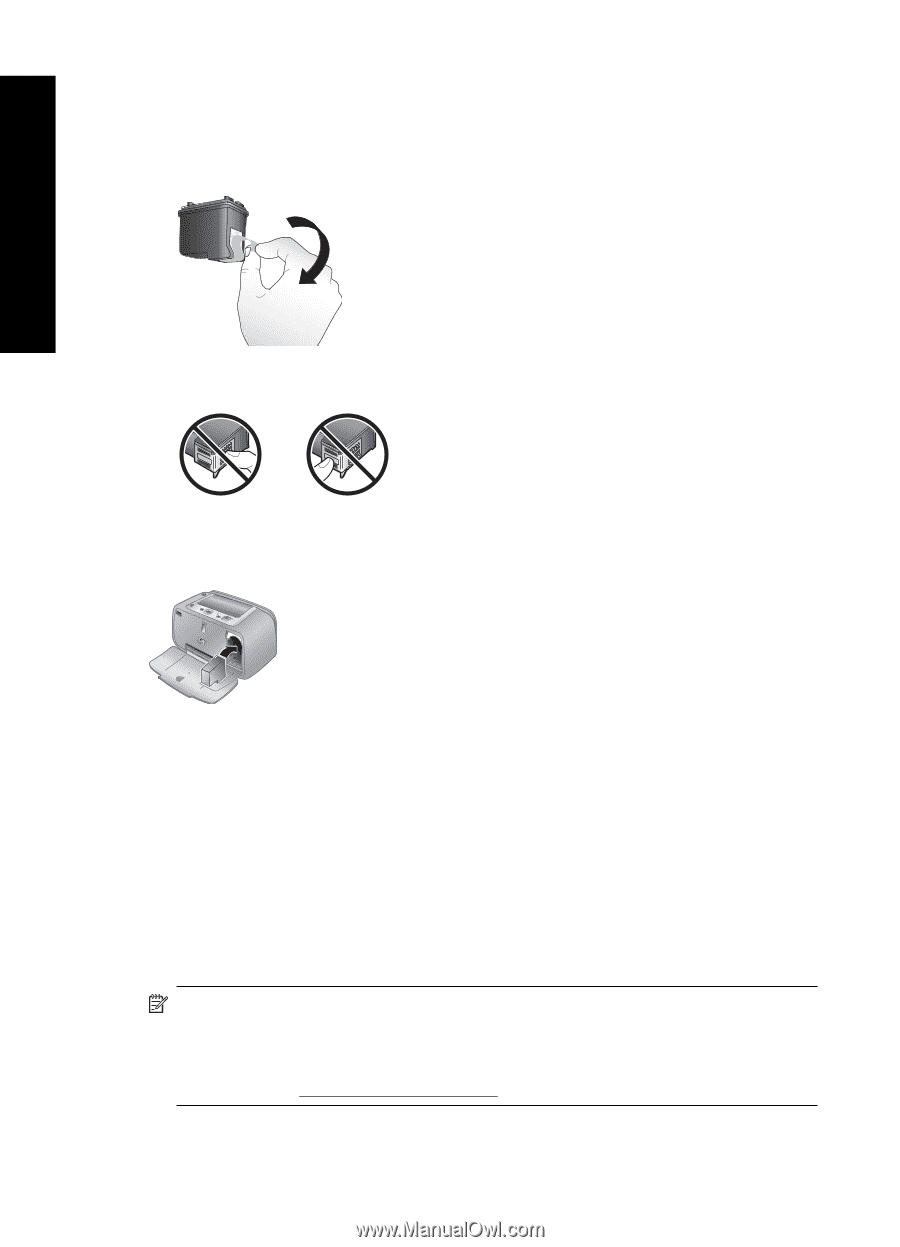
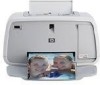
To prepare the printer and cartridge, Remove the pink tape, Do not touch here - photosmart ink
 |
UPC - 808736862721
View all HP A440 manuals
Add to My Manuals
Save this manual to your list of manuals |
Page 14 highlights
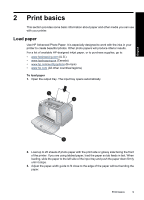
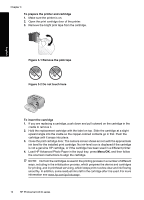
Chapter 3 To prepare the printer and cartridge 1. Make sure the printer is on. 2. Open the print cartridge door of the printer. 3. Remove the bright pink tape from the cartridge. Figure 3-1 Remove the pink tape Figure 3-2 Do not touch here English To insert the cartridge 1. If you are replacing a cartridge, push down and pull outward on the cartridge in the cradle to remove it. 2. Hold the replacement cartridge with the label on top. Slide the cartridge at a slight upward angle into the cradle so the copper-colored contacts go in first. Push the cartridge until it snaps into place. 3. Close the print cartridge door. The camera screen shows an icon with the approximate ink level for the installed print cartridge. No ink-level icon is displayed if the cartridge is not a genuine HP cartridge, or if the cartridge has been used in a different printer. 4. Load HP Advanced Photo Paper in the input tray, press Menu/OK, and then follow the onscreen instructions to align the cartridge. NOTE: Ink from the cartridges is used in the printing process in a number of different ways, including in the initialization process, which prepares the device and cartridges for printing, and in printhead servicing, which keeps print nozzles clear and ink flowing smoothly. In addition, some residual ink is left in the cartridge after it is used. For more information see www.hp.com/go/inkusage. 14 HP Photosmart A440 series
-
 1
1 -
2
-
3
-
4
-
5
-
6
-
7
-
8
-
 9
9 -
 10
10 -
 11
11 -
 12
12 -
 13
13 -
 14
14 -
 15
15 -
 16
16 -
 17
17 -
 18
18 -
 19
19 -
20
-
21
-
22
-
23
-
24
-
25
-
26
-
27
-
28
-
29
-
30
-
31
-
32
-
33
-
34
-
35
-
36
-
37
-
38
-
39
-
40
-
41
-
42
-
43
-
44
-
45
-
46
-
47
-
48
-
49
-
50
-
51
-
52
-
53
-
54
-
55
-
56
-
57
-
58
-
59
-
60
-
61
-
62
-
63
 |
 |