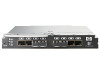
HP Brocade BladeSystem 4/12 HP StorageWorks Fabric OS 6.1.1 administrator guid - Page 29
Activating DHCP
 |
View all HP Brocade BladeSystem 4/12 manuals
Add to My Manuals
Save this manual to your list of manuals |
Page 29 highlights
3. Enter the network information in dotted-decimal notation for the Ethernet IPv4 address and in semicolon-separated notation for IPv6. Example of setting logical switch (sw0)'s IPv6 address on an enterprise-class platform: ecp:admin> ipaddrset -ipv6 -sw 0 --add 1080::8:800:200C:417B/64 IP address is being changed...Done. 4. Enter the Ethernet Subnetmask at the prompt. 5. Skip Fibre Channel prompts by pressing Enter. The Fibre Channel IP address is used for management. 6. Enter the Gateway Address at the prompt. 7. Disable DHCP by entering off. Activating DHCP By default, some HP switches have DHCP enabled. The 4/256 SAN Director and DC SAN Backbone Director (short name, DC Director) do not support DHCP. The Fabric OS DHCP client supports the following parameters: • External Ethernet port IP addresses and subnet masks • Default gateway IP address The DHCP client uses a DHCP vendor class identifier that allows DHCP servers to determine that the Discovers and Requests are coming from a switch. The vendor class identifier is the string "BROCADE," followed by the SWBD model number of the platform. For example, the vendor class identifier for a request from an HP StorageWorks DC Director is BROCADESWBD64. IMPORTANT: The client conforms to the latest IETF Draft Standard RFCs for IPv4, IPv6, and DHCP. Enabling DHCP Connect the DHCP-enabled switch to the network, power on the switch, and the switch automatically obtains the Ethernet IP address, Ethernet subnet mask, and default gateway address from the DHCP server. The DHCP client can only connect to a DHCP server on the same subnet as the switch. Do not enable DHCP if the DHCP server is not on the same subnet as the switch. NOTE: DHCP does not work with IPv6. Enabling DHCP after the Ethernet information has been configured releases the current Ethernet network interface settings, including Ethernet IP, Ethernet Subnetmask, and Gateway. The Fibre Channel (FC) IP address and subnet mask is static and is not affected by DHCP; see "Setting static Ethernet addresses" on page 28 for instructions on setting the FC IP address. To enable DHCP: 1. Connect to the switch and log in using an account assigned to the admin role. 2. Issue the ipaddrset command. 3. If already set up, skip the Ethernet IP address, Ethernet subnet mask, Fibre Channel IP address and subnet mask prompts by pressing Enter. Fabric OS 6.1.1 administrator guide 29
-
 1
1 -
2
-
3
-
4
-
5
-
6
-
7
-
8
-
9
-
10
-
11
-
12
-
13
-
14
-
15
-
16
-
17
-
18
-
19
-
20
-
21
-
22
-
23
-
 24
24 -
 25
25 -
 26
26 -
 27
27 -
 28
28 -
 29
29 -
 30
30 -
 31
31 -
 32
32 -
 33
33 -
 34
34 -
35
-
36
-
37
-
38
-
39
-
40
-
41
-
42
-
43
-
44
-
45
-
46
-
47
-
48
-
49
-
50
-
51
-
52
-
53
-
54
-
55
-
56
-
57
-
58
-
59
-
60
-
61
-
62
-
63
-
64
-
65
-
66
-
67
-
68
-
69
-
70
-
71
-
72
-
73
-
74
-
75
-
76
-
77
-
78
-
79
-
80
-
81
-
82
-
83
-
84
-
85
-
86
-
87
-
88
-
89
-
90
-
91
-
92
-
93
-
94
-
95
-
96
-
97
-
98
-
99
-
100
-
101
-
102
-
103
-
104
-
105
-
106
-
107
-
108
-
109
-
110
-
111
-
112
-
113
-
114
-
115
-
116
-
117
-
118
-
119
-
120
-
121
-
122
-
123
-
124
-
125
-
126
-
127
-
128
-
129
-
130
-
131
-
132
-
133
-
134
-
135
-
136
-
137
-
138
-
139
-
140
-
141
-
142
-
143
-
144
-
145
-
146
-
147
-
148
-
149
-
150
-
151
-
152
-
153
-
154
-
155
-
156
-
157
-
158
-
159
-
160
-
161
-
162
-
163
-
164
-
165
-
166
-
167
-
168
-
169
-
170
-
171
-
172
-
173
-
174
-
175
-
176
-
177
-
178
-
179
-
180
-
181
-
182
-
183
-
184
-
185
-
186
-
187
-
188
-
189
-
190
-
191
-
192
-
193
-
194
-
195
-
196
-
197
-
198
-
199
-
200
-
201
-
202
-
203
-
204
-
205
-
206
-
207
-
208
-
209
-
210
-
211
-
212
-
213
-
214
-
215
-
216
-
217
-
218
-
219
-
220
-
221
-
222
-
223
-
224
-
225
-
226
-
227
-
228
-
229
-
230
-
231
-
232
-
233
-
234
-
235
-
236
-
237
-
238
-
239
-
240
-
241
-
242
-
243
-
244
-
245
-
246
-
247
-
248
-
249
-
250
-
251
-
252
-
253
-
254
-
255
-
256
-
257
-
258
-
259
-
260
-
261
-
262
-
263
-
264
-
265
-
266
-
267
-
268
-
269
-
270
-
271
-
272
-
273
-
274
-
275
-
276
-
277
-
278
-
279
-
280
-
281
-
282
-
283
-
284
-
285
-
286
-
287
-
288
-
289
-
290
-
291
-
292
-
293
-
294
-
295
-
296
-
297
-
298
-
299
-
300
-
301
-
302
-
303
-
304
-
305
-
306
-
307
-
308
-
309
-
310
-
311
-
312
-
313
-
314
-
315
-
316
-
317
-
318
-
319
-
320
-
321
-
322
-
323
-
324
-
325
-
326
-
327
-
328
-
329
-
330
-
331
-
332
-
333
-
334
-
335
-
336
-
337
-
338
-
339
-
340
-
341
-
342
-
343
-
344
-
345
-
346
-
347
-
348
-
349
-
350
-
351
-
352
-
353
-
354
-
355
-
356
-
357
-
358
-
359
-
360
-
361
-
362
-
363
-
364
-
365
-
366
-
367
-
368
-
369
-
370
-
371
-
372
-
373
-
374
-
375
-
376
-
377
-
378
-
379
-
380
-
381
-
382
-
383
-
384
-
385
-
386
-
387
-
388
-
389
-
390
-
391
-
392
-
393
-
394
-
395
-
396
-
397
-
398
-
399
-
400
-
401
-
402
-
403
-
404
-
405
-
406
-
407
-
408
-
409
-
410
-
411
-
412
-
413
-
414
-
415
-
416
-
417
-
418
-
419
-
420
-
421
-
422
-
423
-
424
-
425
-
426
-
427
-
428
-
429
-
430
-
431
-
432
-
433
-
434
-
435
-
436
-
437
-
438
-
439
-
440
-
441
-
442
-
443
-
444
-
445
-
446
-
447
-
448
-
449
-
450
-
451
-
452
-
453
-
454
-
455
-
456
-
457
-
458
-
459
-
460
-
461
-
462
-
463
-
464
-
465
-
466
-
467
-
468
-
469
-
470
-
471
-
472
-
473
-
474
-
475
-
476
-
477
-
478
-
479
-
480
-
481
-
482
-
483
-
484
-
485
-
486
-
487
-
488
-
489
-
490
-
491
-
492
-
493
-
494
-
495
-
496
 |
 |