HP C8975A HP Deskjet 5800 Series printer - (English) User Guide - Page 25
EAP/802.1x, EAP/PSK, Authentication, Advanced Configuration, Infrastructure, Finish
 |
View all HP C8975A manuals
Add to My Manuals
Save this manual to your list of manuals |
Page 25 highlights
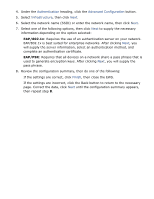
4. Under the Authentication heading, click the Advanced Configuration button. 5. Select Infrastructure, then click Next. 6. Select the network name (SSID) or enter the network name, then click Next. 7. Select one of the following options, then click Next to supply the necessary information depending on the option selected: r EAP/802.1x: Requires the use of an authentication server on your network. EAP/802.1x is best suited for enterprise networks. After clicking Next, you will supply the server information, select an authentication method, and complete an authentication certificate. r EAP/PSK: Requires that all devices on a network share a pass phrase that is used to generate encryption keys. After clicking Next, you will supply the pass phrase. 8. Review the configuration summary, then do one of the following: r If the settings are correct, click Finish, then close the EWS. r If the settings are incorrect, click the Back button to return to the necessary page. Correct the data, click Next until the configuration summary appears, then repeat step 8.
-
 1
1 -
2
-
3
-
4
-
5
-
6
-
7
-
8
-
9
-
10
-
11
-
12
-
13
-
14
-
15
-
16
-
17
-
18
-
19
-
 20
20 -
 21
21 -
 22
22 -
 23
23 -
 24
24 -
 25
25 -
 26
26 -
 27
27 -
 28
28 -
 29
29 -
 30
30 -
31
-
32
-
33
-
34
-
35
-
36
-
37
-
38
-
39
-
40
-
41
-
42
-
43
-
44
-
45
-
46
-
47
-
48
-
49
-
50
-
51
-
52
-
53
-
54
-
55
-
56
-
57
-
58
-
59
-
60
-
61
-
62
-
63
-
64
-
65
-
66
-
67
-
68
-
69
-
70
-
71
-
72
-
73
-
74
-
75
-
76
-
77
-
78
-
79
-
80
-
81
-
82
-
83
-
84
-
85
-
86
-
87
-
88
-
89
-
90
-
91
-
92
-
93
-
94
-
95
-
96
-
97
-
98
-
99
-
100
-
101
-
102
-
103
-
104
-
105
-
106
-
107
-
108
-
109
-
110
-
111
-
112
-
113
-
114
-
115
-
116
-
117
-
118
-
119
-
120
-
121
-
122
-
123
-
124
-
125
-
126
-
127
-
128
-
129
-
130
-
131
-
132
-
133
-
134
-
135
-
136
-
137
-
138
-
139
-
140
-
141
-
142
-
143
-
144
-
145
-
146
-
147
-
148
-
149
-
150
-
151
-
152
-
153
-
154
-
155
-
156
-
157
-
158
-
159
-
160
-
161
-
162
-
163
-
164
-
165
-
166
-
167
-
168
-
169
-
170
-
171
-
172
-
173
-
174
-
175
-
176
-
177
-
178
-
179
-
180
-
181
-
182
-
183
-
184
-
185
-
186
-
187
-
188
-
189
-
190
-
191
-
192
-
193
-
194
-
195
-
196
-
197
-
198
-
199
-
200
-
201
-
202
-
203
-
204
-
205
-
206
-
207
-
208
-
209
-
210
-
211
-
212
-
213
-
214
-
215
-
216
-
217
 |
 |
