HP CP3505 HP Color LaserJet CP3505 Series Printers - User Guide - Page 51
Install the Windows software, Install Windows software for direct connections, Start, Install Printer
 |
View all HP CP3505 manuals
Add to My Manuals
Save this manual to your list of manuals |
Page 51 highlights
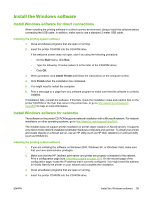
Install the Windows software Install Windows software for direct connections When installing the printing software in a direct-connect environment, always install the software before connecting the USB cable. In addition, make sure to use a standard 2-meter USB cable. Installing the printing system software 1. Close all software programs that are open or running. 2. Insert the printer CD-ROM into the CD-ROM drive. If the welcome screen does not open, start it by using the following procedure: ◦ On the Start menu, click Run. ◦ Type the following: X:\setup (where X is the letter of the CD-ROM drive). ◦ Click OK. 3. When prompted, click Install Printer and follow the instructions on the computer screen. 4. Click Finish when the installation has completed. 5. You might need to restart the computer. 6. Print a test page or a page from any software program to make sure that the software is correctly installed. If installation fails, reinstall the software. If this fails, check the installation notes and readme files on the printer CD-ROM or the flyer that came in the printer box, or go to http://www.hp.com/support/ cljcp3505 for help or more information. Install Windows software for networks The software on the printer CD-ROM supports network installation with a Microsoft network. For network installation on other operating systems, go to http://www.hp.com/support/cljcp3505. The installer does not support printer installation or printer object creation on Novell servers. It supports only direct-mode network installations between Windows computers and a printer. To install your printer and create objects on a Novell server, use an HP utility (such as HP Web Jetadmin) or a Novell utility (such as NWAdmin). Installing the printing system software 1. If you are installing the software on Windows 2000, Windows XP, or Windows Vista, make sure that you have administrator privileges. 2. Make sure that the HP Jetdirect print server and printer are properly connected to the network. Print a configuration page (see Information pages on page 110). On the second page of the configuration page, locate the IP address that is currently configured. You might need this address to initially identify the printer on your network and complete the installation. 3. Close all software programs that are open or running. 4. Insert the printer CD-ROM into the CD-ROM drive. ENWW Install the Windows software 39
-
 1
1 -
2
-
3
-
4
-
5
-
6
-
7
-
8
-
9
-
10
-
11
-
12
-
13
-
14
-
15
-
16
-
17
-
18
-
19
-
20
-
21
-
22
-
23
-
24
-
25
-
26
-
27
-
28
-
29
-
30
-
31
-
32
-
33
-
34
-
35
-
36
-
37
-
38
-
39
-
40
-
41
-
42
-
43
-
44
-
45
-
 46
46 -
 47
47 -
 48
48 -
 49
49 -
 50
50 -
 51
51 -
 52
52 -
 53
53 -
 54
54 -
 55
55 -
 56
56 -
57
-
58
-
59
-
60
-
61
-
62
-
63
-
64
-
65
-
66
-
67
-
68
-
69
-
70
-
71
-
72
-
73
-
74
-
75
-
76
-
77
-
78
-
79
-
80
-
81
-
82
-
83
-
84
-
85
-
86
-
87
-
88
-
89
-
90
-
91
-
92
-
93
-
94
-
95
-
96
-
97
-
98
-
99
-
100
-
101
-
102
-
103
-
104
-
105
-
106
-
107
-
108
-
109
-
110
-
111
-
112
-
113
-
114
-
115
-
116
-
117
-
118
-
119
-
120
-
121
-
122
-
123
-
124
-
125
-
126
-
127
-
128
-
129
-
130
-
131
-
132
-
133
-
134
-
135
-
136
-
137
-
138
-
139
-
140
-
141
-
142
-
143
-
144
-
145
-
146
-
147
-
148
-
149
-
150
-
151
-
152
-
153
-
154
-
155
-
156
-
157
-
158
-
159
-
160
-
161
-
162
-
163
-
164
-
165
-
166
-
167
-
168
-
169
-
170
-
171
-
172
-
173
-
174
-
175
-
176
-
177
-
178
-
179
-
180
-
181
-
182
-
183
-
184
-
185
-
186
-
187
-
188
-
189
-
190
-
191
-
192
-
193
-
194
-
195
-
196
-
197
-
198
-
199
-
200
-
201
-
202
-
203
-
204
-
205
-
206
-
207
-
208
-
209
-
210
-
211
-
212
-
213
-
214
-
215
-
216
-
217
-
218
-
219
-
220
-
221
-
222
-
223
-
224
-
225
-
226
 |
 |