HP CP4005dn HP Color LaserJet CP4005 - User Guide - Page 196
Restricted From Printing In Color, Tray X=[size]
 |
UPC - 882780717169
View all HP CP4005dn manuals
Add to My Manuals
Save this manual to your list of manuals |
Page 196 highlights
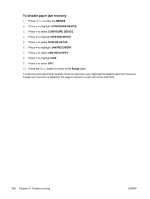
Control panel message Description Recommended action a restore action, such as RESTORE COLOR VALUES. Restoring... The printer is restoring factory settings. No action necessary. factory settings RESTRICTED FROM PRINTING IN COLOR The printer is set to COLOR IF ALLOWED and you or your software program are not alternates with authorized to print in color. Get your network administrator to set the user or program permissions that will allow you to print in color. Ready Rotating [COLOR] motor A component test is in progress; the Press Stop when ready to stop this test. component selected is the cartridge motor. To exit press. Stop Rotating motor To exit press. Stop The printer is executing a component test and Press Stop when ready to stop this test. the component selected is a motor. Setting saved A menu selection has been saved. No action necessary. SIZE MISMATCH TRAY X=[SIZE] For help press alternates with The tray is loaded with media longer or shorter in the feed direction than the size configured for the tray. 1. Adjust the side and rear media guides against the paper. 2. If necessary, press after the tray is closed to change the paper size or type configuration to match the size or type in the tray. Ready Sleep mode on The printer is in sleep mode. A button press, No action necessary. receipt of printable data, or an error condition will clear this message. SUPPLIES IN WRONG POSITION alternates with For status press At least one supply item is incorrectly 1. positioned in the printer and another supply item is missing, incorrectly placed, out, or low. 2. Press to access the SUPPLIES STATUS menu. Press and to highlight the specific supply that has a problem. 3. Press to view help for the supply. 4. Press and to step through the instructions. Transfer unit can be easily damaged. alternates with For help press The supplies gauge will display the consumption levels of print cartridges. The cartridge is either not installed or not correctly installed in the printer. 1. Open the top and front covers. CAUTION The image transfer unit can be easily damaged. 2. Open the image transfer unit. 3. Insert the print cartridge and make sure that it is fully seated. 180 Chapter 8 Problem solving ENWW
-
 1
1 -
2
-
3
-
4
-
5
-
6
-
7
-
8
-
9
-
10
-
11
-
12
-
13
-
14
-
15
-
16
-
17
-
18
-
19
-
20
-
21
-
22
-
23
-
24
-
25
-
26
-
27
-
28
-
29
-
30
-
31
-
32
-
33
-
34
-
35
-
36
-
37
-
38
-
39
-
40
-
41
-
42
-
43
-
44
-
45
-
46
-
47
-
48
-
49
-
50
-
51
-
52
-
53
-
54
-
55
-
56
-
57
-
58
-
59
-
60
-
61
-
62
-
63
-
64
-
65
-
66
-
67
-
68
-
69
-
70
-
71
-
72
-
73
-
74
-
75
-
76
-
77
-
78
-
79
-
80
-
81
-
82
-
83
-
84
-
85
-
86
-
87
-
88
-
89
-
90
-
91
-
92
-
93
-
94
-
95
-
96
-
97
-
98
-
99
-
100
-
101
-
102
-
103
-
104
-
105
-
106
-
107
-
108
-
109
-
110
-
111
-
112
-
113
-
114
-
115
-
116
-
117
-
118
-
119
-
120
-
121
-
122
-
123
-
124
-
125
-
126
-
127
-
128
-
129
-
130
-
131
-
132
-
133
-
134
-
135
-
136
-
137
-
138
-
139
-
140
-
141
-
142
-
143
-
144
-
145
-
146
-
147
-
148
-
149
-
150
-
151
-
152
-
153
-
154
-
155
-
156
-
157
-
158
-
159
-
160
-
161
-
162
-
163
-
164
-
165
-
166
-
167
-
168
-
169
-
170
-
171
-
172
-
173
-
174
-
175
-
176
-
177
-
178
-
179
-
180
-
181
-
182
-
183
-
184
-
185
-
186
-
187
-
188
-
189
-
190
-
 191
191 -
 192
192 -
 193
193 -
 194
194 -
 195
195 -
 196
196 -
 197
197 -
 198
198 -
 199
199 -
 200
200 -
 201
201 -
202
-
203
-
204
-
205
-
206
-
207
-
208
-
209
-
210
-
211
-
212
-
213
-
214
-
215
-
216
-
217
-
218
-
219
-
220
-
221
-
222
-
223
-
224
-
225
-
226
-
227
-
228
-
229
-
230
-
231
-
232
-
233
-
234
-
235
-
236
-
237
-
238
-
239
-
240
-
241
-
242
-
243
-
244
-
245
-
246
-
247
-
248
-
249
-
250
-
251
-
252
-
253
-
254
-
255
-
256
-
257
-
258
-
259
-
260
-
261
-
262
-
263
-
264
-
265
-
266
-
267
-
268
-
269
-
270
-
271
-
272
-
273
-
274
-
275
-
276
-
277
-
278
-
279
-
280
-
281
-
282
 |
 |
