HP Chromebox G3 Maintenance and Service Guide - Page 35
WLAN module, Remove the bottom cover
 |
View all HP Chromebox G3 manuals
Add to My Manuals
Save this manual to your list of manuals |
Page 35 highlights
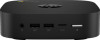
5. Inspect the power connector cable gasket (4). If the gasket needs to be replaced, it is available using spare part number L17265-001. Reverse this procedure to install the power connector cable. WLAN module To remove the WLAN module, use this procedure and illustration. Table 6-5 WLAN module description and part number Description Intel Wi-Fi 6 AX201 ax 2×2 + Bluetooth 5 MU-MIMO M.2 2230 non-vPro MIPI+BRI WW with 2 antennas WLAN module Spare part number L57250-005 IMPORTANT: To prevent an unresponsive system, replace the wireless module only with a wireless module authorized for use in the Chromebook by the governmental agency that regulates wireless devices in your country or region. If you replace the module and then receive a warning message, remove the module to restore device functionality, and then contact technical support. Before removing the WLAN module, follow these steps: 1. Prepare the Chromebox for disassembly (Preparation for disassembly on page 27). 2. Remove the bottom cover (Bottom cover on page 27). 3. Remove the I/O side frame (I/O side frame on page 28). 4. Remove the bottom shield (Bottom shield on page 29). Remove the WLAN module: 1. Disconnect the WLAN antenna cables (1) from the WLAN module terminals. ENWW Component replacement procedures 31
-
 1
1 -
2
-
3
-
4
-
5
-
6
-
7
-
8
-
9
-
10
-
11
-
12
-
13
-
14
-
15
-
16
-
17
-
18
-
19
-
20
-
21
-
22
-
23
-
24
-
25
-
26
-
27
-
28
-
29
-
 30
30 -
 31
31 -
 32
32 -
 33
33 -
 34
34 -
 35
35 -
 36
36 -
 37
37 -
 38
38 -
 39
39 -
 40
40 -
41
-
42
-
43
-
44
-
45
-
46
-
47
-
48
-
49
-
50
-
51
-
52
-
53
-
54
-
55
-
56
-
57
-
58
 |
 |
