HP Color LaserJet 8500 HP Color LaserJet 8500/8500N/8500DN user guide - Page 42
Configuring the Printer for a Network 42, Configuring Novell NetWare Parameters 42
 |
View all HP Color LaserJet 8500 manuals
Add to My Manuals
Save this manual to your list of manuals |
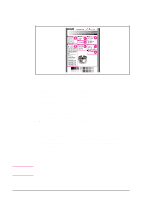
Page 42 highlights
Note Note Configuring the Printer for a Network For printers with the optional HP JetDirect internal print server, certain network parameters might need to be set depending upon the network configuration. If you choose not to use the HP JetAdmin software to configure these parameters, use one of the following procedures to set the network parameters from the printer control panel. For more information on configuring network parameters using the HP JetAdmin software, see the HP JetDirect Print Server Software Installation Guide. EIO slot 1 is the bottom slot; EIO slot 2 is the top slot. Configuring Novell NetWare Parameters The HP JetDirect internal print server automatically selects a Novell NetWare frame type; however, if this selection is incorrect, reset it from the printer control panel. The Novell NetWare frame type is displayed on the configuration page. To configure the Novell NetWare parameters 1 Press [Menu] until HP EIO MENU appears on the printer control panel display. identifies the EIO slot number. 2 Press [Item] until CFG NETWORK = appears on the display. 3 Press [-]Value]+] until YES appears on the display. 4 Press [Select] to save the selection. An asterisk (*) appears to the right of the selection. Selecting CFG NETWORK = YES tells the printer that you want to configure the network. The printer control panel changes back to CFG NETWORK = NO after you finish configuring the Novell NetWare parameters. 5 Press [Item] until CFG NOVELL = appears on the display. 6 Press [-]Value]+] until YES appears on the display. 7 Press [Select] to save the selection. An asterisk (*) appears to the right of the selection. 8 Press [Item] until FRAME = appears on the display. 9 Press [-]Value]+] until the Novell NetWare protocol frame type option you want appears on the display. The available options include the following: • AUTO (default) sets the first detected frame type. 42 Chapter 2 - Using the Printer Control Panel EN
-
 1
1 -
2
-
3
-
4
-
5
-
6
-
7
-
8
-
9
-
10
-
11
-
12
-
13
-
14
-
15
-
16
-
17
-
18
-
19
-
20
-
21
-
22
-
23
-
24
-
25
-
26
-
27
-
28
-
29
-
30
-
31
-
32
-
33
-
34
-
35
-
36
-
 37
37 -
 38
38 -
 39
39 -
 40
40 -
 41
41 -
 42
42 -
 43
43 -
 44
44 -
 45
45 -
 46
46 -
 47
47 -
48
-
49
-
50
-
51
-
52
-
53
-
54
-
55
-
56
-
57
-
58
-
59
-
60
-
61
-
62
-
63
-
64
-
65
-
66
-
67
-
68
-
69
-
70
-
71
-
72
-
73
-
74
-
75
-
76
-
77
-
78
-
79
-
80
-
81
-
82
-
83
-
84
-
85
-
86
-
87
-
88
-
89
-
90
-
91
-
92
-
93
-
94
-
95
-
96
-
97
-
98
-
99
-
100
-
101
-
102
-
103
-
104
-
105
-
106
-
107
-
108
-
109
-
110
-
111
-
112
-
113
-
114
-
115
-
116
-
117
-
118
-
119
-
120
-
121
-
122
-
123
-
124
-
125
-
126
-
127
-
128
-
129
-
130
-
131
-
132
-
133
-
134
-
135
-
136
-
137
-
138
-
139
-
140
-
141
-
142
-
143
-
144
-
145
-
146
-
147
-
148
-
149
-
150
-
151
-
152
-
153
-
154
-
155
-
156
-
157
-
158
-
159
-
160
-
161
-
162
-
163
-
164
-
165
-
166
-
167
-
168
-
169
-
170
-
171
-
172
-
173
-
174
-
175
-
176
-
177
-
178
-
179
-
180
-
181
-
182
-
183
-
184
-
185
-
186
-
187
-
188
-
189
-
190
-
191
-
192
-
193
-
194
-
195
-
196
-
197
-
198
-
199
-
200
-
201
-
202
-
203
-
204
-
205
-
206
-
207
-
208
-
209
-
210
-
211
-
212
-
213
-
214
-
215
-
216
-
217
-
218
-
219
-
220
-
221
-
222
-
223
-
224
 |
 |